Pepper Design Blog

A Little of This & That... Renovating, Decorating, DIY Projects & Family

pepper_header_flower

Bedroom Refresh: New Curtains!

May 1, 2012 by Morgan

This past weekend I finished up the new curtains for the bedroom. Last week I had shared a sneak peek of the fabric I had found, but a little pinning, pressing and hemming later and my curtains are up and hanging.
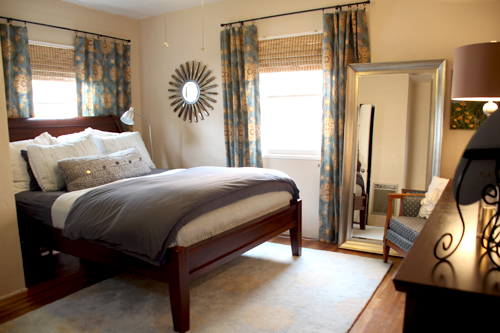
This room has been asking for a little character update since we moved in almost four years ago, and being the hidden bedroom that it is (no one ever really wanders into the master), I’ve left it as-is for some time. But now it’s well on its way to a little sprucing up! Even if that just means a few new fabrics, art and rearranging.
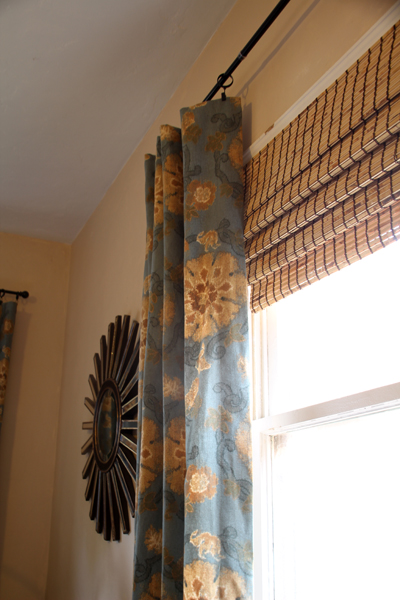
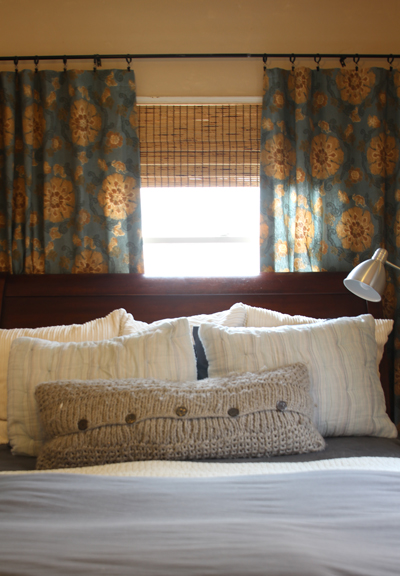
I’m loving the start! This fabric has had me smitten for some time and just as I had imagined, it goes so well in the space. The blue compliments the bedding and the tans work perfectly with our bamboo roman shades.
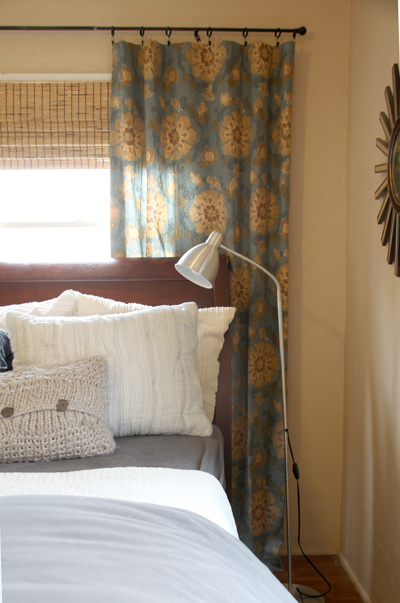
The bed still needs a few punchy throw pillows, and I think I’ll recover those bright white shams in the back, but the new front standard shams are from West Elm and my aqua/soft blue coverlet was found at Pottery Barn. So much better than the all-blue as it was before. This side of the bed is still in dire need of a night stand…

Alright, on to those curtains. Here’s the quick and dirty on how I sew a simple unlined curtain panel (this style can be a pocket rod or used with clips like I did above. Just for reference, here’s where I tackled lined curtains).
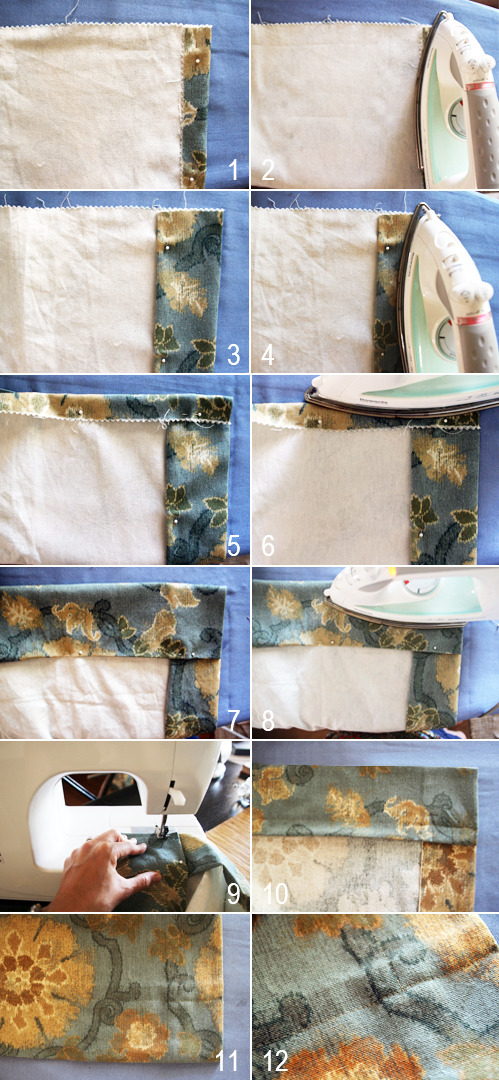
For me, it’s all about the folding and pressing.

I begin by flipping my fabric over, folding down one edge about 1″ and then I pin and press into place. Next I fold down that same edge to create a wide hem, usually 4-5″ for the bottom of a curtain, 3-4″ at the top and 2-3″ on either side (to me, the thicker the hem the more professional it looks).

Here’s an example of prepping the top of the curtain. First I fold the fabric over 1″ and pin, then press that fold into place. Next is folding again for an addition 4″, pin then press. This is what is my new top pocket rod if that’s the style of curtain I’m making.
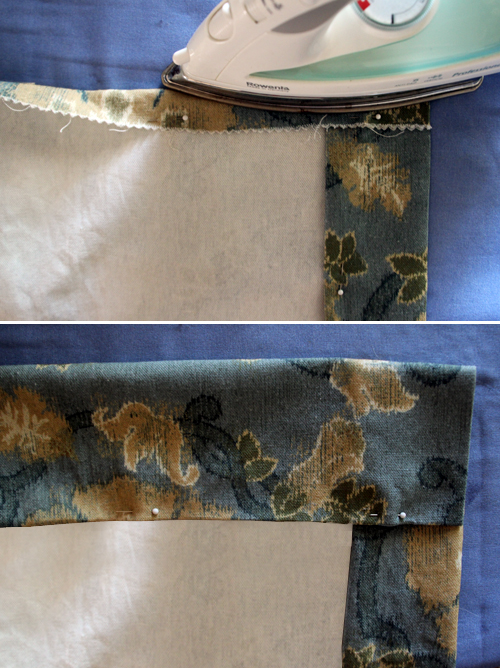
That pressed crease is key! It will not only guide your sewing line but will keep the curtains looking polished.

I repeat that process for three of the four sides (all except the bottom) and then sew along the top fold about 1/2″ in from each new hem (not the edge of the curtain but the folded over part, see arrow).
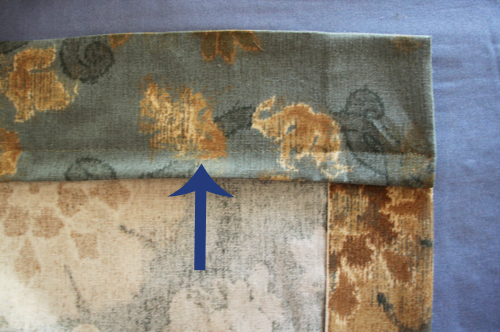
I sew the top hem first and then hang my curtain to let the weight of it pull the fabric down. Now I measure exactly where the fabric hits the ground and pin about 1″ below that to allow a slight break at the floor. This establishes the base point of my curtain. (I highly recommend remeasuring here by hanging your curtain unfinished from the rod, there’s nothing like sewing a panel in one go to only find out your 1/2″ too short or too long!)

Next I pinned, pressed and sewed the bottom hem just as I did the top. I haven’t sewn my sides up, but they are pressed into place just like in the image above.

Now it’s time to sew up the sides. Beginning at the top panel hem (not the top of the curtain) I sew straight down each side, again about 1/2″ in from the folded over hem edge. I’m keeping my top and bottom hems unsewn along the sides because I think it looks cleaner, and it creates a nifty little pocket if you want to hang your curtains directly from the rod without clips.

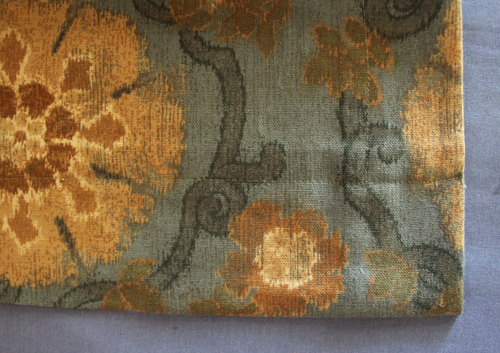
If I flip the corner over, here’s a visual that shows that the side hem stops right at the bottom hem.
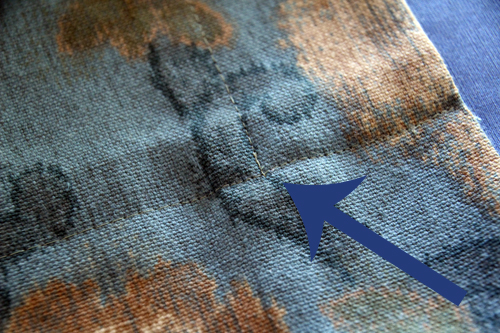
And if you have any boo boos? Because mistakes are always inevitable… I turn to my trusty Sew No More (discovered this guy in the $1 bin at Vons – you know, the bin where they’re just trying to get rid of product? But this stuff is awesome.)
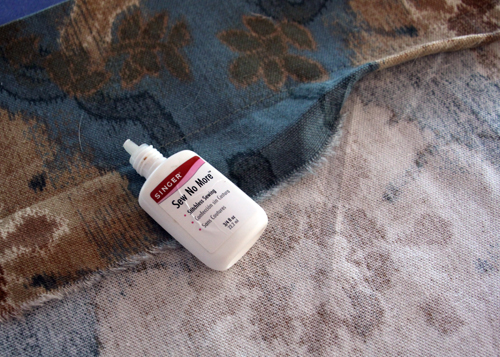
My sewing machine stitch hadn’t caught about 10″ of a pressed hem, so I applied a little fabric adhesive and now it’s all better.
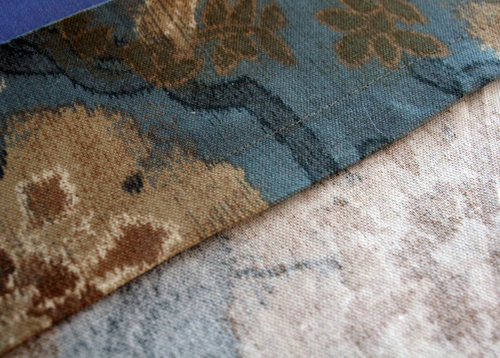
The last step was ironing the curtains one last time and then hanging them up! As mentioned before, I opted to hang my panels from curtain rod clips (you can find a pack of 7 – one pack for each panel – at any home improvement store).
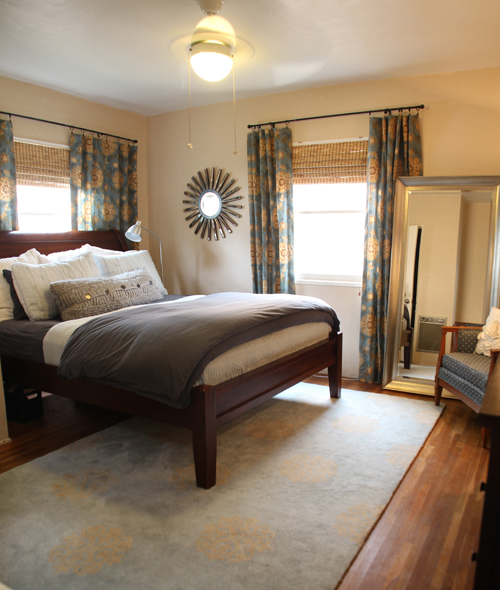
To help shape the pleats, I improvised a bit and used a hair duck clip :) and left the panels bunched for several hours.
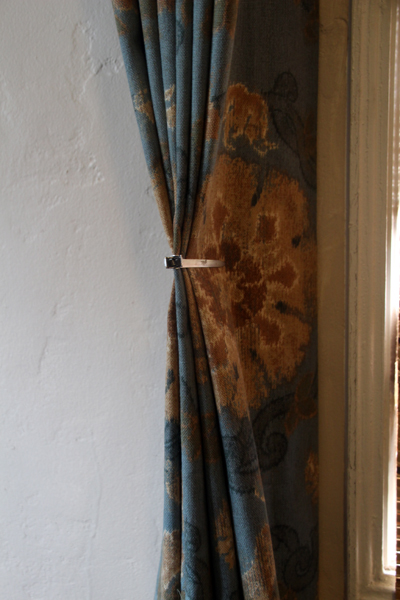
I’m sure there’s a better way to do that…

The curtains tie in well with other areas of the room, too. A garage sale painting I found a while back (above chair) looks as if it were made with the curtain color palette in mind:
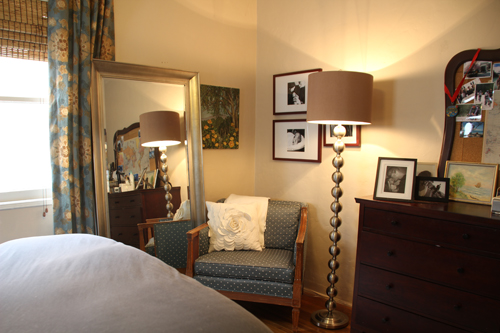
I’m thinking now that mustard might be a great color to use as an accent on the bed? Actually, the fabric from my thrift store chair looks pretty matchy too.

The curtains also help to balance out a window behind the bed that’s a little off center, though this bed is asking for new throw pillows.
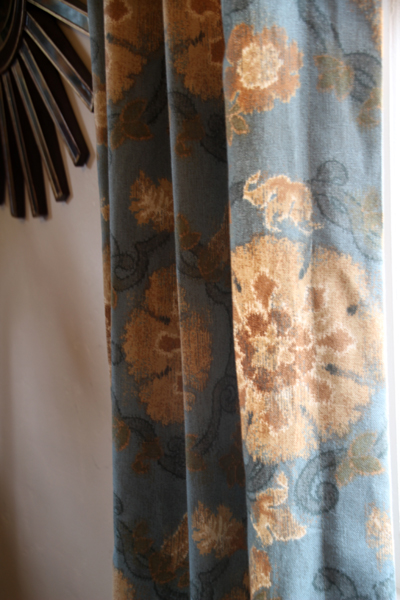
The fabric reminds me of a more floral suzani print, the actual name is Orbetello by Thibaut in blue.
One more project crossed off of the list!

A reminder of the room before we moved in:

What we put together shortly after we unpacked boxes (in pretty bad lighting):
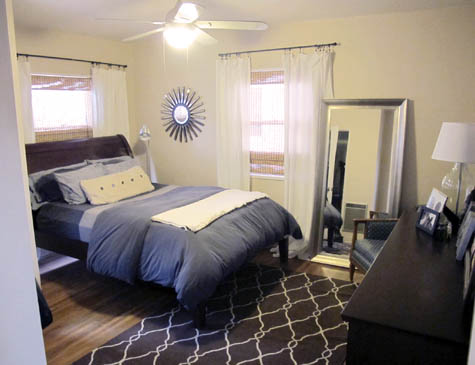
And now where the room is today:

That means as of now the rug, most of the bedding and the curtains are done! With art, pillows and possibly a new bed frame to go.

We actually have plans to demo this room and the adjoining bath to create one master suite sometime next year… that will really be a fun project. But baby steps, all in due time!

More master bedroom posts here: curtain fabric sneak peek, a new rug, the floor plan.

- posted on May 1, 2012 Filed Under: DIY, Home, Our Master Bedroom, Projects, Renovating Adventures, Tutorial Tagged With: Accessories, Blue, Crafty Solutions, Decorating, DIY, Fabric, Home, Patterns & Color, Sewing, Tutorial

*Giveaway* A $249 Room Refresh Design Kit

April 30, 2012 by Morgan

I’m so excited to share today’s giveaway! I first discovered Anna of Ethos Design on Young House Love a while back – and I’ve been a follower of her blog ever since.

Anna is a talented interior designer from North Queensland, Australia, and Ethos Design is her brainchild for virtually helping homeowners all over the world with their design aesthetics, room layouts and furniture/accessory choices (also known as e-decorating). Today’s giveaway features a Room Refresh Design Kit (full of wonderfully helpful customized ideas for updating any room of your choosing) valued at $249.

In the company’s own words: Ethos Design is an interior design company specializing in interior design for real people and real homes. We offer ‘Design Kits’, an online interior design service which gives you all the inspiration, instructions and shopping lists you need to create your dream home.

This is an interior design firm for those who want a beautiful home, but don’t think they should have to pay designer prices for it. It’s for those people that already have some great pieces and just need a hand putting it all together. And it’s for those people that want to have fun with interior design and create a real home that suits their lifestyle.

When Anna reached out to me about hosting a giveaway as well as offering refresh suggestions for a room of in my home, I was happy to virtually hand over the reigns for a space that has been slow to evolve – the office and guestroom! – and was excited to see what her ideas were. When she shared my finished Design Kit, I couldn’t wait to pass on the same offer as giveaway here.

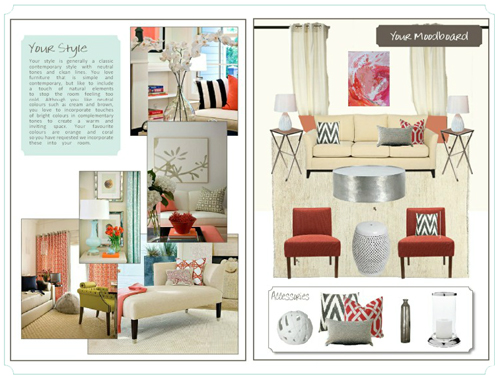
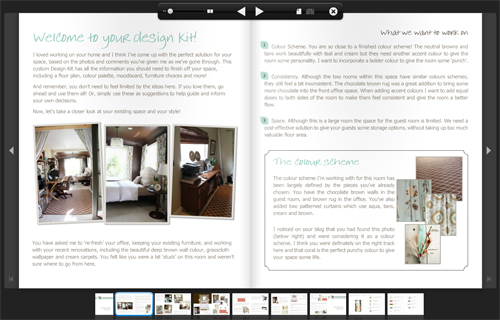
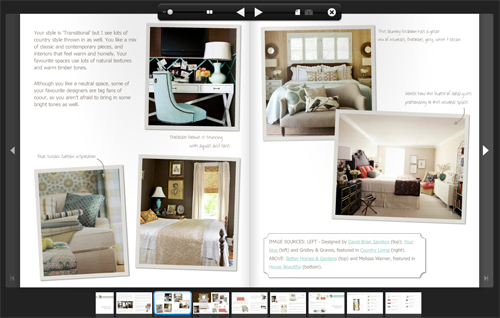
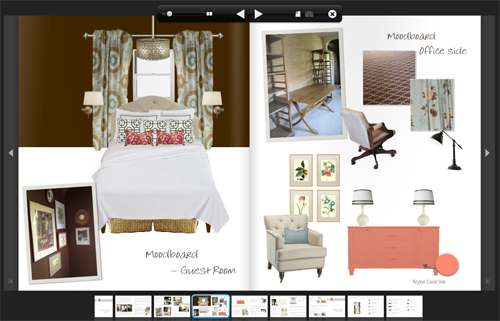
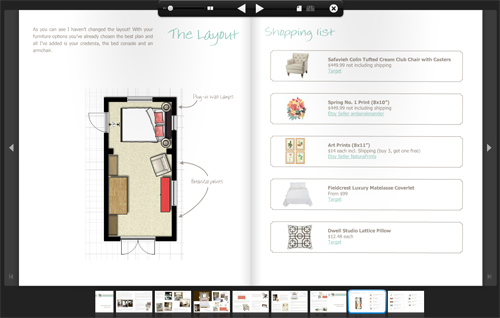
Here’s a sneak peek at our office/guestroom Design Kit, but you can check the entire magazine-style kit out here:

The process begins with a questionnaire that first establishes the space, inspiration, favorite designers, color palettes and so on. (It’s a very insightful way to approach a room and I knew Anna and I were on the same page when many of her inspirational images for the space were images that I had also pinned to my Pinterest board – I was loving where she was going with the design.)

Anna used the questionnaire, photos from the blog and measurements that I sent her way to develop a thorough plan for how she saw the office and guestroom evolving.

She made helpful suggestions on changing up pieces of the room layout (read through the full kit to see thoughts on switching out the current nightstand for sconces and a homemade behind-the-bedframe version), color palette (note that bright pop of coral!) and on what fabrics, artwork and furniture pieces she thought would look best added to the room. I have my own finished idea in mind, so I loved getting a second opinion and I am definitely incorporating many of these ideas!

Finally, the design kit includes a full shopping list that meets your budgetary needs making the design super easy to execute for the homeowner (or as a great list of guidelines on what to look out for).

What a fun process! This is a great giveaway regardless of your own decorating experience or how finished/work-in-progress your home might be. Read more about Ethos Design here.

******************************************************************************************

Giveaway: A virtual room Refresh Design Kit (see all of the Ethos Design packages here) for any room of your choosing. This kit is valued at $249 and is open to any reader, anywhere in the world (yep – it’s all done virtually!).

To Enter: Leave a comment here with the room in your home that you’re ready to refresh! What’s bugging you about it?

For Additional Entries: Become a Facebook fan of Ethos Design and/or Pepper Design Blog. Follow Ethos Design or PDB on Twitter, or follow the Ethos Design blog. Be sure to leave a separate comment for each additional entry.

Giveaway ends Friday, May 4 at midnight PST, winner will be chosen randomly and announced the following Monday. Good luck!

*****************************************************************************************

- posted on April 30, 2012 Filed Under: Giveaway, Sponsored Post

*Giveaway Winner* Business Cards from UPrinting

April 30, 2012 by Morgan

Congratulations to Juliana (an email is headed your way) on winning the UPrinting die cut business card package giveaway :) . Thank you to everyone who entered!

Related Posts Plugin for WordPress, Blogger...

- posted on April 30, 2012 Filed Under: Giveway Winner

  • « Previous Page
  • 1
  • …
  • 221
  • 222
  • 223
  • 224
  • 225
  • …
  • 438
  • Next Page »

Welcome to my little slice of the web where I practice finding family, career, homemade & inspired balance on a daily basis. This is where I capture my happy moments, and I'm honored that you're here to join us. Home + creativity + good eats + journaling + life as a working mom. Read more...

  • Email
  • Facebook
  • Google+
  • Instagram
  • Pinterest
  • RSS
  • StumbleUpon
  • Twitter

Search

Categories

Craft Projects CategoryCrafty Projects Good Eats & Recipes CategoryGood Eats Entertaining Ideas CategoryEntertaining Ideas Decorating Projects CategoryDecorating Style Boards CategoryStyle Boards Everything Holiday CategoryHolidays

Daily Dose

Favorite Posts

Dog Days of Summer: Craft Kits for Kids

Summer Craft Kits for Kids

August is a slower month for our family. Preschool summer school is out, dance lessons are taking a brief break for the month, our family vacation is

Our Double Stroller: Mountain Buggy +One Review

A Mountain Buggy +One Double Stroller Review

I'll preface by saying that this is not a sponsored review - we've found an awesome double stroller and we love it! Our Mountain Buggy + One has served

Wardrobe Style Board: A Work-From-Home Uniform

Wardrobe Style Board: A Stay-At-Home Mom Uniform | Cropped Light Jeans, Tan Sven Clogs, White Madewell V-Neck T-Shirt, Colorful Necklace, Gold Earrings | PepperDesignBlog.com

tan clogs | pocket tee | light jeans | gold disc earrings | colorful necklace It's not uncommon for people to come and go from our house all day long,

Happy 2nd Birthday, Taylor Rose!

Happy 2nd Birthday, Taylor Rose! An Infographic for My Girl | PepperDesignBlog.com

This weekend Taylor turned two. Taylor is such a bright, wonderful light in our lives. She is our funny, spunky little daughter that will do just about

How to Listen to Audiobooks on OverDrive

Intro to Audiobooks on OverDrive Public Library | PepperDesignBlog.com

Liv has developed a big interest in audiobooks as of late. One of my favorite ways for her to spend her 'quiet time' while Taylor and Marley nap is for her

Pistachio, Caramel & Sea Salt Chocolate Bars

Pistachio, Caramel & Sea Salt | Father's Day | PepperDesignBlog.com

Father's Day is not so far away, so here's an easy gift idea that can be made in advance or (literally) the night before. Homemade chocolate bars can be

Liv & Taylor-isms

Liv & Taylor-isms | Funny Things Kids Do & Say | PepperDesignBlog.com

Sometimes I capture something so funny/adorable/sweet that I can’t help but make note of it. Because Taylor is now expressing herself in full sentences, I

30 Things That I’ve Learned By 30

30 Things I've Learned by the Age of 30 | PepperDesignBlog.com

Today is my 30th birthday. I don't feel much older, but hearing that number roll out of my mouth feels as though I'm closing on a big chapter in my

Featured

Featured
VRBO San Diego Flying Bridge Vacation Rental cool toys for kids

Favorite Topics

Welcome to my little slice of the web where I practice finding family, career, homemade & inspired balance on a daily basis. This is where I capture my happy moments, and I'm honored that you're here to join us. Home + creativity + good eats + journaling. Read More…

  • Email
  • Google+
  • Instagram
  • Pinterest
  • RSS
  • StumbleUpon
  • Twitter
May 2025
MTWTFSS
« Feb  
 1234
567891011
12131415161718
19202122232425
262728293031 

Copyright © 2025 · Foodie Pro Theme by Shay Bocks · Built on the Genesis Framework · Powered by WordPress