Pepper Design Blog

A Little of This & That... Renovating, Decorating, DIY Projects & Family

pepper_header_flower

Easy & Pretty Handmade Cake Stands

February 9, 2010 by Morgan

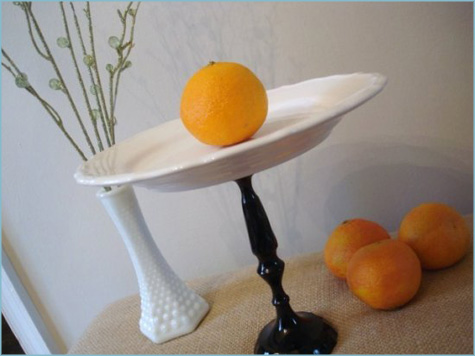
Easy DIY Handmade Cake Stand Main

Here’s a recent idea I found for an upcoming shower… I’m so excited to give these a try. I have a special affection for all things cake stands, especially pretty ones that make lovely silhouette shapes in my kitchen shelves!

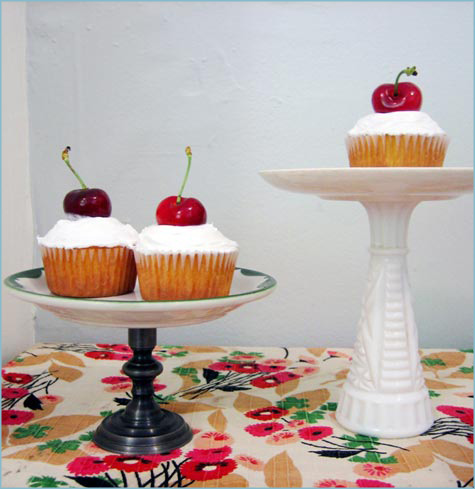
Handmade cake stands are simple and easy, here are two tutorials that outline the step-by-step directions for (1) an eclectic vintage mix and (2) a lovely all-white dessert buffet:

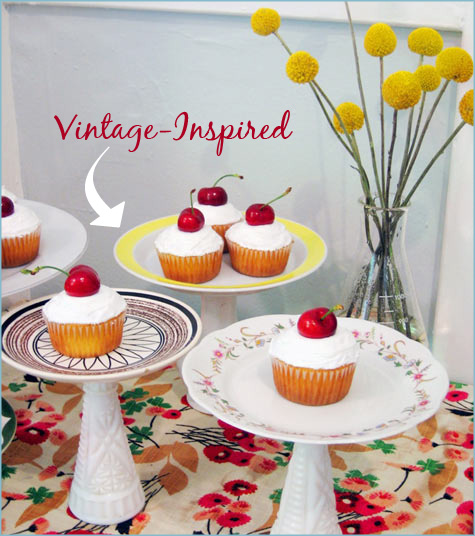
Handmade Cakestand Vintage

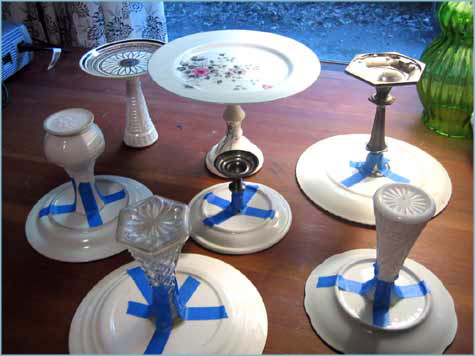
Kate’s recycled cake stands (shared on design*sponge back in 2008) make the perfect eclectic tea party addition. These would make beautiful table centerpieces for an outdoor shower as well.

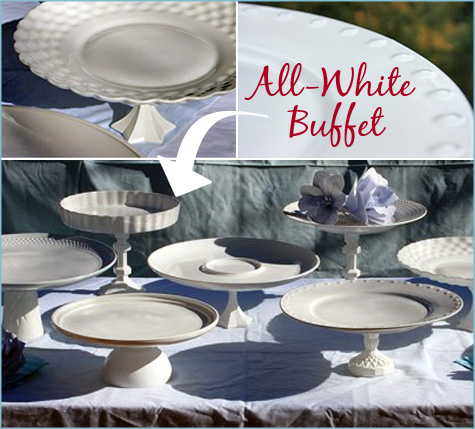
DIY Cake stand Hand Made All White

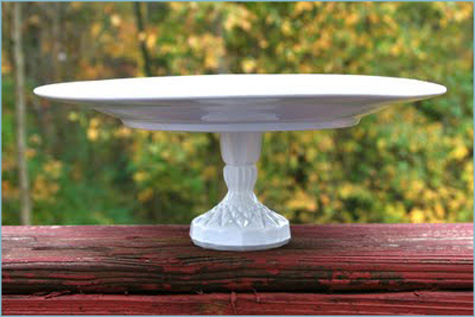
I originally found this classic white dessert bar tutorial on Weddings & Cookies, but Renee’s creations are featured here on design*sponge as well! I love the clean, crisp look of all white – it would make a lovely dessert buffet for a wedding or party.

These would also look perfect lined neatly in a buffet cabinet or on floating shelves in the kitchen/dining room (for a fraction of the price of a store-bought collection!)

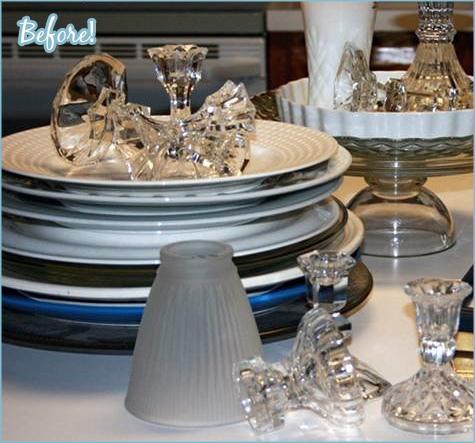
Can you believe they started as this?

DIY Cake Stand Before

Before we jump into the How-To, be sure to check out great Etsy artists like Burlap & Blue as an easy alternative if you’re looking for an option to purchase.

Easy DIY Handmade Cake Stand 8

More pictures (and the How-To) after the jump!

Easy DIY Handmade Cake Stand  4
a

{DIY Cake Stands}

a
Materials: plates, platters, candle sticks and vases in all shapes and sizes, food safe (non-toxic) glass paint/spray paint, STRONG glue (like E6000) or epoxy, masking tape, q-tips

Directions:

{1.} Match up your pieces for your favorite looks. Be sure they can balance on one another successfully without glue.

{2.} Clean all plates and vases/candlesticks thoroughly. Dry completely.

{3.} Carefully find the center of each plate/platter and mark.

{4.} Using your dot as a guide, use glue or epoxy to adhere vase/candle stick to the back of the plate (upside down).

{5.} Let dry for at least 24 hours. If necessary, remove excess epoxy or glue with a q-tip before completely dry. You can use masking tape at this point to help anchor plate to stand.

{6.} Optional: coat plates and stand in non-toxic spray paint. For an extra layer of protection, use doilies or parchment circles under your cakes and cookies.

A big thank you to Renee and Kate for sharing their projects. Be sure to check out their posts here (vintage-inspired) and here (all-white)!

Easy DIY Handmade CakeStand 5

Easy DIY Handmade Cake Stand 6


Related Posts Plugin for WordPress, Blogger...

- posted on February 9, 2010 Filed Under: Crafty Solutions, Parties & Entertaining Tagged With: Baby Shower, Before & After, Birthday, Bridal Shower, Crafty Solutions, Decorating, Desserts, DIY, Kid's Party, Parties & Entertaining, Tutorial, Wedding

« Congrats, Valentine’s Tablescape Winner!
{Pink & Lace} Tea Party Cupcake Toppers »

Comments

  1. caroline @ c.w.frosting says

    May 26, 2011 at

    Love these! I’m on a cupcake stand making mission!

  2. Patricia Freitas says

    August 23, 2010 at

    Ahhhhhhh before I go please tell me what brand did you used for the paint???

    • Morgan says

      August 23, 2010 at

      Hi Patricia,
      You can use any non-toxic spray paint out there – I believe I found mine at Lowes (though you might even be able to order a version that is dishwasher/heating/eating safe online). I still recommend using doilies between food and plate as it is still spray paint. The two above tutorials might have recommendations as well, check out the links in the posts. I didn’t post pictures of my versions because they turned out so similar! But you can see them in my Vintage Nesting post. Good luck!! Glad to help out!

      ~Morgan

  3. Patricia Freitas says

    August 23, 2010 at

    Do you save my life!!!! I’m looking for cake stands for my Mini cakes and is so dificult to find some that fit on. I make mini cakes for special celebrations in size 6″ and now I can do my own style and paint in the colors of my business. Thank you guys so much for share this wonderfullllllll ideas!!! God bless you at all and gave more and more talents for all.

  4. burlap+blue says

    April 22, 2010 at

    Thanks for featuring my shop on your post!! Dessert pedestals/cupcake stands are so popular right now…you linked to a couple of great tutorials! xo

  5. Danielle says

    February 14, 2010 at

    What a great idea! I am always look for new ways to display cakes. These are perfect!

  6. Alexis Meschi says

    February 12, 2010 at

    Such a great idea!

  7. Cammi says

    February 10, 2010 at

    great idea! I can’t wait to try this out for my own upcoming parties! Thanks for sharing!

  8. Tasha says

    February 10, 2010 at

    Cannot wait to try it out!

  9. Dognbird says

    February 10, 2010 at

    This is a FANTASTIC tutorial, highlighted it today on a post about Rosanna tableware!

  10. Brittney says

    February 10, 2010 at

    I’m loving this idea!!

  11. the domestic fringe says

    February 9, 2010 at

    I love this idea of making my own cake stands. I can’t wait to yard sale season, so I can stock up on the necessary pieces. These would be so much fun! They’d make nice hostess gifts too.

    -FringeGirl

Posted on Tuesday, February 9th, 2010

Trackbacks

  1. Halloween Candy Buy Back Program – Tampa Homebody says:
    October 10, 2014 at

    […] If you have a cake or cupcake stand, get it out and use it for some devilishly clever displays. If you have a decorative piece like the one pictured here, no other decorating is needed. However, if yours is of a plain variety, then place a large pumkin on it and simply fill in the space at the bottom with candy corn. Put little tiny pumpkins at the base of the stand and it will look oh-so fine!  Don’t have a cake stand?  You could make one yourself. […]

Welcome to my little slice of the web where I practice finding family, career, homemade & inspired balance on a daily basis. This is where I capture my happy moments, and I'm honored that you're here to join us. Home + creativity + good eats + journaling + life as a working mom. Read more...

  • Email
  • Facebook
  • Google+
  • Instagram
  • Pinterest
  • RSS
  • StumbleUpon
  • Twitter

Search

Categories

Craft Projects CategoryCrafty Projects Good Eats & Recipes CategoryGood Eats Entertaining Ideas CategoryEntertaining Ideas Decorating Projects CategoryDecorating Style Boards CategoryStyle Boards Everything Holiday CategoryHolidays

Daily Dose

Favorite Posts

Dog Days of Summer: Craft Kits for Kids

Summer Craft Kits for Kids

August is a slower month for our family. Preschool summer school is out, dance lessons are taking a brief break for the month, our family vacation is

Our Double Stroller: Mountain Buggy +One Review

A Mountain Buggy +One Double Stroller Review

I'll preface by saying that this is not a sponsored review - we've found an awesome double stroller and we love it! Our Mountain Buggy + One has served

Wardrobe Style Board: A Work-From-Home Uniform

Wardrobe Style Board: A Stay-At-Home Mom Uniform | Cropped Light Jeans, Tan Sven Clogs, White Madewell V-Neck T-Shirt, Colorful Necklace, Gold Earrings | PepperDesignBlog.com

tan clogs | pocket tee | light jeans | gold disc earrings | colorful necklace It's not uncommon for people to come and go from our house all day long,

Happy 2nd Birthday, Taylor Rose!

Happy 2nd Birthday, Taylor Rose! An Infographic for My Girl | PepperDesignBlog.com

This weekend Taylor turned two. Taylor is such a bright, wonderful light in our lives. She is our funny, spunky little daughter that will do just about

How to Listen to Audiobooks on OverDrive

Intro to Audiobooks on OverDrive Public Library | PepperDesignBlog.com

Liv has developed a big interest in audiobooks as of late. One of my favorite ways for her to spend her 'quiet time' while Taylor and Marley nap is for her

Pistachio, Caramel & Sea Salt Chocolate Bars

Pistachio, Caramel & Sea Salt | Father's Day | PepperDesignBlog.com

Father's Day is not so far away, so here's an easy gift idea that can be made in advance or (literally) the night before. Homemade chocolate bars can be

Liv & Taylor-isms

Liv & Taylor-isms | Funny Things Kids Do & Say | PepperDesignBlog.com

Sometimes I capture something so funny/adorable/sweet that I can’t help but make note of it. Because Taylor is now expressing herself in full sentences, I

30 Things That I’ve Learned By 30

30 Things I've Learned by the Age of 30 | PepperDesignBlog.com

Today is my 30th birthday. I don't feel much older, but hearing that number roll out of my mouth feels as though I'm closing on a big chapter in my

Featured

Featured
VRBO San Diego Flying Bridge Vacation Rental cool toys for kids

Favorite Topics

Welcome to my little slice of the web where I practice finding family, career, homemade & inspired balance on a daily basis. This is where I capture my happy moments, and I'm honored that you're here to join us. Home + creativity + good eats + journaling. Read More…

  • Email
  • Google+
  • Instagram
  • Pinterest
  • RSS
  • StumbleUpon
  • Twitter
February 2010
MTWTFSS
1234567
891011121314
15161718192021
22232425262728
« Jan   Mar »

Copyright © 2025 · Foodie Pro Theme by Shay Bocks · Built on the Genesis Framework · Powered by WordPress