Pepper Design Blog

A Little of This & That... Renovating, Decorating, DIY Projects & Family

pepper_header_flower

A Graduation, a 6 Year Anniversary, a Busy Weekend!

June 24, 2013 by Morgan

We’ve had a busy weekend!

No, Baby S is not here yet. She’s still enjoying her quiet time alone. But as many of you who have been reading this blog for a little while know, Kevin has been a hard-working student who has been putting time in the trenches towards a degree in architecture…

photo-9_edit_collage_1000

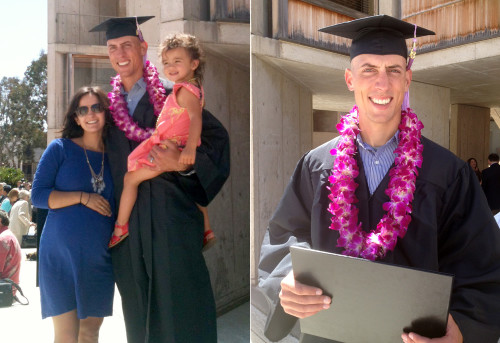
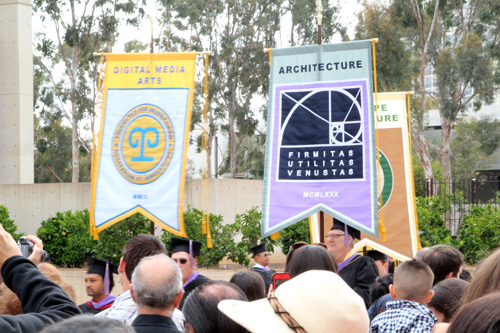
And this Saturday he graduated! So very proud of this huge accomplishment in his life. It’s tough to go back to school with a family and even more so when you’re one of the oldest in your class. But tiny toothpick models (I loved those) and 3D renderings have paid off and he’s made it happen.

IMG_8307_edit_500

IMG_8335_edit_arrow_500

Ahh man, I started tearing up during the address almost immediately. So many years, so much dedicated time, so many night classes… I was so happy to be able to be there to see him receive his diploma.

The Salk Institute here in San Diego is truly a stunning commencement location, perfect for a class full of architecture and design students. That backdrop there? The Pacific Ocean for as far as the eye can see.
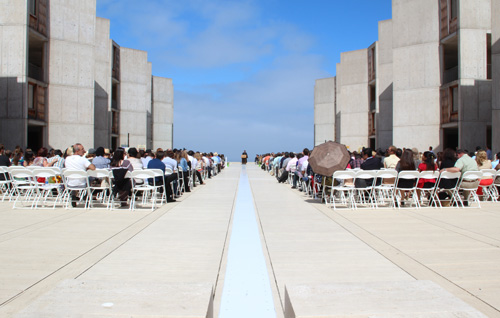
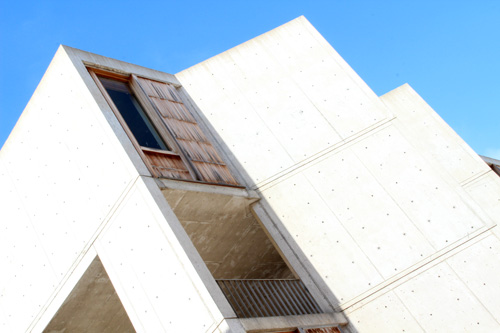
IMG_8318_edit_500

IMG_8313_edit_500

Beautiful.

After the pomp and circumstance we had a nice lunch overlooking the water with our families.

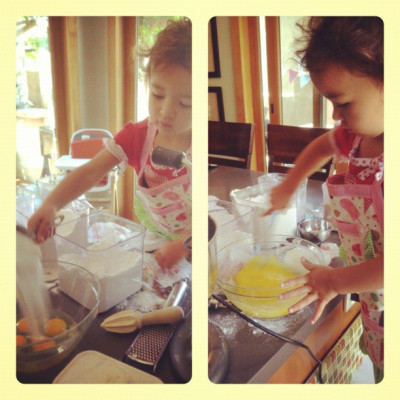
Next day Liv and I made Grandma’s lemon bars (and a giant picnic lunch) and we headed to the beach to celebrate with friends!

photo-13

IMG_8352_edit_5002

IMG_8350_edit_500b

IMG_8364_edit_500

IMG_8374_edit_500

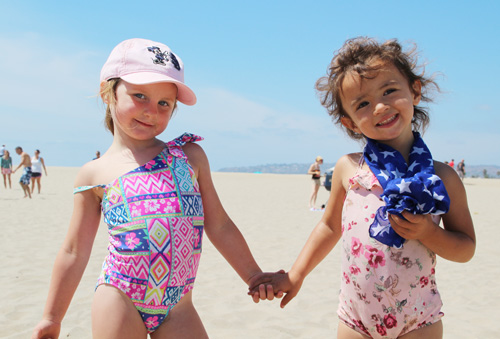
Check out these two as they strike a pose. Baby girl #1 has momma’s crazy hair.

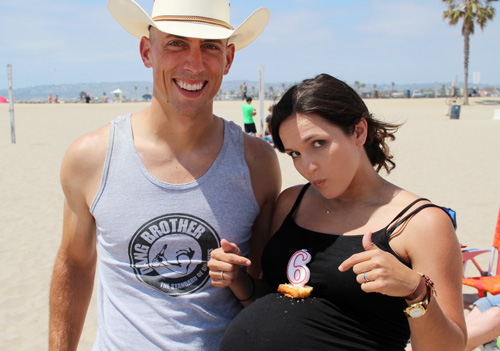
We also celebrated our sixth wedding anniversary! (more about the big day here)

IMG_8347_edit_500

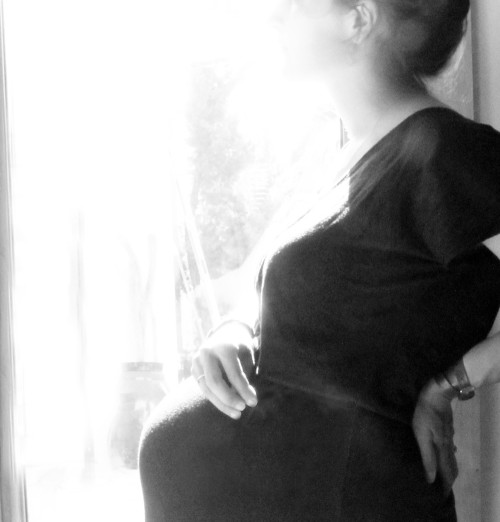
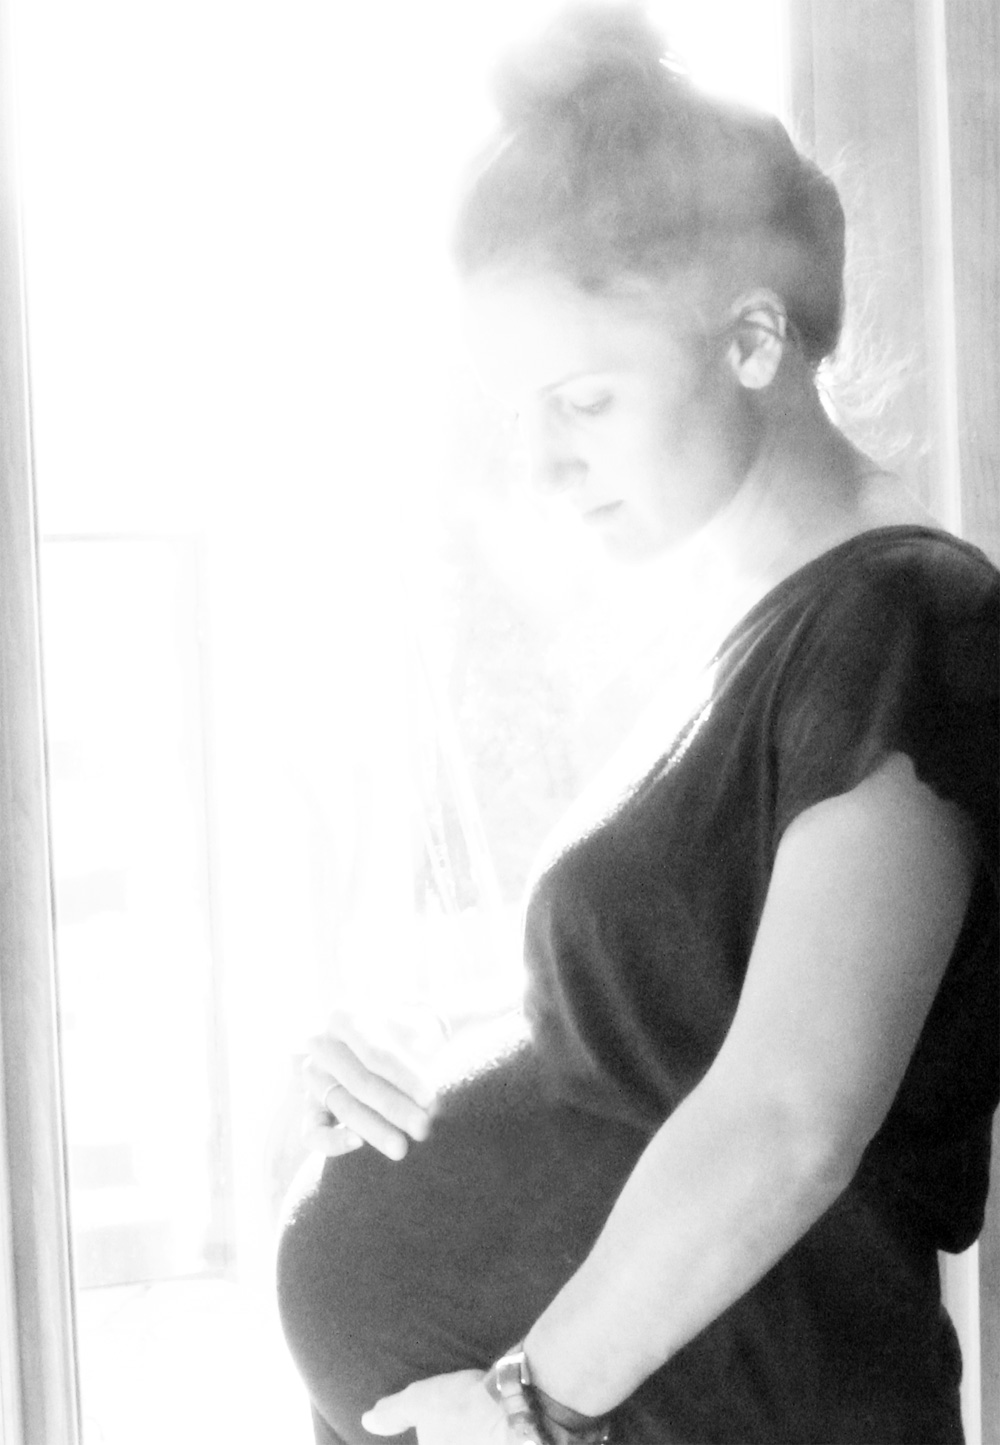
So a busy weekend, no? Hope that you had a wonderful one, too! I’m feeling pretty grateful that this baby has waited long enough for me to celebrate both of these events with Kevin, but now we are ready!

My very uncomfortable sleep/wake/waddle/work schedule is exhaustive… we are ready, ready. We’re like:

Time to Get Out

Awesome clip from here. No but really, we love you sweet baby girl #2. We’re excitedly, anxiously waiting.

PS A back massage from your kids while they play with their toy cars? I must order this asap.

- posted on June 24, 2013 Filed Under: Family & Friends Tagged With: Wardrobe - Maternity

Girls’ Room: Wallpaper Installation

June 20, 2013 by Morgan

One of my big plans for changing the nursery around was to add a large accent wall covered in a pretty wallpaper. It has taken some time to narrow down, order, install, make a mistake in the installing process, reorder and reinstall, but I think we are just about there!

Thank you for all of your kind comments, emails and messages regarding yesterday’s post… as you can see I’m still here with no major updates! But maybe this weekend??

Back to the girls’ room. First, here’s the wallpaper I ended up choosing:

Tips for Hanging Wallpaper | PepperDesignBlog.com

I designed it myself in photoshop and had it printed out using Spoonflower (which I’ve used for fabric before such as here in the office), but this was my first go with their new wallpaper printing.

I based the design off of Osborne & Little’s beautiful Coronata Star wallpaper, which unfortunately doesn’t come in pink/peach and is a little pricer than I was hoping to spend… I also didn’t love the pointy edged stars that it featured and so in my version I designed a funkier star from scratch, gave it a nice, round edge and then repeated it in an offset fashion (with every other star flipped upside down) to make it my own.

Here’s a close up:

DIY Wallpaper Design | PepperDesignBlog.com

Spoonflower printed out the rolls for $38/piece, which is by no means cheap – but when it comes to wallpaper (and customized) it’s definitely on the lower end of the price scale.

Here are a few of the other designs from Spoonflower that I was considering:

Nursery Wallpaper Samples : PepperDesignBlog.com

Loved them so much I even ordered a set of samples for the wall to see if any were just right.

Nursery Wallpaper Samples : PepperDesignBlog.com

I ended up choosing a very basic wallpaper because I didn’t want it to limit the fabric and patterns that could be brought into the room in other ways (curtains, bedding, window cushion). This pattern feels subtle, serene and perfect for the space.

In the end, I’m really happy with my design and with the final look of the hanging wallpaper! Can’t wait to tackle the rest of the room with this soft, peachy pink as my base!

Tips for Hanging Wallpaper | PepperDesignBlog.com

As far as applying wallpaper yourself, I’ll admit that I initially collected a couple of quotes from professionals out there (by using Craigslist and HomeAdvisor) for the accent wall. We have very textured walls, I’ve got a big ole’ belly and I was nervous that I’d bite off more than I could chew attempting it on my own (and potentially ruining a couple of hundred dollars worth of wallpaper). But when the quotes came back and all were in the $300 range (with one guy at $150), I decided to roll up the sleeves and give it a go myself. We’ve DIYed our entire house, surely this is possible too.

And guess what! It definitely was. Absolutely manageable and I’d do it again in a heartbeat.

Tips for Hanging Wallpaper | PepperDesignBlog.com

Materials included a level, ruler, painter’s tape, sponge, wallpaper smoother, new utility knife (sharp blades are key) and the wallpaper itself. I ended up not relying so much on the painter’s tape and ruler, but the others I’d consider key installation components. We had the level and tape on hand, I bought a fresh sponge, set of smoothers and utility knife all for under $10 at Lowes.

Here’s where I’ll preface that this didn’t work out well the first time around! We made a crucial install mistake which you’ll see very shortly… but for the purpose of laying out our instructions with clear pictures, let’s start from the beginning (mistake and all).

newnursery_wallpaper_install_oops1_500

My first partner in crime for this project was my good friend Trish who volunteered to come and help me hang the paper one Sunday afternoon. We began by using the level to make a straight line across the entire will. This old house is full of uneven walls (hand built and having had a chance to ‘settle’ over 80 years will do that…) so I couldn’t follow just the ceiling or I’d end up with a slightly descending or ascending wallpaper pattern when finished. Side note: If you’re lining your wallpaper panels up against the ceiling or flush with pre existing molding, you may have no choice on the line you’re working with.

I’m adding molding to the ceiling when I’m done with this project so I have a little give on how closely that wallpaper lines up (about 3 1/2″ give, which is really helpful :)).

Then we began installing the panels one at a time from the right side of the room… and this is where it all went wrong!!

newnursery_wallpaper_install_oops2_400

After two panels had been installed (more on that soon), we stepped back to examine our work and quickly saw that the wallpaper was somewhat transparent! Even after it started to dry you could clearly see the wall stripes which was NOT an obvious giveaway in the samples that we’d been experimenting with. Womp. Womp.

So we tore it down.

Liv's Nursery | PepperDesignBlog.com

Kev primed the wall the next day and I ordered two more rolls of wallpaper. Thankfully the kind guys at Spoonflower took pity on my mistake and sent out replacement rolls free. I’d like to see the primer step added to their directions (which are brilliant other than that) just for seriously thick heads like mine.

Tips for Hanging Wallpaper | PepperDesignBlog.com

The rolls arrived and I hopped right on it. This time I started at the opposite end and put up two rolls of wallpaper by myself, that’s how easy it was.

Let’s jump back into the how-to now.

My little brother was over one evening for dinner and I snagged him to help me with the last two rolls and so I could take a few pictures of the process.

First step? Unroll your wallpaper panel (which comes design facing out) and reroll it so that the design is facing in. If you don’t have a wallpaper tub, your bathtub works as a great alternative.

Tips for Hanging Wallpaper | PepperDesignBlog.com

Spoonflower offers pre-pasted wallpaper which is just awesome. No rolling on paste, no dipping in paste, no prepping your walls with paste primer… just reverse roll your wallpaper panel, submerge in room temperature water for 15 seconds to activate the adhesive (make sure all surfaces are adequately wet, so you’ll be doing a little unrolling here) and ‘book’ your paper as you pull it out.

Here’s a nifty technique all paper-hangers should know. ‘Booking’ your wallpaper brings you from an 8′ section of panel to a more manageable, folded ‘book’ panel of about half the size. Here’s a terrible drawing reenactment, but hopefully it helps:

Tips for Hanging Wallpaper | PepperDesignBlog.com

The design should be on the outside.

I booked the wallpaper panels right there in the tub and then brought the roll out to the nursery (did I mention covering your floors in towels? I learned that about 1 panel in as we began to drip water everywhere).

Then you gently loosen one end of the booking (if you have a ‘top’ to your panel you’ll loosen that end) and line up along your level pencil line. See how we’re crawling away form the ceiling at this point? It’s a good thing we’re installing molding over the top next because even though my wallpaper pattern is perfectly straight, there is a very obvious dip at the top.

Tips for Hanging Wallpaper | PepperDesignBlog.com

Tips for Hanging Wallpaper | PepperDesignBlog.com

Spoonflower also overlays about 3/4″ of the design on each roll, which means the sides will not butt up against each other but will overlap by that amount. It makes it easy to line up your design, but a little frustrating to see the seams when you’re done.

Tips for Hanging Wallpaper | PepperDesignBlog.com

Next step for us was smoothing out all of those bubbles from the top down and inside out. By inside, I mean that we pushed the bubbles out to the outter, unpaneled edge.

Tips for Hanging Wallpaper | PepperDesignBlog.com

Andy started at the top, I worked on the lower half.

This wallpaper is so forgiving! If you have to pull it up and reapply because of a loose bubble there’s no issue with paste, adhesion or drying out. I loved working with it (minus those seams, don’t like the seams).

Tips for Hanging Wallpaper | PepperDesignBlog.com

Tips for Hanging Wallpaper | PepperDesignBlog.com

We went back and forth between the smoother and the sponge. The sponge was probably the most practical and used tool because, while it didn’t apply as much pressure as the smoother, you could wipe, wipe, wipe and the littler bubbles (and textures in our wall) slowly began to disappear.

Tips for Hanging Wallpaper | PepperDesignBlog.com

Tips for Hanging Wallpaper | PepperDesignBlog.com

Finally we reached the end of the wall!

Tips for Hanging Wallpaper | PepperDesignBlog.com

A miniature slice of panel was added to finish my accent wall off.

Most of the little hiccups that you see below are from the original texture of these Spanish walls (unavoidable dips and lines), but there were two spots that caused me to panic when we had finished up:

Tips for Hanging Wallpaper | PepperDesignBlog.com

Giant bubbles!! Ahhhh! I didn’t panic enough to rip out panels of wallpaper, and it’s a good thing because by the time the wall dried they were gone. Just like that.

Tips for Hanging Wallpaper | PepperDesignBlog.com

Those other bumps and flaws are the texturized plaster that’s beneath the paper… nothing to be done about those.

The bottom of the paper panels did butt up against molding, so I used my smoother to make a crease at the very edge:

Tips for Hanging Wallpaper | PepperDesignBlog.com

Which looked like this when dry:

Tips for Hanging Wallpaper | PepperDesignBlog.com

And my utility knife (with a sharp, fresh blade) to cut clean:

Tips for Hanging Wallpaper | PepperDesignBlog.com

And there you have it! A wallpapered wall. We are working on installing top molding now! It looks great! Can’t wait to share the ‘after’ photo with you.

PS More nursery/big girl room transformation posts here.

- posted on June 20, 2013 Filed Under: Crafty Solutions, DIY, Girls' Room, Home, Liv's Nursery, Projects, Renovating Adventures, Tutorial Tagged With: Decorating, DIY, Home, Nursery, Patterns & Color, Pink, Tutorial, wallpaper

Waiting…

June 18, 2013 by Morgan

Pregnancy & Waiting | PepperDesignBlog.com

The kitchen floors are clean (I can’t explain it, it’s just my thing). Baby clothes have been washed and sorted (oh my! they’re so small, I forget how small they are). Hospital bag is (sort of) packed. My outstanding projects for work are near wrapped up and prepped for maternity leave. Everything feels ready.

So now we are waiting.

Today is my due date, according to six years of charting, that is. According to the doctors it’s actually this Friday. Either way it’s a terrible waiting game!

Liv was eleven days over (11!) which would technically take us into July. But this one makes me feel like she is going to come at any moment (other moms out there, know what I mean?). The doctors have offered induction (so different now that I’m going the OB route vs midwife delivery like I did with Liv), but I’m trying to remind myself to wait, wait.

Pregnancy & Waiting | PepperDesignBlog.com

So now we continue playing the waiting game.

But of course that means more paint and more cleaning, more organizing, more work, work. Gotta keep busy. PS if I suddenly disappear, you know where I am! If you’d like, stay in the loop on Instagram: @morganspenla. Waiting is the hardest part.

Related Posts Plugin for WordPress, Blogger...

- posted on June 18, 2013 Filed Under: Family & Friends Tagged With: Pregnancy

  • « Previous Page
  • 1
  • …
  • 151
  • 152
  • 153
  • 154
  • 155
  • …
  • 438
  • Next Page »

Welcome to my little slice of the web where I practice finding family, career, homemade & inspired balance on a daily basis. This is where I capture my happy moments, and I'm honored that you're here to join us. Home + creativity + good eats + journaling + life as a working mom. Read more...

  • Email
  • Facebook
  • Google+
  • Instagram
  • Pinterest
  • RSS
  • StumbleUpon
  • Twitter

Search

Categories

Craft Projects CategoryCrafty Projects Good Eats & Recipes CategoryGood Eats Entertaining Ideas CategoryEntertaining Ideas Decorating Projects CategoryDecorating Style Boards CategoryStyle Boards Everything Holiday CategoryHolidays

Daily Dose

Favorite Posts

Dog Days of Summer: Craft Kits for Kids

Summer Craft Kits for Kids

August is a slower month for our family. Preschool summer school is out, dance lessons are taking a brief break for the month, our family vacation is

Our Double Stroller: Mountain Buggy +One Review

A Mountain Buggy +One Double Stroller Review

I'll preface by saying that this is not a sponsored review - we've found an awesome double stroller and we love it! Our Mountain Buggy + One has served

Wardrobe Style Board: A Work-From-Home Uniform

Wardrobe Style Board: A Stay-At-Home Mom Uniform | Cropped Light Jeans, Tan Sven Clogs, White Madewell V-Neck T-Shirt, Colorful Necklace, Gold Earrings | PepperDesignBlog.com

tan clogs | pocket tee | light jeans | gold disc earrings | colorful necklace It's not uncommon for people to come and go from our house all day long,

Happy 2nd Birthday, Taylor Rose!

Happy 2nd Birthday, Taylor Rose! An Infographic for My Girl | PepperDesignBlog.com

This weekend Taylor turned two. Taylor is such a bright, wonderful light in our lives. She is our funny, spunky little daughter that will do just about

How to Listen to Audiobooks on OverDrive

Intro to Audiobooks on OverDrive Public Library | PepperDesignBlog.com

Liv has developed a big interest in audiobooks as of late. One of my favorite ways for her to spend her 'quiet time' while Taylor and Marley nap is for her

Pistachio, Caramel & Sea Salt Chocolate Bars

Pistachio, Caramel & Sea Salt | Father's Day | PepperDesignBlog.com

Father's Day is not so far away, so here's an easy gift idea that can be made in advance or (literally) the night before. Homemade chocolate bars can be

Liv & Taylor-isms

Liv & Taylor-isms | Funny Things Kids Do & Say | PepperDesignBlog.com

Sometimes I capture something so funny/adorable/sweet that I can’t help but make note of it. Because Taylor is now expressing herself in full sentences, I

30 Things That I’ve Learned By 30

30 Things I've Learned by the Age of 30 | PepperDesignBlog.com

Today is my 30th birthday. I don't feel much older, but hearing that number roll out of my mouth feels as though I'm closing on a big chapter in my

Featured

Featured
VRBO San Diego Flying Bridge Vacation Rental cool toys for kids

Favorite Topics

Welcome to my little slice of the web where I practice finding family, career, homemade & inspired balance on a daily basis. This is where I capture my happy moments, and I'm honored that you're here to join us. Home + creativity + good eats + journaling. Read More…

  • Email
  • Google+
  • Instagram
  • Pinterest
  • RSS
  • StumbleUpon
  • Twitter
May 2025
MTWTFSS
« Feb  
 1234
567891011
12131415161718
19202122232425
262728293031 

Copyright © 2025 · Foodie Pro Theme by Shay Bocks · Built on the Genesis Framework · Powered by WordPress