Pepper Design Blog

A Little of This & That... Renovating, Decorating, DIY Projects & Family

pepper_header_flower

*Giveaway* Lowe’s $50 & Change Challenge + Belly Update

March 4, 2013 by Morgan

Update: Congratulations to Liliana on winning the Lowe’s $50 & Change giveaway! Please check your email :). Thank you to everyone who entered!

It’s funny how sometimes time seems to fly by so very quickly. Or how some days it seems to stand absolutely still. I suppose it’s all how you’re feeling at that moment. There are days when I feel like this pregnancy is zooming past and I can’t believe we are six months along, and then there are the ‘other’ days when I can’t believe I have at least 100 days to go. But, as far as a belly bump update, it’s safe to say I’ve officially popped and it’s no big secret any longer. Especially to the grocery checkout girl (that’s when you know…).

The ‘pop’ happened overnight. The belly went from the ‘wow she’s getting a little round in the middle’ to ‘oh, she’s pregnant!’ a few weeks ago. Maybe just before this big reveal. I figured I owe you a belly bump shot, but since I’m not so keen on photos these days I rarely slip in front of the camera (I’m also growing the typical tree trunk thighs to support said belly). But! With such a beautiful, sunny, happy weekend, Liv and I were feeling photo optimistic and we took a couple of profile shots just after the Farmer’s Market on Sunday. (Poor second babe, I think I documented every month of Liv’s pregnancy). Liv is still sure there’s a little baby growing in her belly too…

Now on to today’s home update!

We are very excited to once again be partnering with Lowes’ $50 & Change campaign to share what recent $50 update we’ve made around the house. Funny how the everyday fix-it/Saturday morning projects tend to hover around that $50 mark, no? It could be installing crown molding or painting a room or planting a spring veggie garden… but $50 is that magic number!
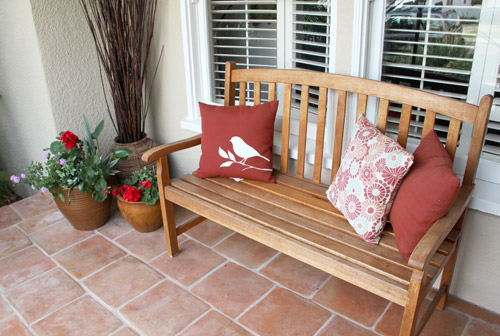
For $50, we gave our front porch a mini facelift.

It’s been on my to-do for a while but now that the weather is turning in our favor and the sun is shining bright, it was time to add a little welcoming color to the porch of our Spanish casita.

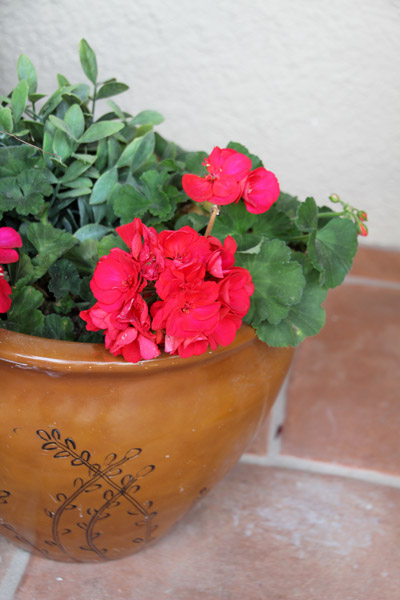
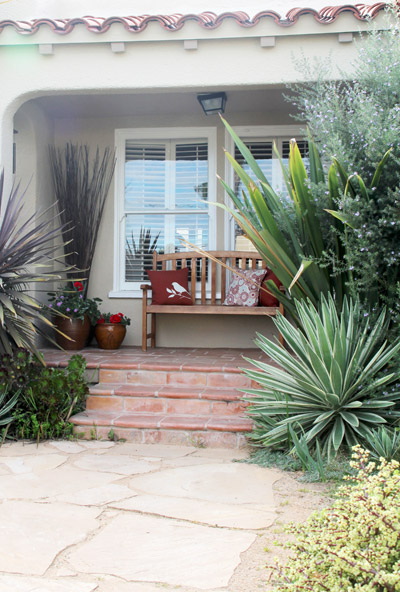
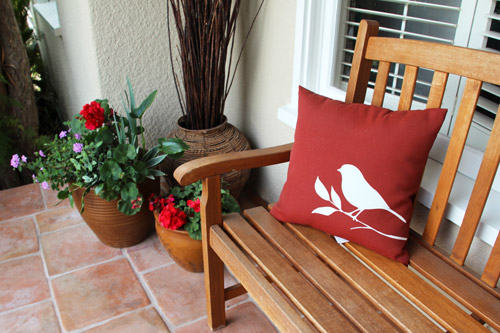
I used my $50 to invest in a new pot, 4 new 1/2 gallon plants (3 red geraniums and 1 purple verbena) and a pretty pillow to add to the mix!

The sticks and basket have been relocated from our dining room – they look much better out here now and bring great height – and the other two pillows across from the new bird pillow had already called our bench home.
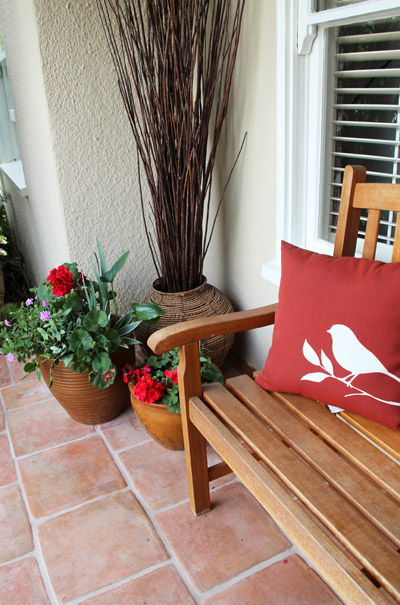
This part of the porch (and the lack of any direct sunlight) makes it really hard to grow anything. I’ve killed my fair share of beautiful potted flowers before and was near throwing in the towel, but I’m committed to give these no-sun-needed shade varieties an honest go.

To better my chances, I actually mixed in a few ‘faux’ Ikea plants as well. Can you tell?
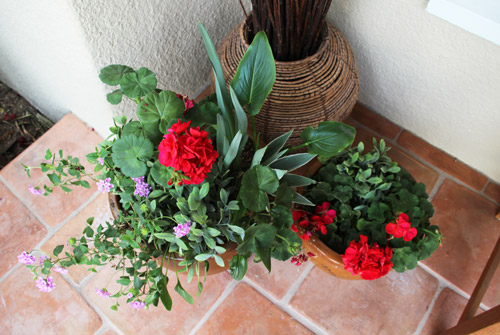
Those green foliage hedge-like guys are actually fake! but when mixed in with all of the flowers and real leaves, you couldn’t tell even if you were just five inches away. Now even when all plants are not flowering the pots look full and green.
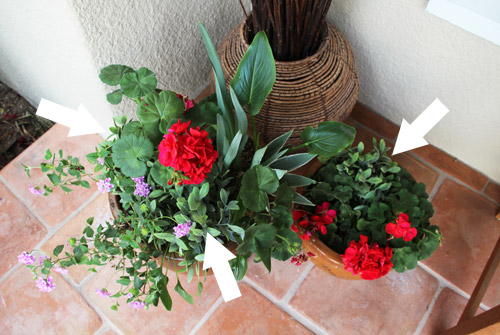
Here’s a rough before. This is ‘before’ paint trim had been decided (hence the two tone windows) and back when the porch was feeling very lonely for color (and our yard for anything flowery, for that matter).
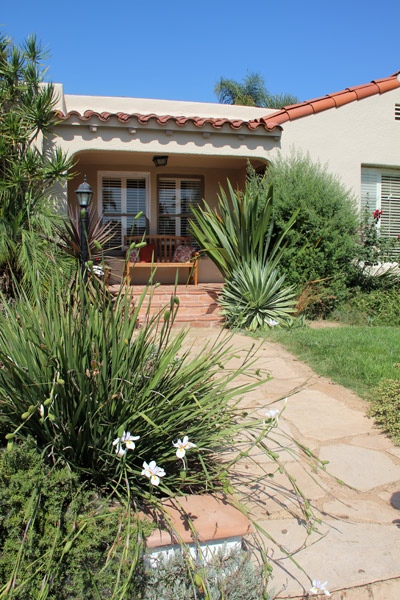
I love walking up to my front door now!
Lowe’s is generously offering a $50 gift card to a reader who would like to take on the $50 & Change challenge as well! Your next Saturday morning project is on the house. More info on the $50 & Change program (with ideas and inspiration) here and here.

******************************************************************************************

Giveaway: A $50 gift card to Lowe’s!

To Enter: Use the Rafflecopter giveaway entry form to enter once or multiple times.

Giveaway ends Thursday, March 7 at midnight PST, winner will be chosen randomly and announced on the blog. Good luck!

******************************************************************************************

a Rafflecopter giveaway

- posted on March 4, 2013 Filed Under: DIY, Gardening, Giveaway, Home, Our Yard, Renovating Adventures, Sponsored Post

Homemade Tomato Soup

March 1, 2013 by Morgan

PS I have 25+ colorful felt bowties/bows leftover from this party that we have no more use for and that I’m happy to drop in the mail to the first reader who shoots me an email: morgan at pepperdesignblog dot com. Update: reserved!

Sometimes there’s nothing quite like a rich homemade soup to end your day with. I’m such a soup girl, I could eat soup for lunch or dinner every day and be as content as a bee. Love me some soup.

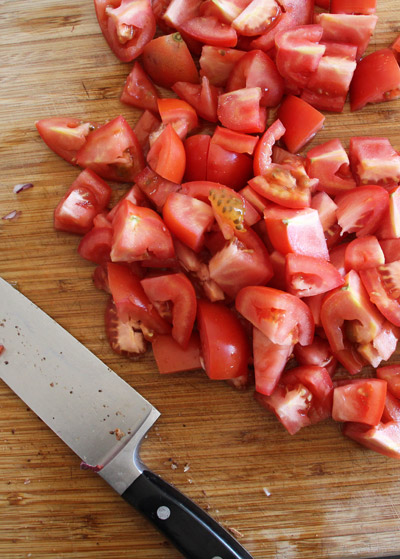
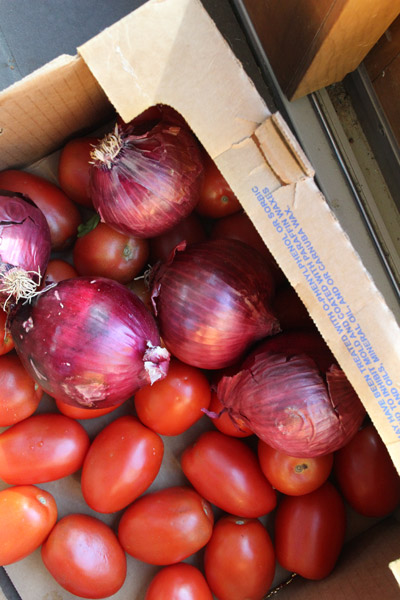
We recently had a box of something like 20lbs of tomatoes left over from an event and as they say there in our kitchen day upon day (getting older and older), I was beginning to fret over perfectly good food that was slowly wasting away. Sure, we poked into the big cardboard box to grab two for a lunch salad or a few to throw in with eggs in the morning, but our meals were not making an impact on the pile.

Picture this box but full to the brim. This is an after-soup shot.

And then the idea of a big stock pot full of homemade tomato soup came to mind. Yum. We could enjoy with grilled cheese during these cloudier days, pass out to friends or freeze a few containers for the future.

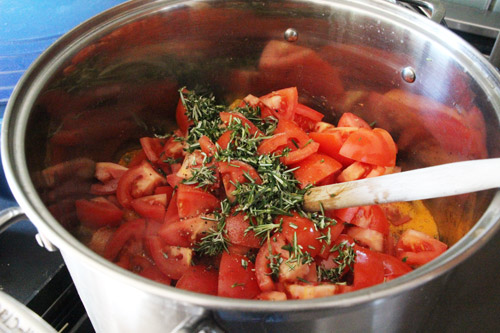
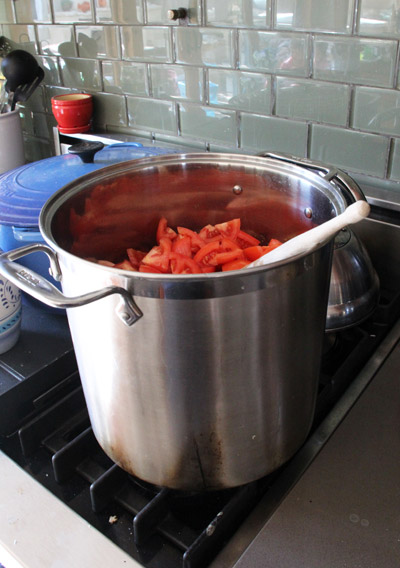
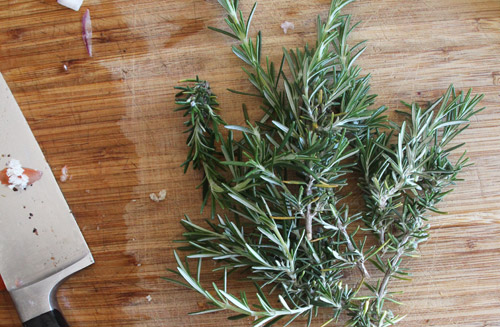
Into the pot went five big red onions, near my entire box of tomatoes and a healthy dose of fresh rosemary from the garden.

************************************************************************************
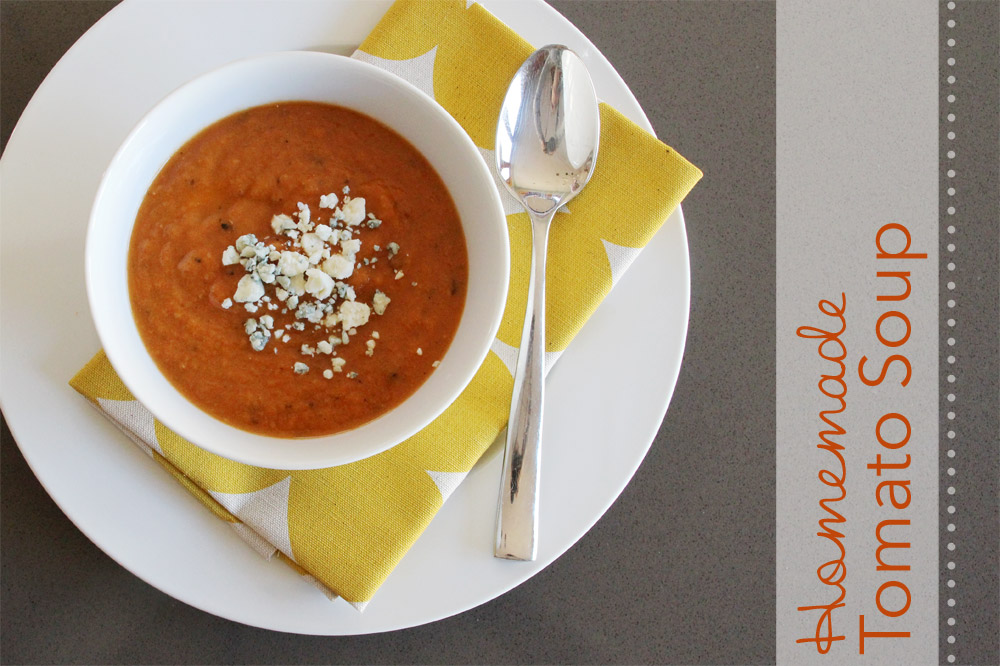
Homemade Garden Fresh Tomato Soup

m
Ingredients for ~6 servings: 4 cups chopped fresh tomatoes, 1 onion, 1 clove garlic, 1 cup stock (veggie or chicken), 1/2 cup cream, ~1/4 cup butter, ~2 T flour, bit of olive oil, 2-3 sprigs fresh rosemary, salt and pepper, additional spices to your liking (ideas include: bay leaf, celery root, white pepper, cloves)

I’ll call this soup a ‘garden fresh’ variety because I didn’t use canned or stewed tomatoes like most recipes call for. There’s always that alternative available though.

I used what I had in the kitchen and ended up with enough tomato soup to feed a small army (where are the 7 brothers/brother-in-laws when you need ’em?), but if I were to break it on down to a more manageable recipe size-wise, it would be the above. Keep in mind I’m a huge fan of ‘a pinch of this’ and a ‘dash of that’ so not all of my measurements are super, super accurate. Plus, soup is one of those grand dishes that you can adjust and change as you go. Have extra celery? Throw it in! Want to use up a can of tomato paste? Why not. Too many potatoes in the veggie bin? Any soup will love potatoes.

First up is sautéing the garlic and onions until they are tender, brown and full of aroma.

The trick I’ve learned with sautéing garlic and onions is to apply in this order: heat up empty stock pot (or sauté pan if you’re using this trick for any everyday dinner recipe) until you can hold your open palm about five inches from surface for just five seconds (and then it becomes to hot to keep hovering), add olive oil (enough to glaze the entire top of the pan just barely) and allow to heat up again (you can follow the five second rule here, too), add onions and allow to brown for a few minutes on their own without stirring, add chopped garlic and give the pan a toss, coating everything in the pan again in olive oil. Now let brown for a few minutes and toss again. Repeat until the room smells just delicious.

Next up for this particular soup is to add the chopped tomatoes, broth, rosemary, salt & pepper, and any other favorite herbs. Allow to stew uncovered for as long as you can (1-2 hours should do the trick, though I let mine simmer all day long. The longer your flavors have a chance to ‘get to know each other’ the better).

I kept the soup uncovered because fresh tomatoes will add a lot of water to your dish. Allowing the steam to evaporate will help to thicken up the soup as it simmers, you might decide to cover up canned and drained tomatoes to keep the water from leaving the pot though depending on how she’s cooking.

I also employ a simple roux trick to assist in creating a decently thick soup too. It goes something like this: add 3 parts ish butter to a sauce pan and let heat up until completely melted, add 1 part ish flour and stir continuously over heat until mixture is completely disintegrated with no lumps (add more or less butter/flour here depending on consistency, you’re going for a smooth chowder look and feel), add milk and turn off heat. Stir to combine.

A roux is simply a thickening agent and a great one to have in your back pocket for any recipe. I prefer flour over corn starch (based on taste) any day and melted butter over water.

Back to our soup. Add roux to simmering soup just as it’s finishing its time on the stove. Additional cream can go into the pot if you’re wanting a slightly creamier texture as well.

Finally, emulsify your soup with an immersion/hand blender or let cool and use your everyday smoothie blender (you’ll have to pour the soup back into the pot and heat it up again if you go this route). I love, love this immersion blender for soups because the lower portion of the hand blender simply pops off and goes into the sink for washing. Christmas present last year and it’s a favorite.

Update: Just saw on Hautelook that they are offering the same Cuisinart hand mixer at 50% off right now!

Done! (Some people love their tomato soup super thin and strained, you could emulsify more than I did below until the consistency is similar to a liquid and then strain out larger herbs.)

For dinner, I served this guy up with an apple, mozzarella and blue cheese grilled sandwich. Chop up some of that sandwich to make ‘grilled cheese croutons’ as an alternative – delicious! If you have an olive oil of excellent quality (perhaps a Christmas gift or something from a little tasting shop that you’re not quite sure what to do with), swirl a bit on top for added flavor.

PS this makes a great base for tomato sauces as an alternative use, it is also really yummy served cold (learned that trick in Spain) and is a good base for veggie or noodle soups if you don’t emulsify (instead add roasted veggies or pasta to your chunky tomato base).

************************************************************************************
PSS all recipes featured on the blog are linked right here. Happy eating!

- posted on March 1, 2013 Filed Under: Recipes Tagged With: Recipes

Pinterest Challenge: Faux Stacked Log Fireplace Facade

February 27, 2013 by Morgan

Update: our faux fireplace screen made it into This Old House! Check out the details here.

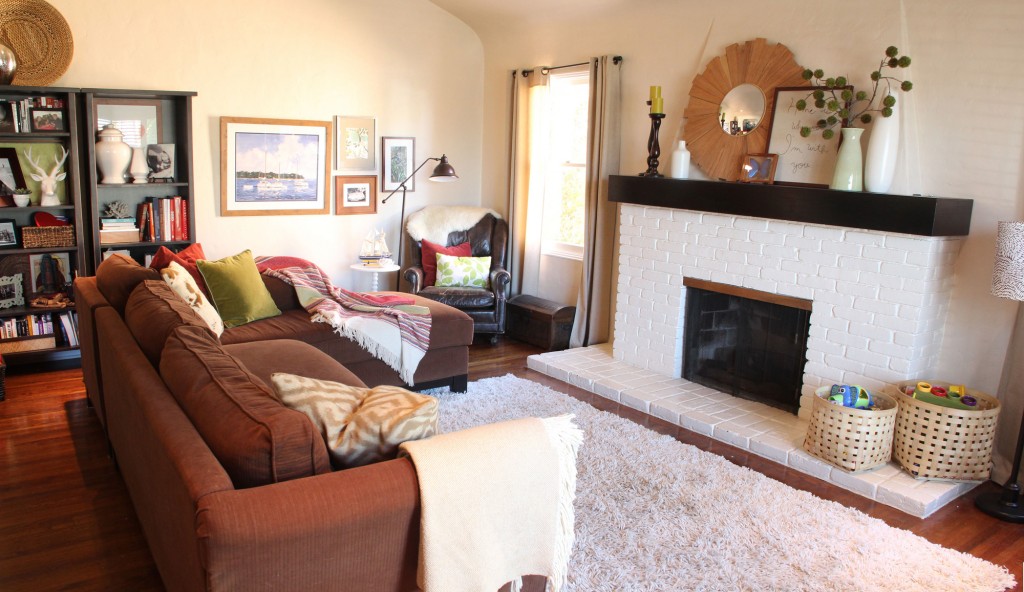
Six ish months ago we had to turn the gas off in our fireplace… which was such a downer as there’s nothing more amazing than flipping that little gas switch and watching a beautiful, blazing fire set the mood for your living room. Perfect for chilly nights that call for family games on the living room rug or for a late night Netflix. But alas, this is an older home with old fireplace issues and we had to switch her off.

Hopefully one day she’ll blaze again.

Until that day it’s time to turn the eye-sore innards of this old fireplace (black bricks, metal curtain and goldish top plate and all) into a prettier focal point for the room. Enter Pinterest Challenge, Winter 2013.

I love these little challenges because they provide the motivation to cross a big project off of the massive to-do list, and usually I can justify choosing a project that I more love and want to complete, and less of one I must do because it’s next on the priority list. Here are a few past projects that we’ve tackled around here, including painter’s tape wallpaper, gold chevron napkins and an ombre stool for Liv (one of my favorites) among others.

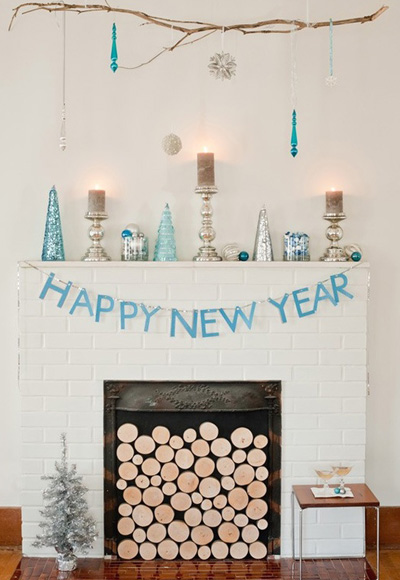
With a little motivation, a week to track down materials and a great inspiration picture, I had an idea of where to start.

Oooo I love the above image! What a great way to utilize the empty space in a fireplace while still keeping a room cozy and comfortable (fireplaces and stacked wood have a way of doing that…).

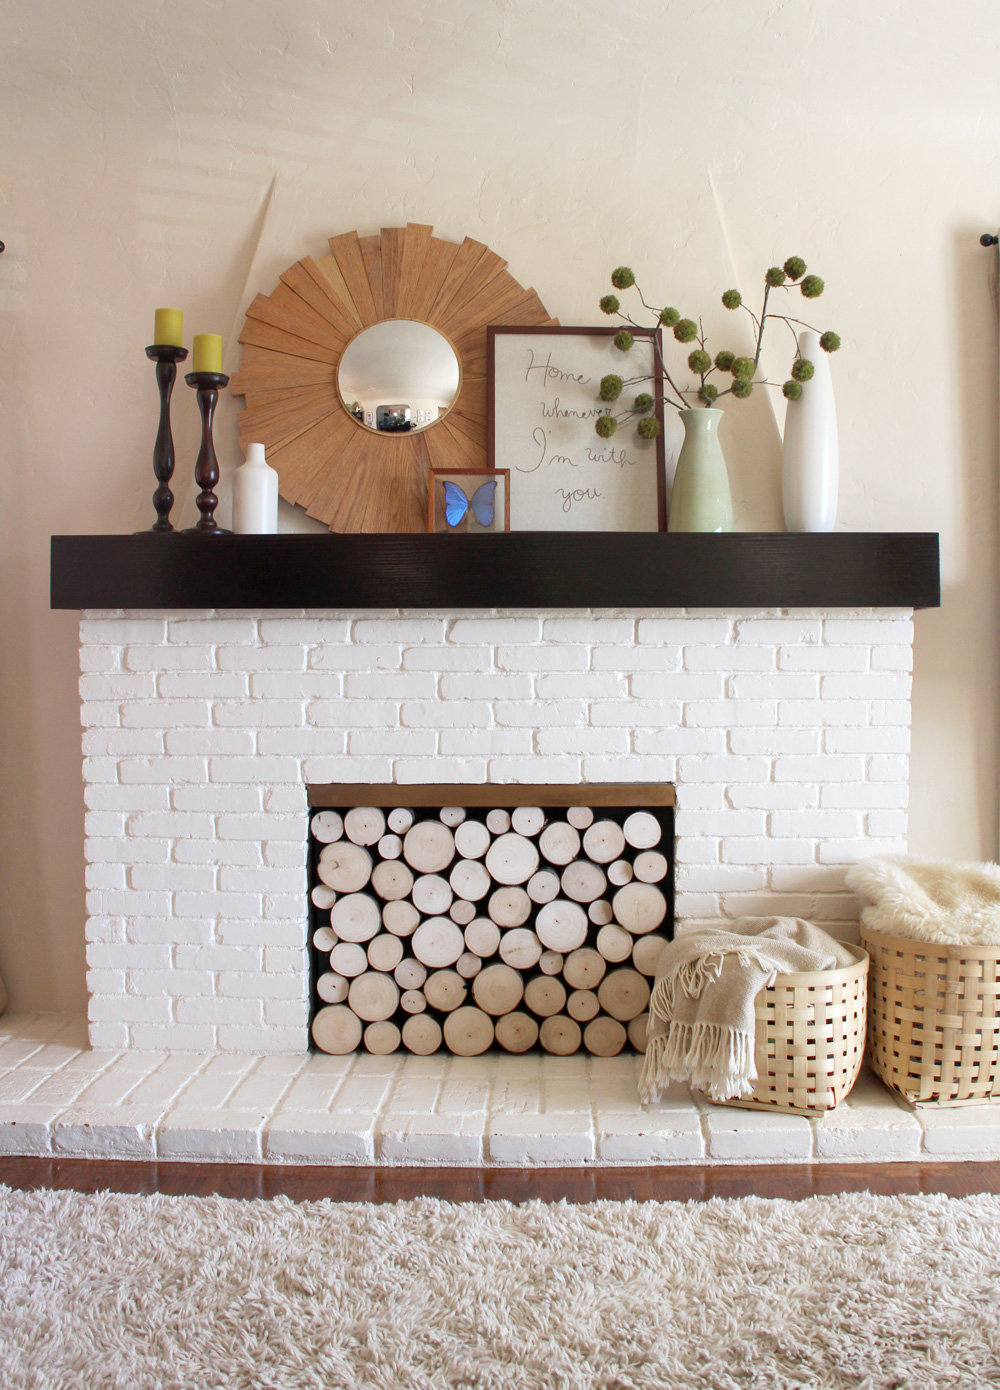
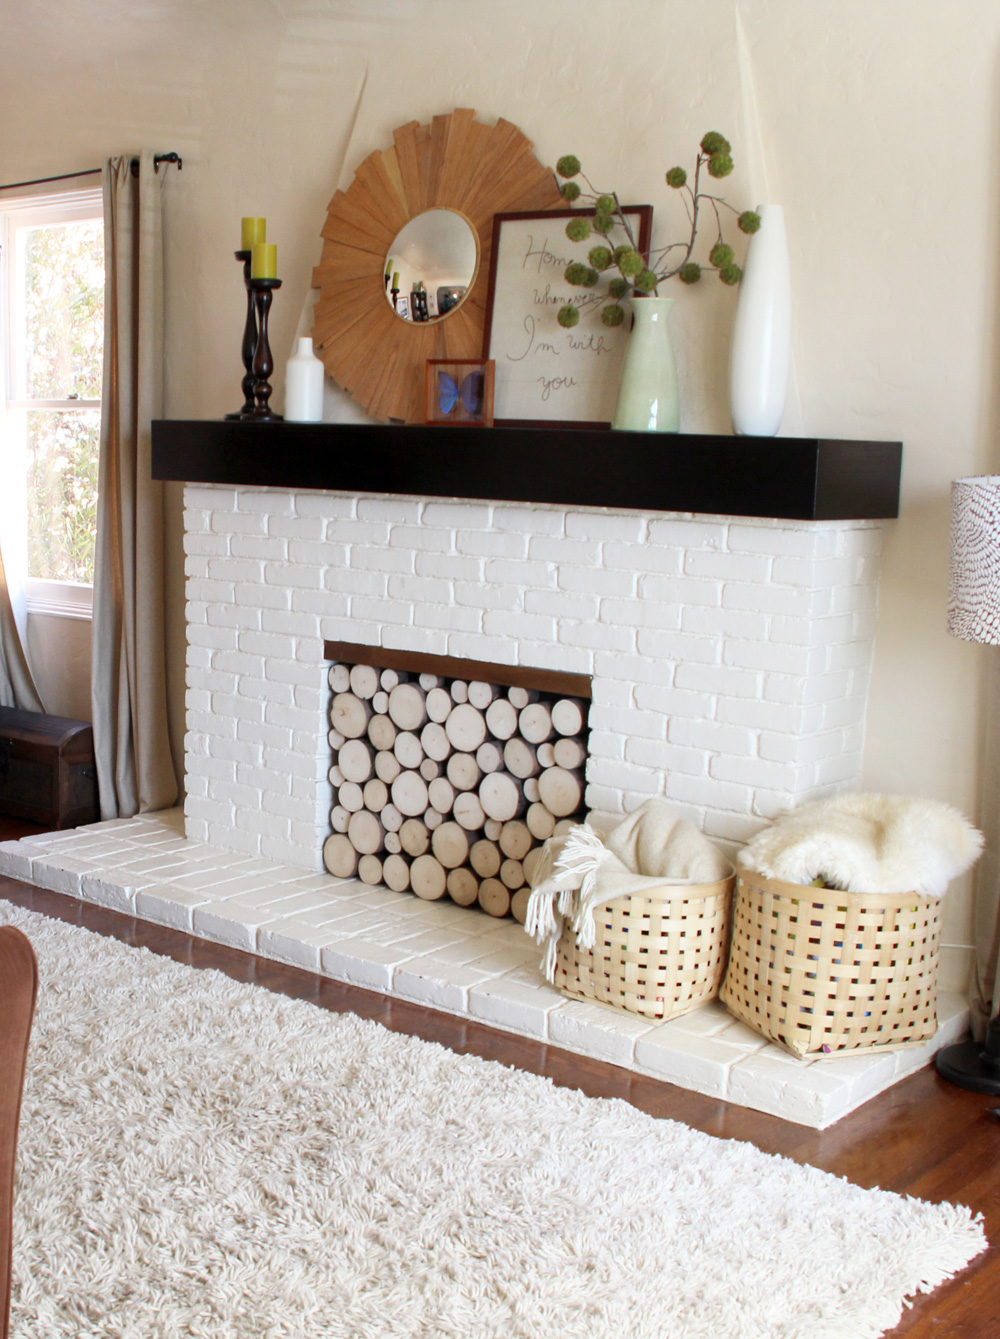
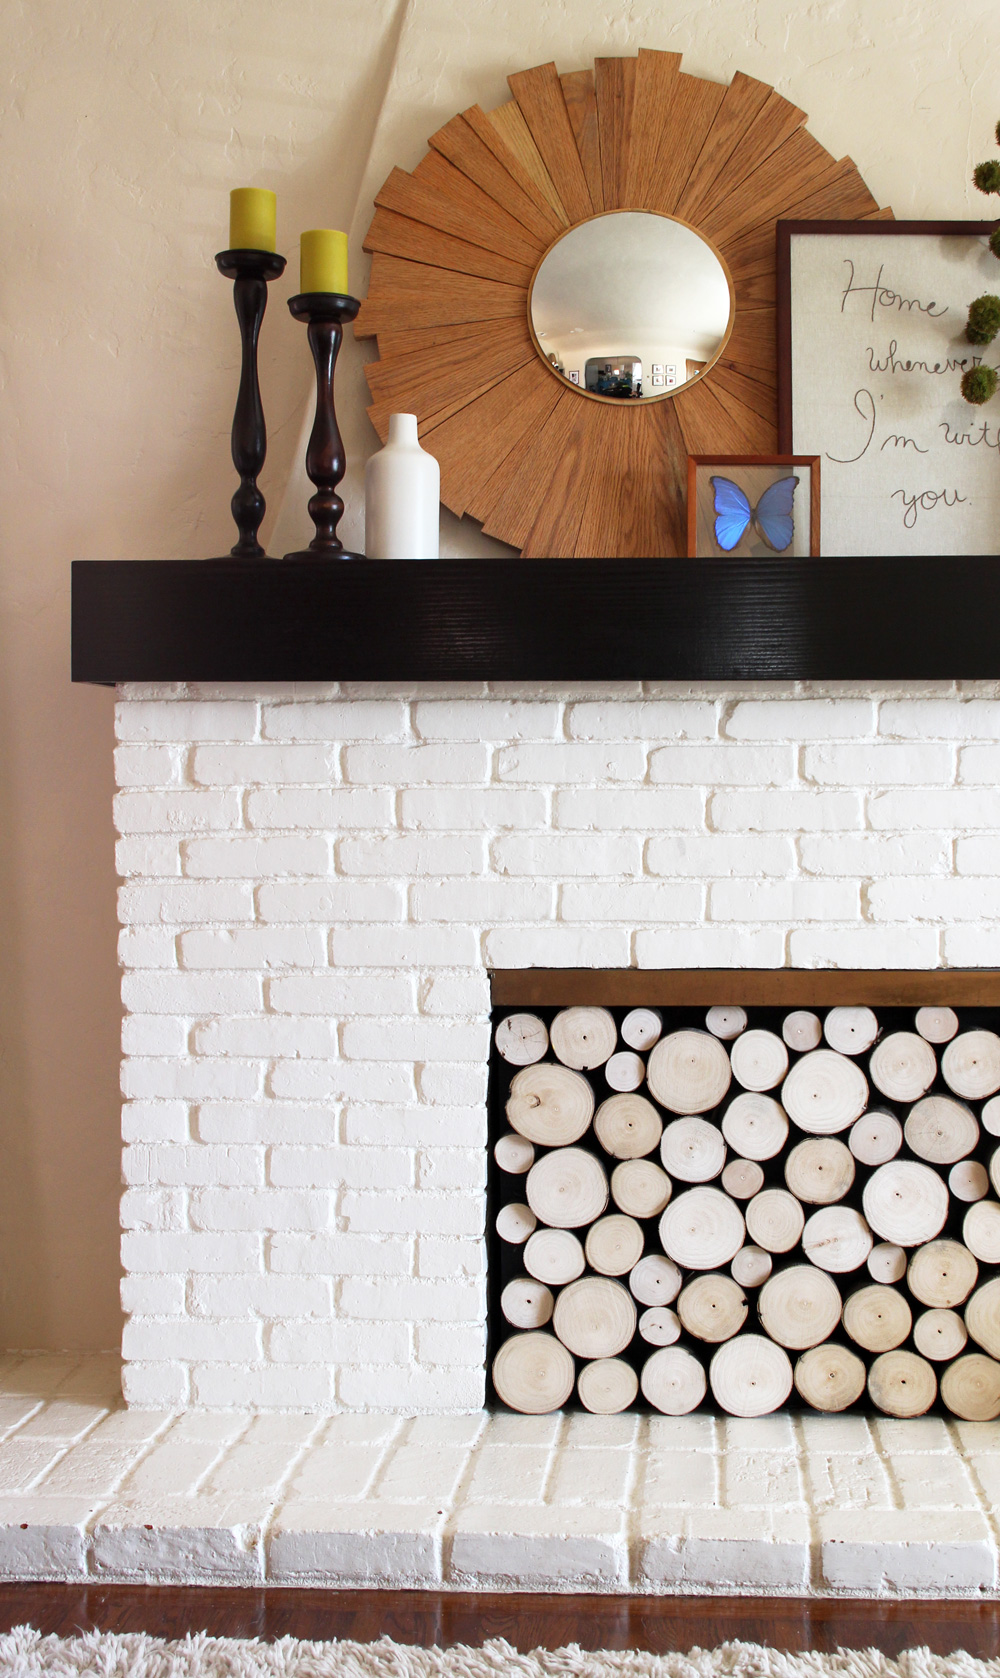
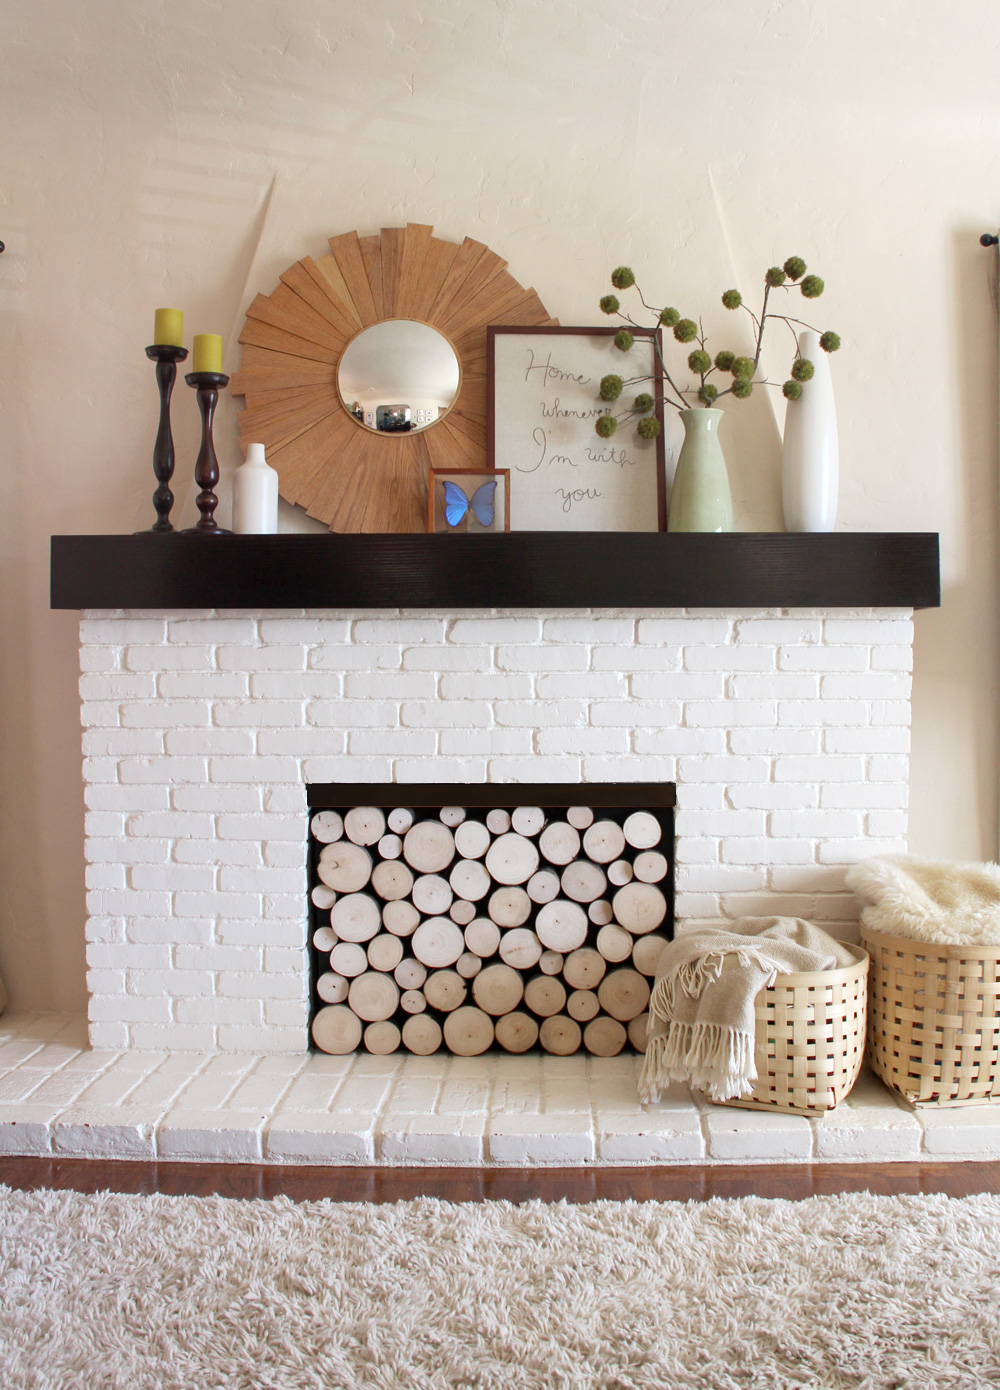
Our finished project… drumroll…

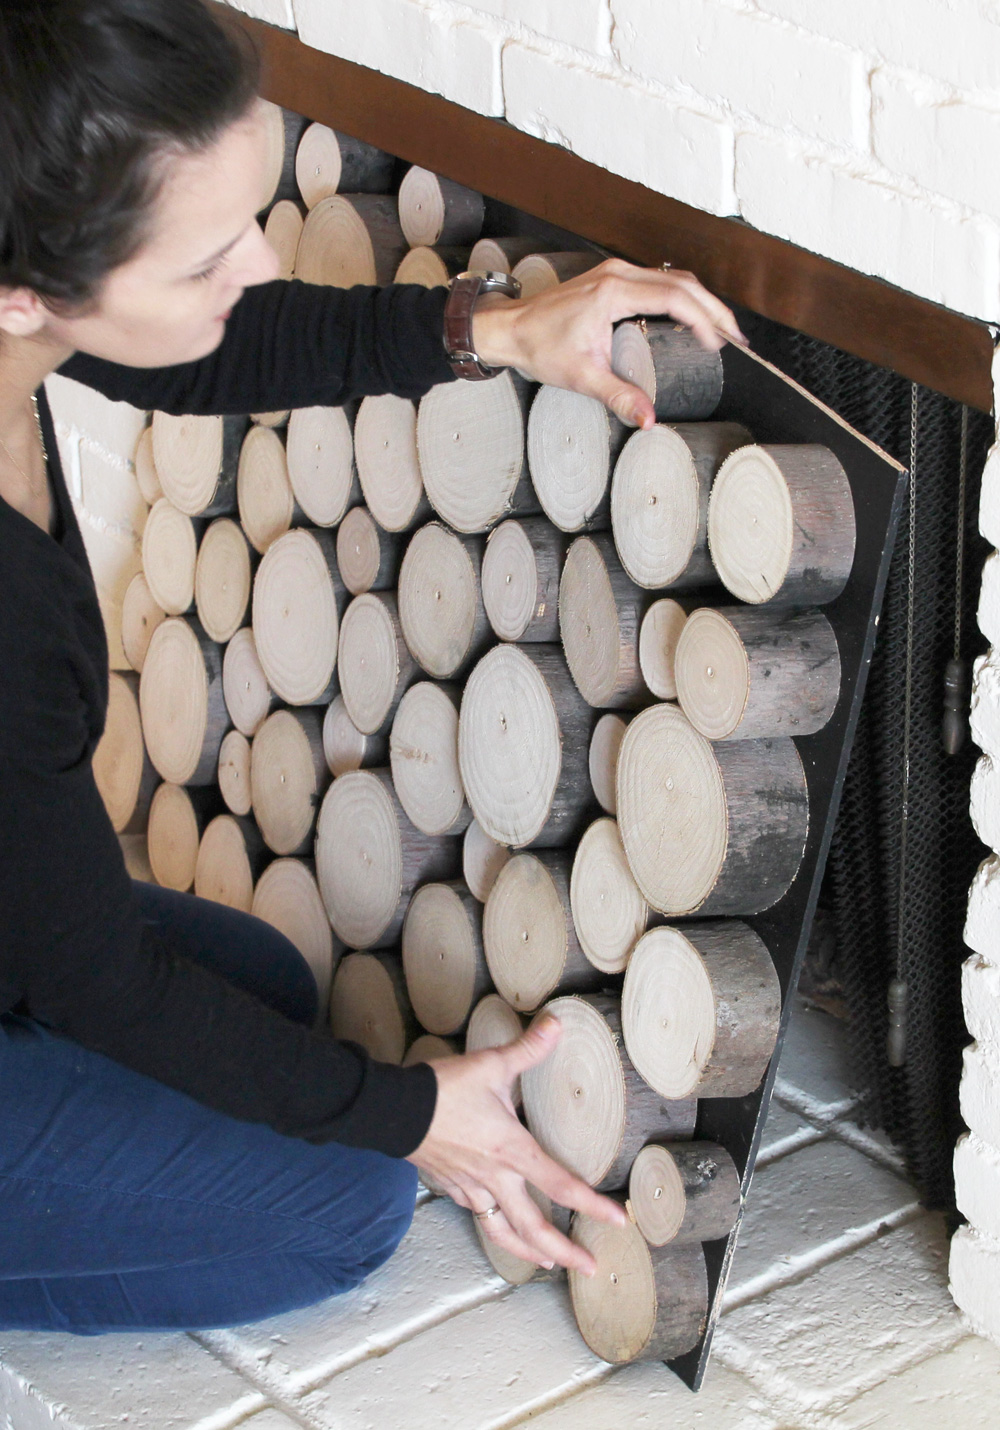
I would be very happy if you thought we went and stacked a bunch of logs in our fireplace and called it a project! But I promise it was much more than that. The goal here was to build a faux log stack facade that we could remove when we were ready to use the actual fireplace, and replace the next day once the fireplace was cool again.

The hope was that the screen would give the depth and perception of a a bunch of stacked wood, but really it would be just a few inches thick and somewhat easy to pop in and out.

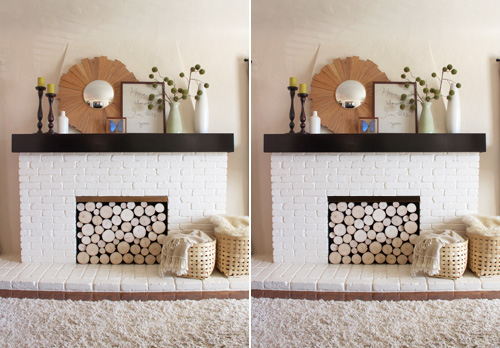
What do you think? Are we fooling anyone?

Now on to building the screen!

*******************************************************************************
Fireplace Faux Wood Stack Facade

m
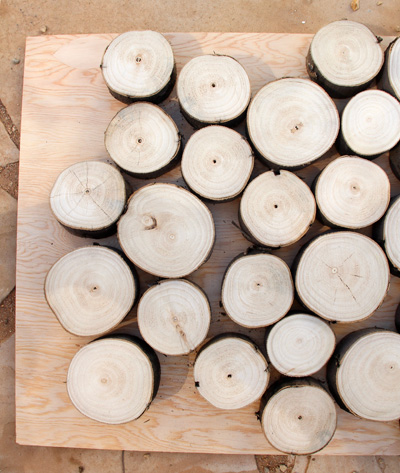
Materials: ~50 variously sized log slices, plywood cut to the shape of your fireplace opening, black matte paint, wood glue (or nail gun) UPDATE: some readers have had success ordering logs from Amazon

I ran into the first big road block while tracking down the actual logs. You’d think that this would be fairly easy… but turns out smaller logs (unchopped) in lighter wood colors (such as birch rather than oak or redwood) are not always readily available in these desert parts of San Diego. Who would have guessed.

I really lucked out when a friend of ours suggested eucalyptus and then found a huge pile of firewood for the taking! And he generously handed over variously sized logs for me to include in the project (thanks, Dave). Other resources that might be useful? Craigslist and Etsy (turns out you can even purchase sliced logs for the right price).

Kevin chopped up my logs into 3″ slices and I began assembling my faux stacked wood.

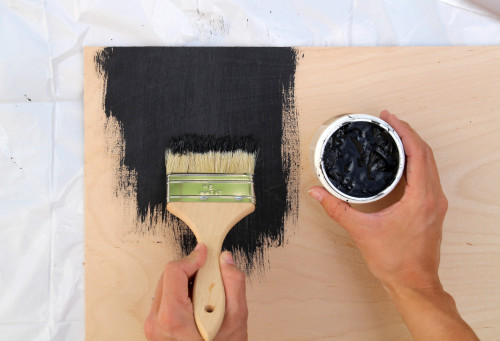
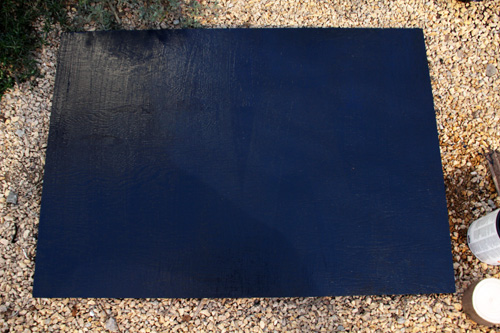
The backing for our fireplace screen is a piece of plywood measured, cut to size and painted black.

livingroom_fireplacelogscreen_painting

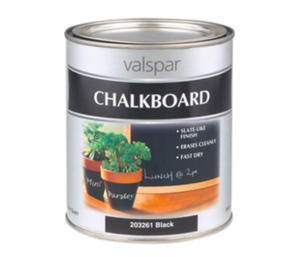
I considered spray painting it but we had only a satin finish in the paint closet, so I used up a bit of leftover chalkboard paint that we had on hand (from this and this project) to achieve a more matte finish (the above is still wet, but once this paint dried it was more than perfect).

Our nail gun is out on loan at the moment or I would have simply lined up my log slices, laid the backing over the top and fired away to secure the slices to the backing and to keep the logs from moving, but instead I lathered each slice individually with a thin coat of wood glue and allowed the entire project to dry overnight (that stuff is tough). When we get the nail gun back I’ll add extra reinforcements to ensure that none of these logs come sliding down, especially with toddlers at play.

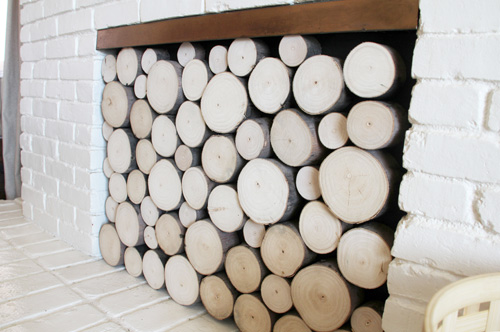
I opted for a 3″ depth on the log slices (rather than 1/2″ or something easier to manage/less heavy) so that they would add more depth to the fireplace and (hopefully) make the black backing a bit more invisible. In person it’s obvious that this is a faux fix to our little fireplace conundrum, but it’s a neat faux finish at that! 

Should I paint out that gold top plate a darker, oil rubbed bronze color?

That might be step two to this project, looks kind of nice!

*******************************************************************************
I’m linking this project back to Katie’s, Sherry’s, Megan’s and Michelle’s Link Parties today!

PS all Pinterest Challenge projects are sorted here, and all living room projects can be found here.

Related Posts Plugin for WordPress, Blogger...

- posted on February 27, 2013 Filed Under: Crafty Solutions, DIY, Favorites, Home, Our Living Room, Projects, Renovating Adventures, Tutorial Tagged With: Accessories, Before & After, Crafty Solutions, Decorating, DIY, Home, Living Room, Pinterest Challenge, Tutorial, Wardrobe - Winter

  • « Previous Page
  • 1
  • …
  • 170
  • 171
  • 172
  • 173
  • 174
  • …
  • 438
  • Next Page »

Welcome to my little slice of the web where I practice finding family, career, homemade & inspired balance on a daily basis. This is where I capture my happy moments, and I'm honored that you're here to join us. Home + creativity + good eats + journaling + life as a working mom. Read more...

  • Email
  • Facebook
  • Google+
  • Instagram
  • Pinterest
  • RSS
  • StumbleUpon
  • Twitter

Search

Categories

Craft Projects CategoryCrafty Projects Good Eats & Recipes CategoryGood Eats Entertaining Ideas CategoryEntertaining Ideas Decorating Projects CategoryDecorating Style Boards CategoryStyle Boards Everything Holiday CategoryHolidays

Daily Dose

Favorite Posts

Dog Days of Summer: Craft Kits for Kids

Summer Craft Kits for Kids

August is a slower month for our family. Preschool summer school is out, dance lessons are taking a brief break for the month, our family vacation is

Our Double Stroller: Mountain Buggy +One Review

A Mountain Buggy +One Double Stroller Review

I'll preface by saying that this is not a sponsored review - we've found an awesome double stroller and we love it! Our Mountain Buggy + One has served

Wardrobe Style Board: A Work-From-Home Uniform

Wardrobe Style Board: A Stay-At-Home Mom Uniform | Cropped Light Jeans, Tan Sven Clogs, White Madewell V-Neck T-Shirt, Colorful Necklace, Gold Earrings | PepperDesignBlog.com

tan clogs | pocket tee | light jeans | gold disc earrings | colorful necklace It's not uncommon for people to come and go from our house all day long,

Happy 2nd Birthday, Taylor Rose!

Happy 2nd Birthday, Taylor Rose! An Infographic for My Girl | PepperDesignBlog.com

This weekend Taylor turned two. Taylor is such a bright, wonderful light in our lives. She is our funny, spunky little daughter that will do just about

How to Listen to Audiobooks on OverDrive

Intro to Audiobooks on OverDrive Public Library | PepperDesignBlog.com

Liv has developed a big interest in audiobooks as of late. One of my favorite ways for her to spend her 'quiet time' while Taylor and Marley nap is for her

Pistachio, Caramel & Sea Salt Chocolate Bars

Pistachio, Caramel & Sea Salt | Father's Day | PepperDesignBlog.com

Father's Day is not so far away, so here's an easy gift idea that can be made in advance or (literally) the night before. Homemade chocolate bars can be

Liv & Taylor-isms

Liv & Taylor-isms | Funny Things Kids Do & Say | PepperDesignBlog.com

Sometimes I capture something so funny/adorable/sweet that I can’t help but make note of it. Because Taylor is now expressing herself in full sentences, I

30 Things That I’ve Learned By 30

30 Things I've Learned by the Age of 30 | PepperDesignBlog.com

Today is my 30th birthday. I don't feel much older, but hearing that number roll out of my mouth feels as though I'm closing on a big chapter in my

Featured

Featured
VRBO San Diego Flying Bridge Vacation Rental cool toys for kids

Favorite Topics

Welcome to my little slice of the web where I practice finding family, career, homemade & inspired balance on a daily basis. This is where I capture my happy moments, and I'm honored that you're here to join us. Home + creativity + good eats + journaling. Read More…

  • Email
  • Google+
  • Instagram
  • Pinterest
  • RSS
  • StumbleUpon
  • Twitter
May 2025
MTWTFSS
« Feb  
 1234
567891011
12131415161718
19202122232425
262728293031 

Copyright © 2025 · Foodie Pro Theme by Shay Bocks · Built on the Genesis Framework · Powered by WordPress