Pepper Design Blog

A Little of This & That... Renovating, Decorating, DIY Projects & Family

pepper_header_flower

Project Nursery: Sewing the Curtains, Part 2

February 23, 2011 by Morgan

Back to the sewing machine we go to finish off the curtains for the new nursery! Check out Part 1 here for an intro to the project and the first steps in sewing lined drapery panels.

Just before the weekend we left off at Step 6, where the lining is initially pinned to the top hem of the drapery fabric in preparation for sewing the two panels together.
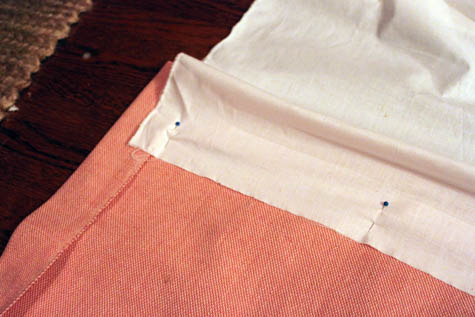
I followed Janell’s tutorial carefully (I’m quite the sewing novice) and if you’re searching for in-depth directions on how to accomplish lining curtains, I recommend hopping on over to check it out.

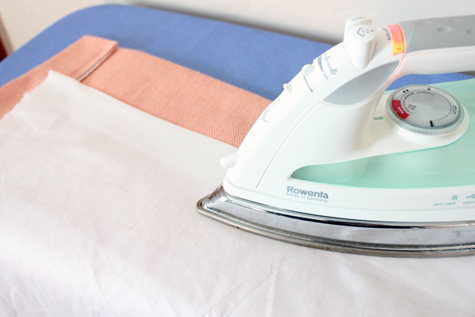
Step 7: Sew along the newly pinned top hem of the drapes and flip fabric over. Press newly connected fabric + lining.
Step 8: The process of sewing the lining to the sides of the curtain fabric is a bit tricky. In fact it took me quite a few ‘trial’ attempts (with pins rather than the machine) to figure out the best way to handle this inside-out-contorted-fabric conundrum.

The goal is to hide the thread lines into the side hems and to do this you must pin the fabric accurately, turn the panel inside out and then sew. For the pinning of the lining to the panel to be intuitive to me, I began by casually pinning the lining to the fabric and turning inside out to check out how well it lined up (the first few times resulted in bunched or waved fabric across the panel so I definitely recommend playing with the pinning before you make your stitches permanent with the machine).
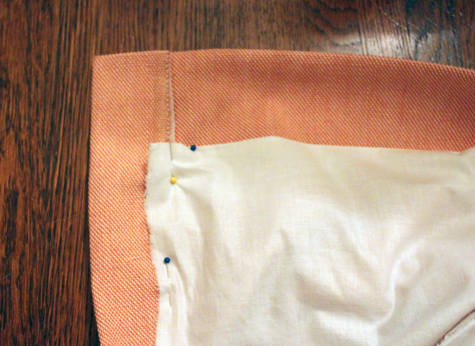
The above image shows how the lining will ‘fit’ into the top and side hems of the curtain. To get that lining underneath the overlapping curtain hem, you must pin the curtain inside out. But use the casual above pinning as a guide to show you were to pin when the fabric is inside out.

You can see in the next image that the fabric was pinned with the edge of the lining to the edge of the curtain fabric and then flipped inside out. I’m showing the pinning (which is hidden when it’s inside out) to demonstrate how these two fabrics connect edge to edge (when you flip it right side out, the large side hems will come back!).
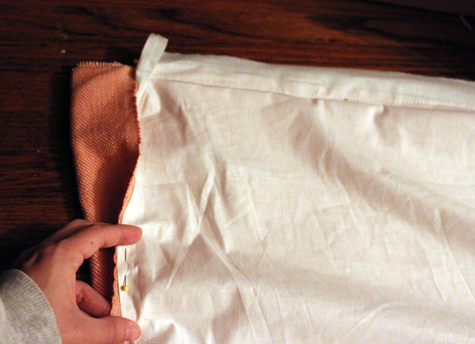
Step 9: Using the pins as your guide, sew your side panels together. Since both sides need to be sewn top to bottom (if one is sewn bottom to top you’ll end up with wavy fabric – I know it’s awkward though), one side should be fairly easy:
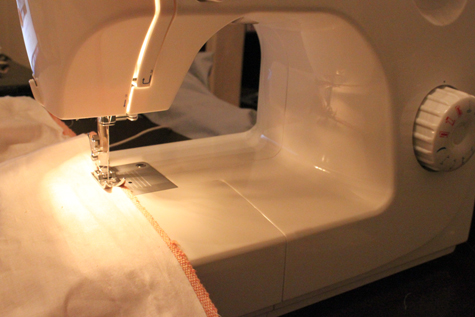
And the other will be much more difficult (is there any easier way to do the opposite side without stuffing your entire drapery panel into your machine?):

Challenging!

Step 10: Press out all of your hems and admire your work!
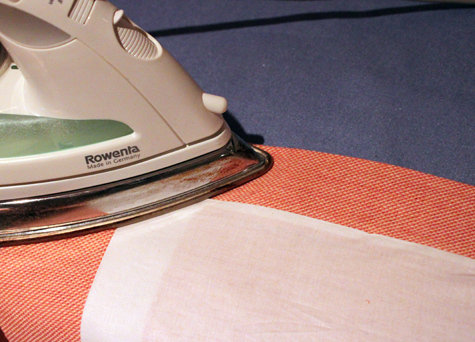
I should have a full curtain shot here to show you the result :(. Even though most of the side panel areas turned out clean and smooth, there was the occasional pucker and error:

I’ve learned plenty of lessons during round 1 – next time I have a better idea of how to correct these little errors. But a little hand sewing will fix most of these buckles in a cinch.

I’m pressing everything out now and hanging the curtain rods! The new lined panels will be up very soon. Woohoo!

If you’re catching up on Project Nursery, here’s a link to the sewing the curtains part 1, nursery fabric board, curtain fabric selection, rocking horse find, new pendant light, vintage wall art addition, changing table makeover, nursery wall striping tutorial, painted animal project, the initial inspiration board and the before picture posts.

Related Posts Plugin for WordPress, Blogger...

- posted on February 23, 2011 Filed Under: Crafty Solutions, Home, Liv's Nursery, Projects, Renovating Adventures, Tutorial Tagged With: Decorating, DIY, Fabric, Nursery, Sewing, Tutorial

« If My Life Were a Comic Strip…
Project Nursery: Sewing the Curtains, Part 3 »

Comments

  1. Malibu Draperies says

    February 24, 2011 at

    This is great! A step by step procedure in sewing curtains, complete with pictures. Next time maybe a video?

  2. Nancy U says

    February 23, 2011 at

    I guess what I liked best about this post was you showing where you screwed up and got a bit of bunching. Sometimes its nice to know that other people aren’t perfect. Thanks for sharing.

    • Morgan says

      February 23, 2011 at

      Thanks, Nancy. In fact I had quite a few bunching errors – but nothing that couldn’t be fixed or hidden with a bit of patience!

      ~Morgan

  3. Londen @ Sixty-Fifth Avenue says

    February 23, 2011 at

    Oh to be able to sew…they look great, can’t wait to see them hung!

  4. Nina Designs says

    February 23, 2011 at

    Can’t wait to see the result!

Posted on Wednesday, February 23rd, 2011

Welcome to my little slice of the web where I practice finding family, career, homemade & inspired balance on a daily basis. This is where I capture my happy moments, and I'm honored that you're here to join us. Home + creativity + good eats + journaling + life as a working mom. Read more...

  • Email
  • Facebook
  • Google+
  • Instagram
  • Pinterest
  • RSS
  • StumbleUpon
  • Twitter

Search

Categories

Craft Projects CategoryCrafty Projects Good Eats & Recipes CategoryGood Eats Entertaining Ideas CategoryEntertaining Ideas Decorating Projects CategoryDecorating Style Boards CategoryStyle Boards Everything Holiday CategoryHolidays

Daily Dose

Favorite Posts

Dog Days of Summer: Craft Kits for Kids

Summer Craft Kits for Kids

August is a slower month for our family. Preschool summer school is out, dance lessons are taking a brief break for the month, our family vacation is

Our Double Stroller: Mountain Buggy +One Review

A Mountain Buggy +One Double Stroller Review

I'll preface by saying that this is not a sponsored review - we've found an awesome double stroller and we love it! Our Mountain Buggy + One has served

Wardrobe Style Board: A Work-From-Home Uniform

Wardrobe Style Board: A Stay-At-Home Mom Uniform | Cropped Light Jeans, Tan Sven Clogs, White Madewell V-Neck T-Shirt, Colorful Necklace, Gold Earrings | PepperDesignBlog.com

tan clogs | pocket tee | light jeans | gold disc earrings | colorful necklace It's not uncommon for people to come and go from our house all day long,

Happy 2nd Birthday, Taylor Rose!

Happy 2nd Birthday, Taylor Rose! An Infographic for My Girl | PepperDesignBlog.com

This weekend Taylor turned two. Taylor is such a bright, wonderful light in our lives. She is our funny, spunky little daughter that will do just about

How to Listen to Audiobooks on OverDrive

Intro to Audiobooks on OverDrive Public Library | PepperDesignBlog.com

Liv has developed a big interest in audiobooks as of late. One of my favorite ways for her to spend her 'quiet time' while Taylor and Marley nap is for her

Pistachio, Caramel & Sea Salt Chocolate Bars

Pistachio, Caramel & Sea Salt | Father's Day | PepperDesignBlog.com

Father's Day is not so far away, so here's an easy gift idea that can be made in advance or (literally) the night before. Homemade chocolate bars can be

Liv & Taylor-isms

Liv & Taylor-isms | Funny Things Kids Do & Say | PepperDesignBlog.com

Sometimes I capture something so funny/adorable/sweet that I can’t help but make note of it. Because Taylor is now expressing herself in full sentences, I

30 Things That I’ve Learned By 30

30 Things I've Learned by the Age of 30 | PepperDesignBlog.com

Today is my 30th birthday. I don't feel much older, but hearing that number roll out of my mouth feels as though I'm closing on a big chapter in my

Featured

Featured
VRBO San Diego Flying Bridge Vacation Rental cool toys for kids

Favorite Topics

Welcome to my little slice of the web where I practice finding family, career, homemade & inspired balance on a daily basis. This is where I capture my happy moments, and I'm honored that you're here to join us. Home + creativity + good eats + journaling. Read More…

  • Email
  • Google+
  • Instagram
  • Pinterest
  • RSS
  • StumbleUpon
  • Twitter
February 2011
MTWTFSS
« Jan Mar »
 123456
78910111213
14151617181920
21222324252627
28 

Copyright © 2025 · Foodie Pro Theme by Shay Bocks · Built on the Genesis Framework · Powered by WordPress