Pepper Design Blog

A Little of This & That... Renovating, Decorating, DIY Projects & Family

pepper_header_flower

Office Makeover: New DIY Curtains

November 4, 2011 by Morgan

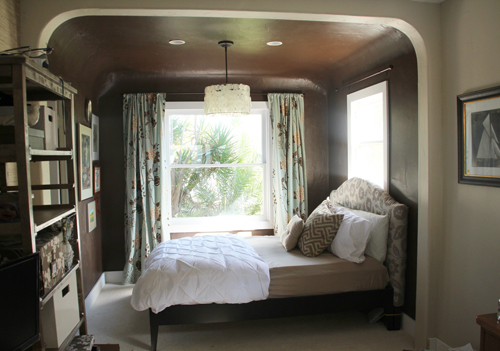
On Wednesday I shared how the guestroom portion of the office is looking right about now. You might have noticed that I moved the curtains that used to be between the kitchen and office (covering the french doors) to the big window near the bed. But they might not stay.

I’ve been using Spoonflower to play with a few handmade designs for a new pair of curtains for this area and here’s where I’m at now:
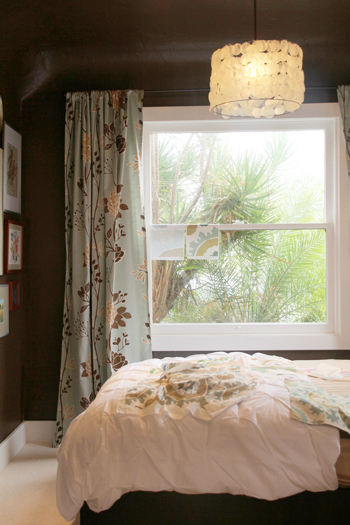
Here’s a better look at what’s going on on the bed, or the ‘test swatch’ area:
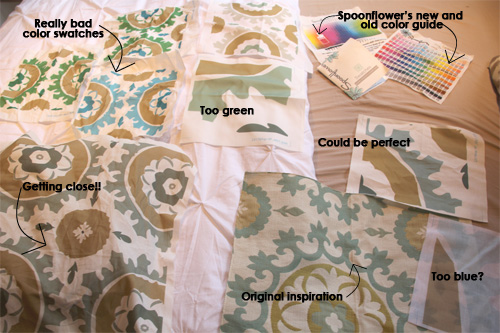
The original inspiration came from this beautiful upholstery weight suzani print from Calico Corners, but the heavy woven fabric did not lend itself well to a soft, breezy curtain that would allow light in (the walls are brown so light, even with curtains, is a must).

Have you heard of Spoonflower? You can create your own design and they’ll print it up on a variety of different types of fabric. I love it! I’ve used it for curtains in the past and went to work to create a suzani print of my very own.

The first time I ordered I used their original color guide to pick my fabric shades, and you can see from the ‘really bad color swatches’ above that I was waaaaay off. Spoonflower was great though, they sent out their latest and greatest color guide (so you know exactly what colors to send your design in for printing), and even reimbursed me one round of bad swatches.

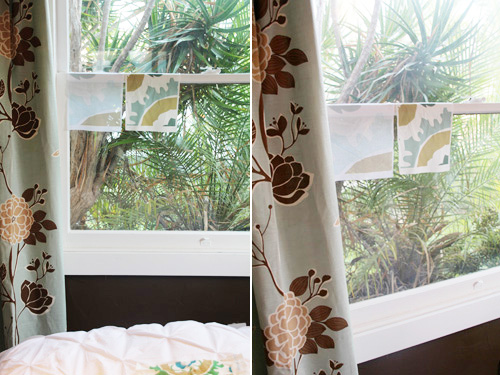
Soon I was left with the two swatches (on two different types of fabric) that were very close color-wise to my inspiration print:
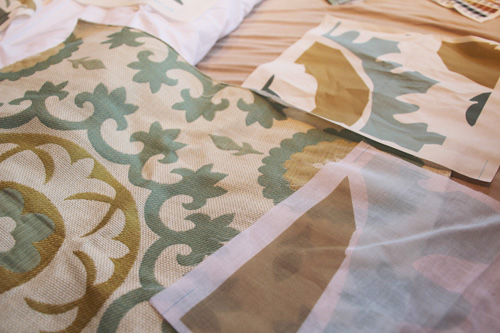
Here they are up against the natural light of the window. The fabric on the left is a sheer fabric and the one on the right is a cotton. The jury is out on which looks better at the moment… I’m nervous the sheer is too sheer and the cotton might be too prone to wrinkles. But I’m hoping to have picked one by the end of today!
My over all experience with Spoonflower has been positive. There were a few frustrating moments (aka ordering swatch upon swatch – plus waiting for shipping – and then finding horrible coloring) but their customer service is awesome and they ship for $1, so you can order all day and it won’t really cost you much. Another bonus is that there are thousands of free designs that others have uploaded – so if you’re searching for the perfect print and you just can’t find it online or at your craft store, a Spoonflower artist might just have what you’re looking for.

Decisions, decisions. Hmmm… those original curtains do work pretty well, too!

For more Office Makeover posts, check out: new shell pendant, organizing the bookshelves, wall collage part 1, part 2, fabric bulletin board inspiration, (new) inspiration board, new lamps, wallpapering open shelves, finding the perfect credenza, new trim, dining table-to-desk, a new desk & bookshelves, installing remnant carpeting, grasscloth wallpaper, painting the office nook, finding carpet for the office, chocolate brown wall ideas, plastering progress,  inspiration for a diy desk, back in action!, desking hunting for under $300, bookcases under $300,inspirational rooms, room layout options, demo part 1 & demo part 2.

- posted on November 4, 2011 Filed Under: Craft Projects, Crafty Solutions, DIY, Home, Our Guestroom/Office, Projects, Renovating Adventures Tagged With: Accessories, Bedroom, Crafty Solutions, Decorating, DIY, Fabric, Home, Office, Patterns & Color

Office Makeover + Pinterest Challenge: New Pendant!

November 2, 2011 by Morgan

I took on the Young House Love + Bower Power Pinterest Challenge and I’m excited to share my results!

So the room is no where near done (you can read about the progress here), but you might remember that it started as this:

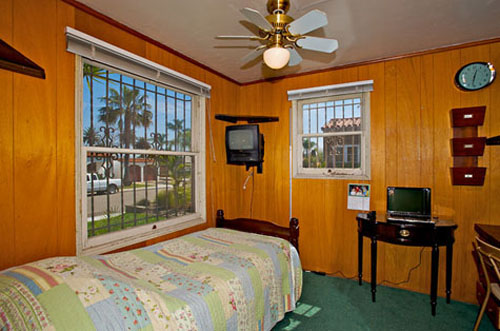
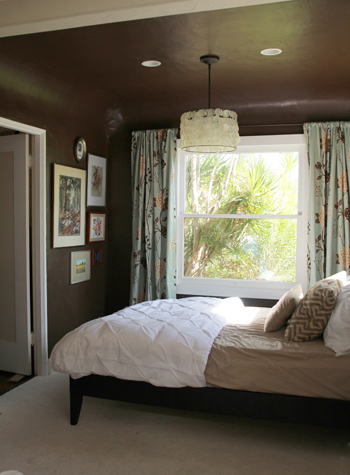
Some major demo, a little bold paint and a few other fun additions later, and we’re left with this:


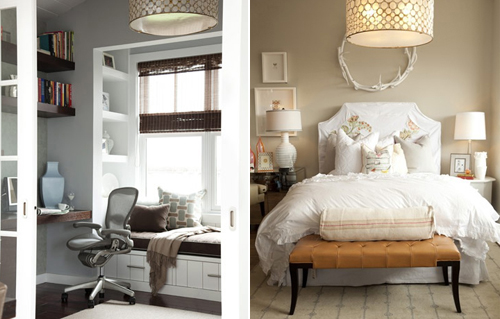
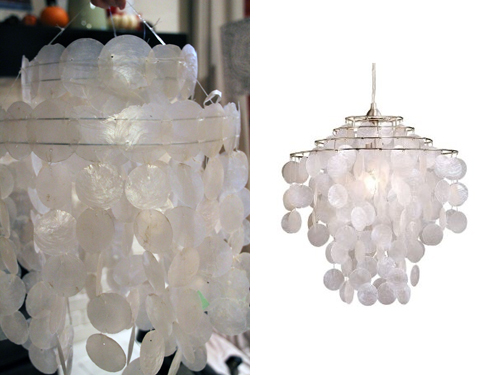
But back to the challenge… I wanted to make a chandelier for the guestroom ‘nook’ (aka the far end of the office with the Spanish rounded ceilings) and I decided to try my hand at a capiz shell pendant. I saved this beautiful Serena capiz chandelier by Oly in my ‘favorites’ folder a long long time ago, it’s so stunning!

Source 1 & 2

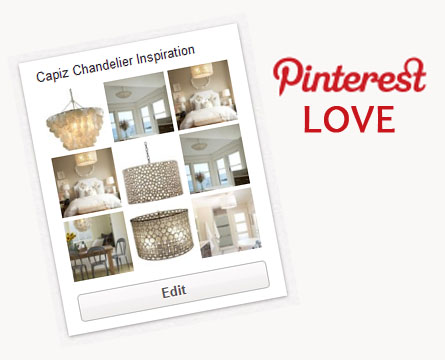
Actually, I had no idea who it was by or how crazy pricey it was (north of $1,500) until I began pinning similar styles on Pinterest.


So after much deliberation for how a not-so-fancy version could be DIYed, I set out to hunt down my main materials.

First, I needed capiz shells to line my new pendant with. I searched eBay, Amazon, online vendors… you name it. And then I remembered a shell shop near the beach in San Diego that was sure to have exactly what I was looking for. Best part? The shop is always 50% off. It’s funny, locals are on to the game, but when I stopped by earlier this week to peruse capiz shells, I overheard one of the owners tell a tourist wondering when the sale was going to end ‘Oh, you know… we never know. Maybe a few weeks?’ I wanted to whisper into the girl’s ear ‘Don’t worry, if you come back next year it will still be on’.

Nevertheless I found my best option. This chandelier was $39 and at 50% off it beat my online finds. If you’re looking for something similer though, this online chandelier or several of these capiz strands could definitely be used.

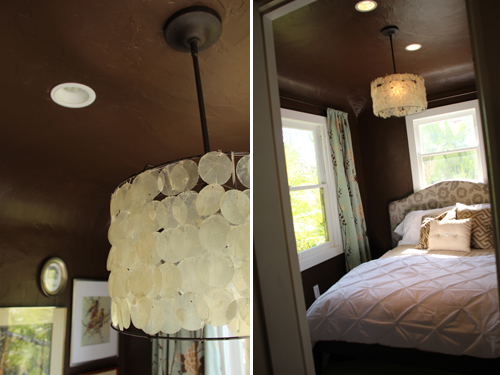
Mine on the left kind of looks like a super cheap version of the Laura Ashley chandelier on the right.

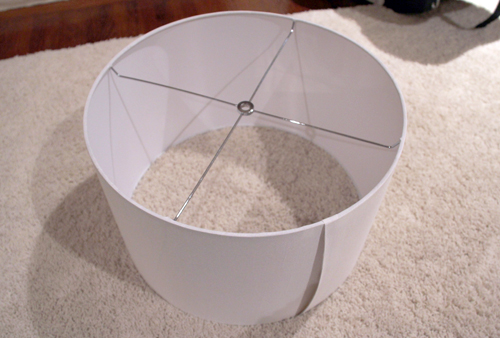
Now that I had my shells I set out to make the pendant frame. My initial thought was to hunt down a drum lampshade at a thrift shop, but I searched and searched… and then I thought that maybe I could build the frame from two tapered lampshades with the same sized bases (I was looking for about 18″). That turned out to be quite pricey because only the big box stores had them in stock. Finally, I ended up at Lowe’s searching for wire that I could shape into a circle and solder together. I realized I was taking on a huge project  when I sat there deliberating where the clamps might be put and how I could weld two perfectly straight ends into one long circle.

I decided to give HomeGoods one last shot late in the evening last night. I was hoping to find a drum lampshade period – no tapering, no fancy schmancys. Just one that I could take home, take apart and begin my project. Wow did HomeGoods come through in a big way! Not only did I find my lampshade (the Perfect shade!) but  it was coming apart at the end and I was able to get it and the base lamp for $15. Sweet.

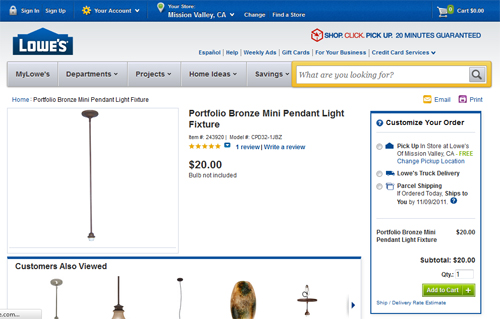
The last piece of the pie was a basic pendant light from Lowe’s for $20. I found a similar one at Home Depot but it was $39, so that one will be going back.

Now it was time to get crafty!

*********************************************************************************

Capiz Shell Pendant Light

a
Materials: pendant lampshade, 200 capiz shells with at least one hole drilled into each – preferably pre-strung (this number will depend on the size of your shade and the length that you’d like it to hang), white thread & needle, craft glue (any glue that will dry clear), pendant kit, paint (in the same color/finish as your pendant kit) & paint brush, spray paint (in the same color/finish as your pendant kit), light bulb, x-acto knife, Goo Gone (plus rag and gloves)

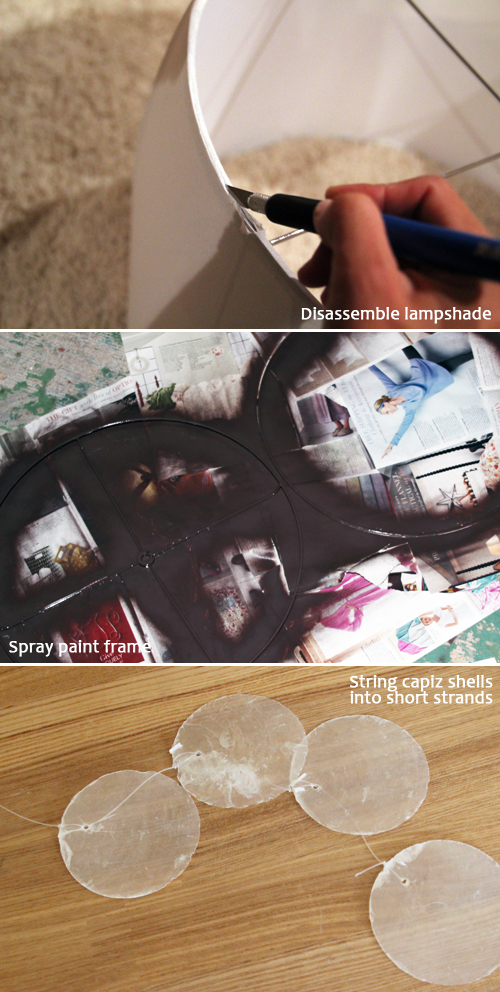
{1.} I began by disassembling the lampshade so that I had just the top and bottom frames. My x-acto knife really came in handy for this one – I started with scissors but quickly realized that a thin blade would be much better at pealing the outside right off. If you’re left with a gooey mess, try wiping down the frame Goo Gone and a rag, just be sure to use gloves.

{2.} I spray painted the metal top and bottom frames a dark brown to match my bronze pendant kit.

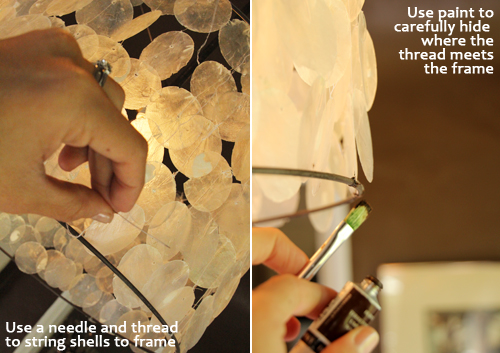
{3.} While the paint was drying I began to take the shell chandelier apart. I kept strands of five shells strung together and restrung (with white thread and a needle) any loose or shorter strands so that I had nearly 40 strands of five shells.

{4.} Then I slowly began attaching the strands of five to the top frame of the disassembled lampshade.

{5.} When all 40 strands had been tied to the top frame, I measured the length of the shells and tied the bottom frame directly to the top frame at the same distance with thread (fishing line would work great for this step as well). I wanted a ‘top’ and ‘bottom’ to the pendant so that it really did resemble a lampshade, but you could always forgo the bottom and just let the pretty shells sway.

At this point I found it helpful to hang the lampshade from a floor lamp (removing the previous shade) so that I could work with it while it was hanging.

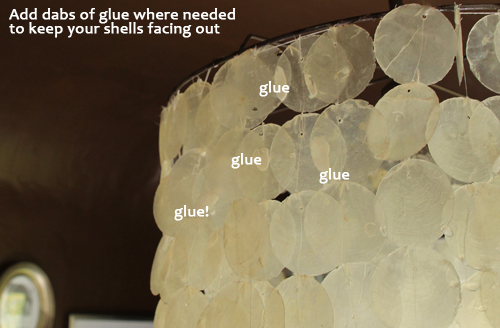
{6.} Now it was touch-up time. First was gluing stray shells together so that the shade had a flat look to it (totally optional), previous to gluing the shells sort of ‘spun’ on their own.

{7.} Now that the pendant was upright and hanging, the next touch-up step was to restring and retie several of the shells that had come apart or out of order. I even tied several strands directly to the bottom frame so that some stayed taught.

{8.} Finally, I used brown paint and a brush to cover up the points where the thread wrapped around the now brown lampshade frame.

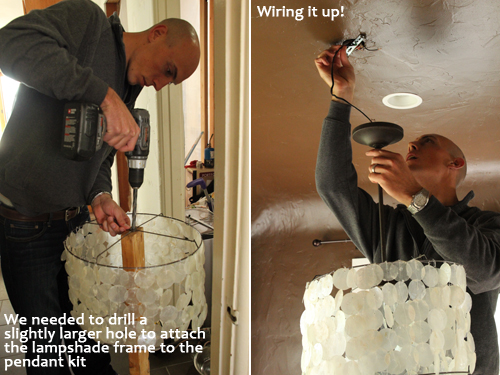
{9.} Depending on the lampshade that you chose, you may be able to attach it directly to your pendant light kit and wire ‘er up! We had to make the washer in the top frame of the lampshade slightly larger to fit our pendant kit.

{10.} I posted an ad on Craigslist for a licensed electrician (a good tip is to ask them to bring a copy of their license with them right in the ad to weed out anyone that could do damage and not be accountable) to hook the pendant to our existing light switch for $25. An electrician from our neighborhood responded and rewired the new light the next morning! When that was taken care of Kevin simply attached the new wires to the existing box. You can tell from this shot that we took out two of the three arms of the pendant kit so that it wasn’t quite as long.

*********************************************************************************


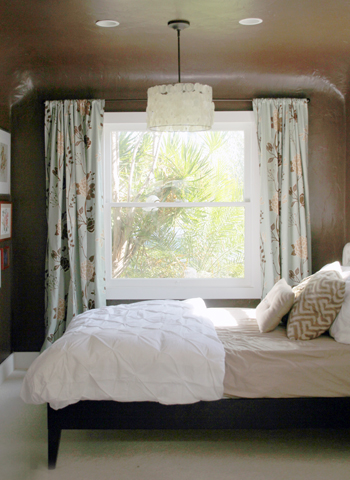
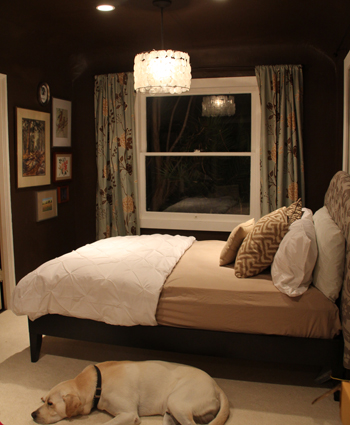
Here’s a shot at night to see how the shells make the pendant sort of ‘glow’, I love that. For this photo Bodie decided he was definitely not moving.

And there you have it! I’m linking over at Katie’s, Ana’s, Erin’s, and Sherry & John’s blogs… come check out all of the great ideas.

For more Office Makeover posts, check out: organizing the bookshelves, wall collage part 1, part 2, fabric bulletin board inspiration, (new) inspiration board, new lamps, wallpapering open shelves, finding the perfect credenza, new trim, dining table-to-desk, a new desk & bookshelves, installing remnant carpeting, grasscloth wallpaper, painting the office nook, finding carpet for the office, chocolate brown wall ideas, plastering progress,  inspiration for a diy desk, back in action!, desking hunting for under $300, bookcases under $300,inspirational rooms, room layout options, demo part 1 & demo part 2.
- posted on November 2, 2011 Filed Under: Craft Projects, Crafty Solutions, DIY, Home, Our Guestroom/Office, Projects, Renovating Adventures, Tutorial Tagged With: Before & After, Decorating, Home, Lighting, Office, Pinterest Challenge, Tutorial

Halloween Fun!

November 1, 2011 by Morgan

As promised, a few pics from our night of Halloween fun.

We began the evening with a trip around the block with all of the kiddies in their adorable costumes and ended the night with a delicious potluck at the house.

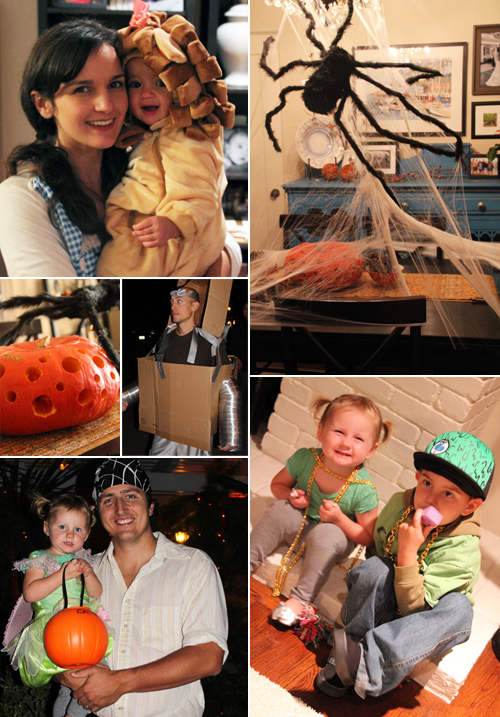
Here are a few shots from before the sun went down:

Look at that adorable Cowardly Lion! Such a cutie.

Here’s a group shot just before we headed out for a little trick o’ treating:

Awesome costumes! See that family of five there to the right? They’re ‘Gang-Green’, so great.

A close up of a few more costumes:

Our family theme was the Wizard of Oz – but Kev didn’t have much time for his Tin Man costume (despite the Awesome radiator cover I found) and ended up as a robot ;). Bodie was our Scarecrow but we forgot to dress him up for pictures!

Found Liv’s costume on eBay a couple of weeks ago. Such a treasure trove of discounted goodies!

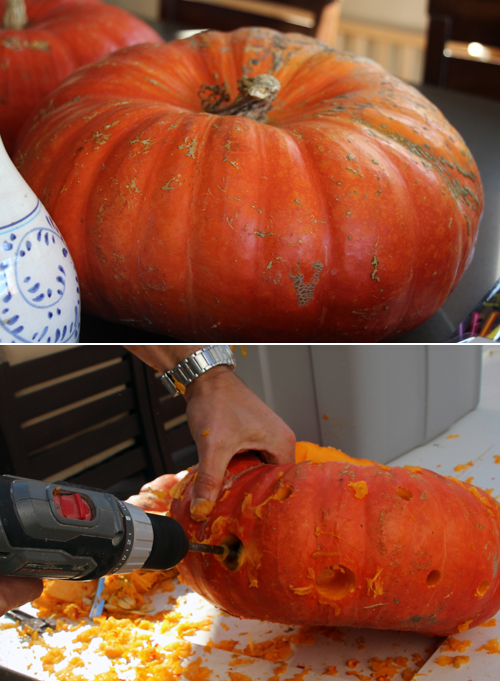
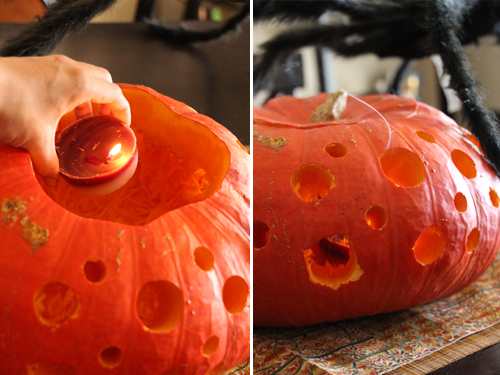
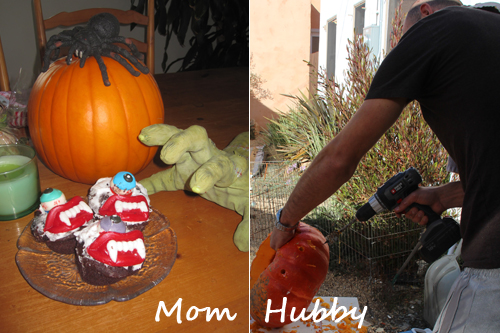
Kev’s big day-of project were these ‘carved’ pumpkins. We didn’t do any real carving this year (maybe when Liv’s a bit older) but for some spooky ambiance Kevin picked up these guys from the local grocery store for $2 a pop, hollowed them out and drilled different sized holes in them. That’s my creative hubby!

Speaking of crafty ideas, my mom sent over pics from her latest Halloween party up in Northern California and I’m happy to say that this blogging/crafting business must run in the family.

Such a fun night. Liv might not remember it but we’ve captured plenty of adorable photos for her future wedding slideshow!

Related Posts Plugin for WordPress, Blogger...

- posted on November 1, 2011 Filed Under: Family & Friends, Halloween, Holidays, Weekend Fun Tagged With: Halloween

  • « Previous Page
  • 1
  • …
  • 253
  • 254
  • 255
  • 256
  • 257
  • …
  • 438
  • Next Page »

Welcome to my little slice of the web where I practice finding family, career, homemade & inspired balance on a daily basis. This is where I capture my happy moments, and I'm honored that you're here to join us. Home + creativity + good eats + journaling + life as a working mom. Read more...

  • Email
  • Facebook
  • Google+
  • Instagram
  • Pinterest
  • RSS
  • StumbleUpon
  • Twitter

Search

Categories

Craft Projects CategoryCrafty Projects Good Eats & Recipes CategoryGood Eats Entertaining Ideas CategoryEntertaining Ideas Decorating Projects CategoryDecorating Style Boards CategoryStyle Boards Everything Holiday CategoryHolidays

Daily Dose

Favorite Posts

Dog Days of Summer: Craft Kits for Kids

Summer Craft Kits for Kids

August is a slower month for our family. Preschool summer school is out, dance lessons are taking a brief break for the month, our family vacation is

Our Double Stroller: Mountain Buggy +One Review

A Mountain Buggy +One Double Stroller Review

I'll preface by saying that this is not a sponsored review - we've found an awesome double stroller and we love it! Our Mountain Buggy + One has served

Wardrobe Style Board: A Work-From-Home Uniform

Wardrobe Style Board: A Stay-At-Home Mom Uniform | Cropped Light Jeans, Tan Sven Clogs, White Madewell V-Neck T-Shirt, Colorful Necklace, Gold Earrings | PepperDesignBlog.com

tan clogs | pocket tee | light jeans | gold disc earrings | colorful necklace It's not uncommon for people to come and go from our house all day long,

Happy 2nd Birthday, Taylor Rose!

Happy 2nd Birthday, Taylor Rose! An Infographic for My Girl | PepperDesignBlog.com

This weekend Taylor turned two. Taylor is such a bright, wonderful light in our lives. She is our funny, spunky little daughter that will do just about

How to Listen to Audiobooks on OverDrive

Intro to Audiobooks on OverDrive Public Library | PepperDesignBlog.com

Liv has developed a big interest in audiobooks as of late. One of my favorite ways for her to spend her 'quiet time' while Taylor and Marley nap is for her

Pistachio, Caramel & Sea Salt Chocolate Bars

Pistachio, Caramel & Sea Salt | Father's Day | PepperDesignBlog.com

Father's Day is not so far away, so here's an easy gift idea that can be made in advance or (literally) the night before. Homemade chocolate bars can be

Liv & Taylor-isms

Liv & Taylor-isms | Funny Things Kids Do & Say | PepperDesignBlog.com

Sometimes I capture something so funny/adorable/sweet that I can’t help but make note of it. Because Taylor is now expressing herself in full sentences, I

30 Things That I’ve Learned By 30

30 Things I've Learned by the Age of 30 | PepperDesignBlog.com

Today is my 30th birthday. I don't feel much older, but hearing that number roll out of my mouth feels as though I'm closing on a big chapter in my

Featured

Featured
VRBO San Diego Flying Bridge Vacation Rental cool toys for kids

Favorite Topics

Welcome to my little slice of the web where I practice finding family, career, homemade & inspired balance on a daily basis. This is where I capture my happy moments, and I'm honored that you're here to join us. Home + creativity + good eats + journaling. Read More…

  • Email
  • Google+
  • Instagram
  • Pinterest
  • RSS
  • StumbleUpon
  • Twitter
May 2025
MTWTFSS
« Feb  
 1234
567891011
12131415161718
19202122232425
262728293031 

Copyright © 2025 · Foodie Pro Theme by Shay Bocks · Built on the Genesis Framework · Powered by WordPress