Pepper Design Blog

A Little of This & That... Renovating, Decorating, DIY Projects & Family

pepper_header_flower

A Little Labor Day Inspiration: Party Poppers!

August 25, 2011 by Morgan

With a three-day weekend quickly approaching at the end of the month, I thought it would be fun to share this creative idea from guest contributor Karina over at Hostess with the Mostess.

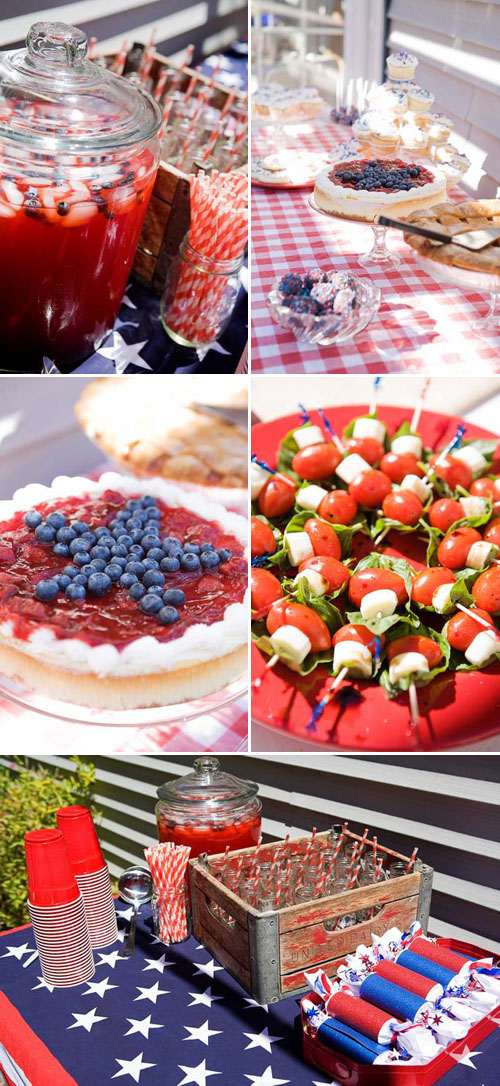
She designed an adorable Red, White & Blue party that includes a fun treat for kids or adults: party poppers!

They make great favors, name cards (across a dinner plate) or prizes. A quick Google search revealed a super easy party popper tutorial, materials include: goodies for inside the popper (candy, little toys, a handmade fortune), toilet paper/paper towel roll, cracker snaps (from a local packaging store or online at packaging/party supply site), tissue paper, ribbon, cardstock, tape or glue. Read all about assembly here.
Looking for more Labor Day inspiration? Check out this link which sorts through all July 4th, Memorial Day and Labor Day parties & ideas shared on the blog!

- posted on August 25, 2011 Filed Under: Parties & Entertaining, Projects, Tutorial Tagged With: DIY, July 4th and Labor Day, Kid's Party, Memorial Day, Paper Goods, Parties & Entertaining, Tutorial

Office Makeover: All of the Trimmings

August 23, 2011 by Morgan

I love moulding. I adore moulding. Rooms that are trimmed with baseboards, lined windows and crown moulding have that clean and ‘finished’ look that’s hard to beat regardless of how much decorating and attention other areas of the room get. It’s the icing on the cake, the cherry on top, the well-deserved encore. I wish I could heed my own advice and install moulding in every room tonight, but it’s one of those painstakingly slow projects that despite the great results, is usually last on the list to get done (part of that is for good reason… you want your carpet and your wallpaper to sit under the molding, after all).

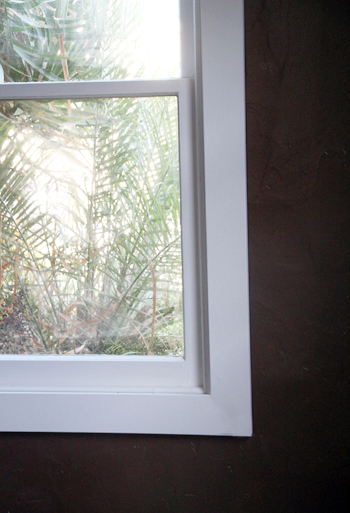
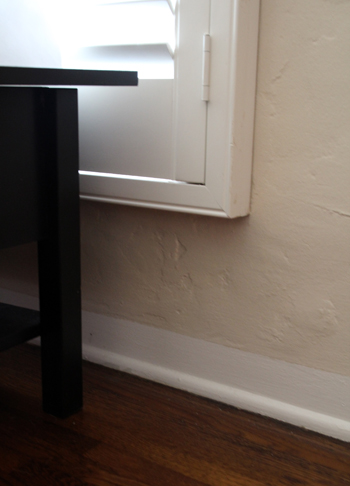
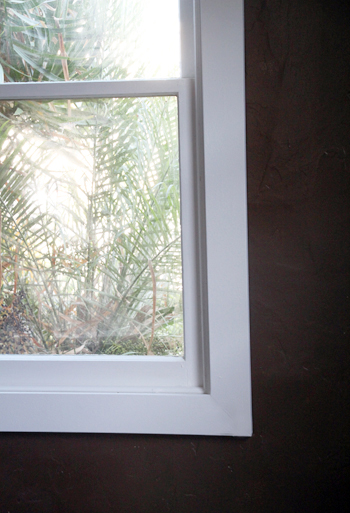
The new office just received her baseboards and window trim, though!

Wow, what a difference. Now that brown pops right off of the walls!

While traditional moulding can be quite fancy with all of the little grooves and edgings, I’ve always preferred classic and simple. It stands the test of time (in fact it looks more original in an older house) and provides a clean framing. I love the simple style so much that when purchasing, we opted for cheaper 1/2″ x 12′ boards rather than the pre-primed moulding options available.

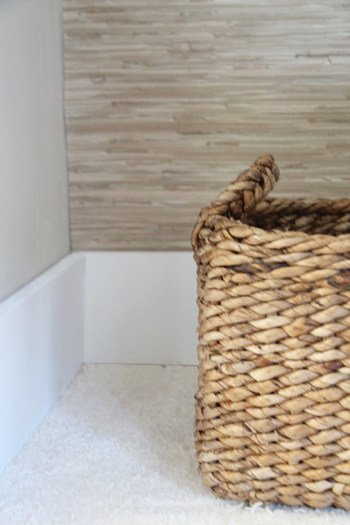
For the floors, we chose a larger-than-average baseboard and it really helps to ground the space.

The trick to installing moulding as efficiently as possible is to measure twice, cut once (lesson learned). Each cut received a 45 degree angle so that the corners disappear into each other and it’s oh-so important that that 45 degree angle is cut in the right direction at the right length, otherwise you end up with a lot of re-dos.

With that comes the suggestion to make all of your cuts before you begin painting. It’s almost inevitable that you’ll make a bad cut and it’s such a shame when it’s on a 10′ baseboard that you’ve just primed, painted and repainted.

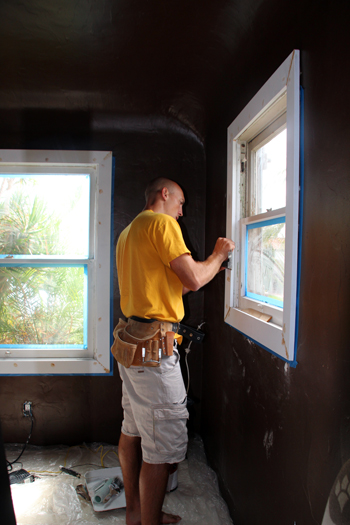
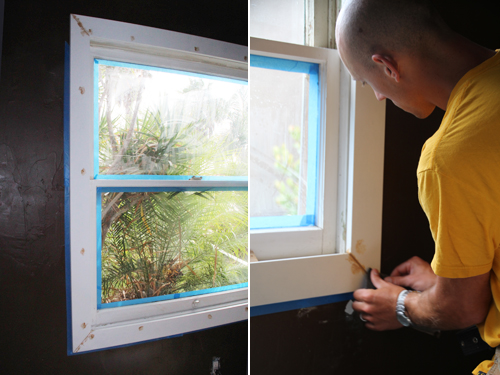
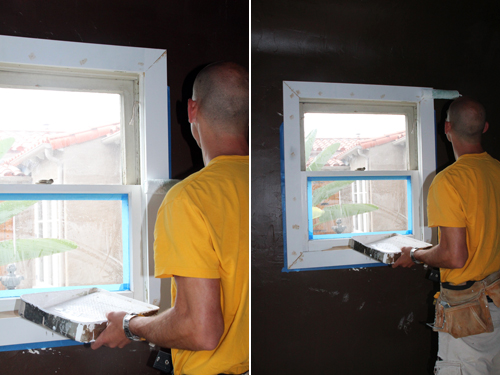
After painting and drying comes installation. We used a nail gun attached to a compressor for a quick install, making sure to nail the baseboard to the wall at each stud (usually 16″ intervals along the wall). The window trim received a nail each 8″ or so, plus the corners.

Next is caulking. We used plastic wood, a filler similar to caulking but one that dries as closely to wood as possible for the fewest seams. We filled those new nail holes, creases and gaps and then gave the plastic wood a good day to dry. A generous amount of sanding ensured that the filler was even with the original wood trim.

Finally the molding was painted over one last time to hide all of the new brown plastic wood filler spots. Speaking of paint, I read somewhere that bright white shows the most dust and that a shade just off will help to hide smudges. We’ll see how that works out!

And now those rich chocolate walls have white (or just off-white?) trim to help brighten the space! It looks great and I wish I could wave the magic wand to outfit every room with this simple but great looking moulding.

We painted a ‘faux’ moulding while originally painting each room (here’s a little clip of the living room) when we first moved in, hope to replace this with the real deal someday:

While we didn’t tackle crown moulding this time around, the room is beginning to take on that ‘finished’ look!

For more Office Makeover posts, check out: dining table-to-desk,  a new desk & bookshelves, installing remnant carpeting, grasscloth wallpaper, painting the office nook, finding carpet for the office, chocolate brown wall ideas, plastering progress,  inspiration for a diy desk, back in action!, desking hunting for under $300, bookcases under $300, inspirational rooms, room layout options, demo part 1 & demo part 2.

- posted on August 23, 2011 Filed Under: Home, Our Guestroom/Office, Renovating Adventures Tagged With: Construction, Decorating, DIY, Home, Office

Office Makeover: Chop It Down, Chop It Down

August 22, 2011 by Morgan

Hope you had a great weekend! We’ve been busy over here c-l-e-a-n-i-n-g. If there’s one thing I hate about a project it’s that after you tear everything out of a room and transplant it to the garage, you have put it back into the space when you’re finished (on the plus side – our office is finished enough to begin putting everything back!).

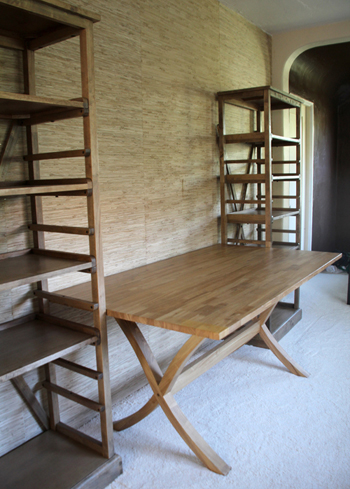
You might remember that I found a dining table for the office that would work perfectly as a new desk. Well, a couple of weeks of functioning as a desk and we’re realizing the table is too big. I was originally hunting down a desk that was bigger than average, but my Craigslist dining table sticks out pretty far into the room when it has a chair pulled up to it (it’s a pretty narrow room). Bummer.

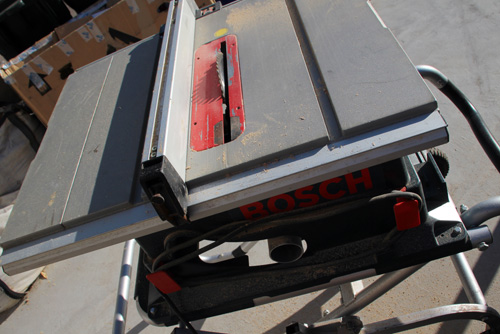
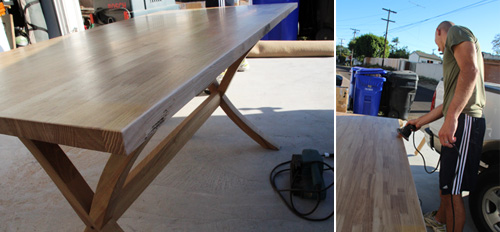
So the solution? Chop it down. We took the dining table out to meet the table saw and after flipping it over so that the table was legs side up, smoothly cut off several inches along the back side. Table liposuction.

Here’s a nice angle showing off our alley and trash cans. The newly cut side received a quick sanding to get rid of any rough edges or large splinters.

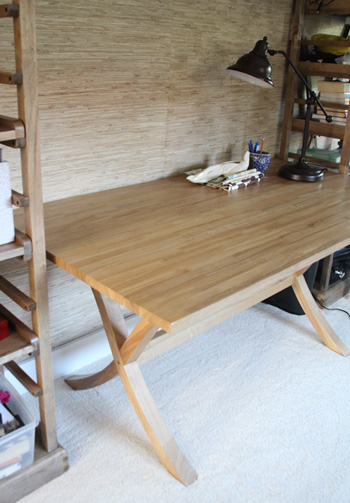
The front was left untouched so that we didn’t have to stain any raw wood. Then we brought the table back in and pushed the newly cut edge tight up against the wall.

While a few inches doesn’t sound like much, it made a big difference once the table was back in place as a desk.

Can’t tell the difference? I know… it’s not too exciting but it goes to show how easy it is to modify a Craigslist/antique/thrift store find with a little help from the power tools.

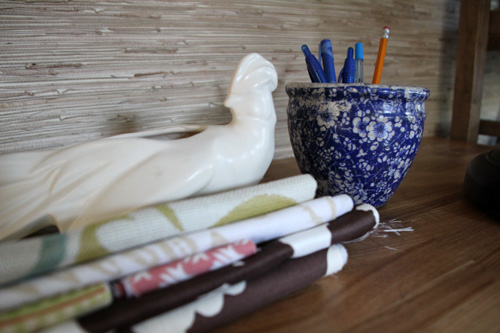
Check out these great souvenirs from our recent trip to Iowa:

Don’t they just scream Iowa? Just kidding. They’re the most unlikely to be picked up on vacation but I saw them in an antique/garden shop in little Woodward, Iowa (where Kevin’s Dad’s family is from) and found a way to stuff them in my suitcase. That’s a white ceramic lounging bird there on the left and an old flower pot on the right. The first accessories for the new space :). And those fabrics are just the start of what I’m gathering for the room.

So cutting down the desk was no big deal – a quick one hour project including moving the piece of furniture, cutting, sanding and putting ‘er right back where we had found it!

For more Office Makeover posts, check out: a new desk & bookshelves, installing remnant carpeting, grasscloth wallpaper, painting the office nook, finding carpet for the office, chocolate brown wall ideas, plastering progress,  inspiration for a diy desk, back in action!, desking hunting for under $300, bookcases under $300, inspirational rooms, room layout options, demo part 1 & demo part 2.

Related Posts Plugin for WordPress, Blogger...

- posted on August 22, 2011 Filed Under: Home, Our Guestroom/Office, Renovating Adventures Tagged With: Accessories, Before & After, Construction, Crafty Solutions, Decorating, DIY, Home, Office

  • « Previous Page
  • 1
  • …
  • 265
  • 266
  • 267
  • 268
  • 269
  • …
  • 438
  • Next Page »

Welcome to my little slice of the web where I practice finding family, career, homemade & inspired balance on a daily basis. This is where I capture my happy moments, and I'm honored that you're here to join us. Home + creativity + good eats + journaling + life as a working mom. Read more...

  • Email
  • Facebook
  • Google+
  • Instagram
  • Pinterest
  • RSS
  • StumbleUpon
  • Twitter

Search

Categories

Craft Projects CategoryCrafty Projects Good Eats & Recipes CategoryGood Eats Entertaining Ideas CategoryEntertaining Ideas Decorating Projects CategoryDecorating Style Boards CategoryStyle Boards Everything Holiday CategoryHolidays

Daily Dose

Favorite Posts

Dog Days of Summer: Craft Kits for Kids

Summer Craft Kits for Kids

August is a slower month for our family. Preschool summer school is out, dance lessons are taking a brief break for the month, our family vacation is

Our Double Stroller: Mountain Buggy +One Review

A Mountain Buggy +One Double Stroller Review

I'll preface by saying that this is not a sponsored review - we've found an awesome double stroller and we love it! Our Mountain Buggy + One has served

Wardrobe Style Board: A Work-From-Home Uniform

Wardrobe Style Board: A Stay-At-Home Mom Uniform | Cropped Light Jeans, Tan Sven Clogs, White Madewell V-Neck T-Shirt, Colorful Necklace, Gold Earrings | PepperDesignBlog.com

tan clogs | pocket tee | light jeans | gold disc earrings | colorful necklace It's not uncommon for people to come and go from our house all day long,

Happy 2nd Birthday, Taylor Rose!

Happy 2nd Birthday, Taylor Rose! An Infographic for My Girl | PepperDesignBlog.com

This weekend Taylor turned two. Taylor is such a bright, wonderful light in our lives. She is our funny, spunky little daughter that will do just about

How to Listen to Audiobooks on OverDrive

Intro to Audiobooks on OverDrive Public Library | PepperDesignBlog.com

Liv has developed a big interest in audiobooks as of late. One of my favorite ways for her to spend her 'quiet time' while Taylor and Marley nap is for her

Pistachio, Caramel & Sea Salt Chocolate Bars

Pistachio, Caramel & Sea Salt | Father's Day | PepperDesignBlog.com

Father's Day is not so far away, so here's an easy gift idea that can be made in advance or (literally) the night before. Homemade chocolate bars can be

Liv & Taylor-isms

Liv & Taylor-isms | Funny Things Kids Do & Say | PepperDesignBlog.com

Sometimes I capture something so funny/adorable/sweet that I can’t help but make note of it. Because Taylor is now expressing herself in full sentences, I

30 Things That I’ve Learned By 30

30 Things I've Learned by the Age of 30 | PepperDesignBlog.com

Today is my 30th birthday. I don't feel much older, but hearing that number roll out of my mouth feels as though I'm closing on a big chapter in my

Featured

Featured
VRBO San Diego Flying Bridge Vacation Rental cool toys for kids

Favorite Topics

Welcome to my little slice of the web where I practice finding family, career, homemade & inspired balance on a daily basis. This is where I capture my happy moments, and I'm honored that you're here to join us. Home + creativity + good eats + journaling. Read More…

  • Email
  • Google+
  • Instagram
  • Pinterest
  • RSS
  • StumbleUpon
  • Twitter
May 2025
MTWTFSS
« Feb  
 1234
567891011
12131415161718
19202122232425
262728293031 

Copyright © 2025 · Foodie Pro Theme by Shay Bocks · Built on the Genesis Framework · Powered by WordPress