Pepper Design Blog

A Little of This & That... Renovating, Decorating, DIY Projects & Family

pepper_header_flower

Living Room Update: New ‘Invisible Zipper’ Cushions

August 11, 2011 by Morgan

So the sun has been shining with full force and the weather has been warm! and then just like that the switch was flipped and this morning we have grey skies here in San Diego. Oh funny weather…

A way while back I had mentioned finishing up a couple of sewing projects that involved zippers, one being new throw pillows for the living room. And these aren’t just any zippers, they’re the infamous invisible zippers! I accidentally purchased a ton of these for a few new projects around the house, and then realizing my mistake (and being a bit stubborn) I set out to tackle the invisible zipper rather than return for the regular version.

You’ll find invisible zippers on most store bought cushions and pieces of clothing, they’re great because when applied correctly, the zipper literally disappears within your fabric.
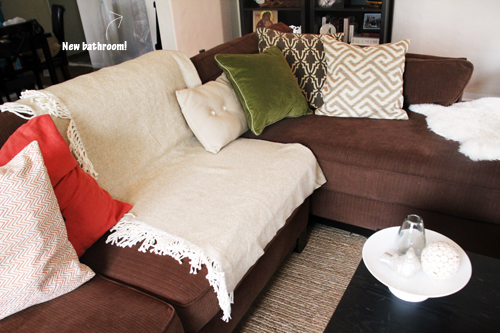
The new bathroom project is hiding there in the background. We’ve had to pause that guy temporarily while we wait on permits and Kevin works on summer school.
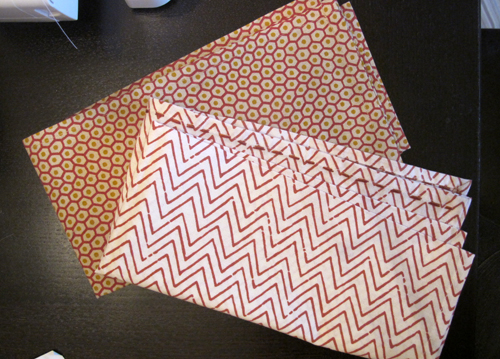
I found a few clearance napkins at West Elm that fit with my color scheme and I knew they’d be perfect for the project at just $4 a pop. That plus left over fabric from my favorite nursery glider makeover (that awesome tan ikat) left me with three new pillows that were quick and easy to sew up.

I researched a few slipcover pillow ideas but settled on adding a zipper because I knew that I wanted these pillows to really stand the test of time. Plus, I was dying to experiment with zippers, something I haven’t tried in ages. The first pillow was a challenge (think twisted, inside out fabric and thread), but as soon as I had the ‘invisible zipper’ down, the other two were easy peasy. It looks difficult, but I promise that if you go that extra step to hide your zippers, you’ll love the results.
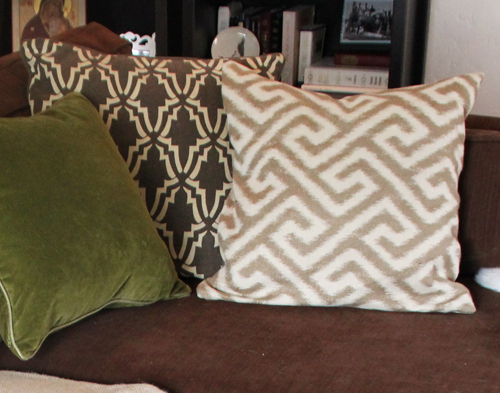
For stuffing, I usually cover up an existing throw pillow. You can also purchase bags of filler at your local fabric shop for a few dollars. If you go that route, I recommend making an insert for your pillow as well so that you’re not constantly fighting clumps and wisps of filler material as you zip and unzip your covers.

***************************************************************************************************

Sewing Throw Pillows with an Invisible Zipper

a
Materials: 2 19×19″ squares of fabric for one 18″ pillow OR a set of cloth napkins, an invisible zipper (two inches shorter than one side of your pillow, though you can always shorten a longer zipper by sewing across the zipper, too), zipper footer for your sewing machine, complimenting thread, threaded bobbin, pins, scissors, pillow stuffing/inserts

1. To sew an 18″ pillow, cut your fabric into two 19×19″ pieces. This should allow a 1/2 hem on all edges. Remove one set tags if you’re using a napkin – I like to keep one set hidden inside with washing instructions for the future. Baby + dog + dinner parties = definite spots :). Cloth napkins are great because they’re already hemmed and provide a clean finish on the underside of your new pillows. Plus, they’re the perfect size!

2. Pin the fabric/napkins together at the corners with the top sides facing each other (we’re going to do this first step with the pillows inside out).
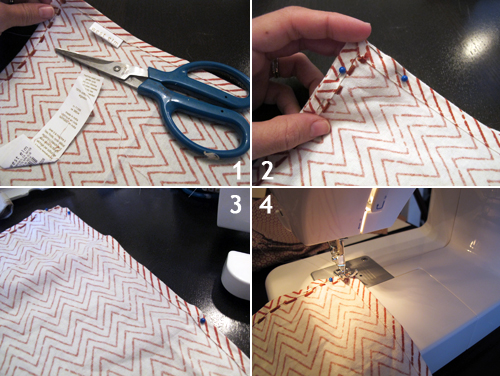
3. Add a pin roughly half way between each corner.

4. Sew three sides of your pillow together, leaving just the edge for your invisible zipper open.

5. Now comes the tricky part. The easiest way to add your invisible zipper is to pin it in place as you imagine it functioning. Go ahead and pin your zipper in a couple of inches from the edge so that you leave yourself a little working space. We’ll close that up at the end.

6. Then flip your pillow right side out and try it. If the zipper opens and closes correctly without twisting any fabric, great job – you nailed it on the first try. It took me a couple of times of pinning, flipping, repinning to get this just right. Note: if you’d like, you can iron your invisible zipper flat before pinning to help you get as close of a stitch to the zipper part as possible.
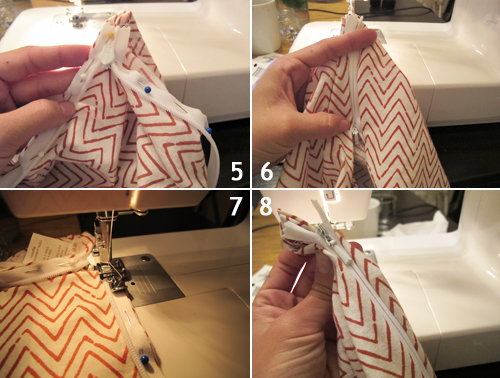
7. Add your zipper foot to the sewing machine. It usually comes with your machine in that little parts bag below the main compartment, but you can also pick a plastic one up from the store for a few dollars. Sew your zipper edges to the fabric running that little zipper foot right up against your zipper.

8. If you flip your pillow inside out now, you’ll notice that your zipper closes (yay!) and that your fabric edges are hidden.

9. This picture illustrates the end of the zipper which has been left open – that’s the extra ‘working space’ we left from step 5.
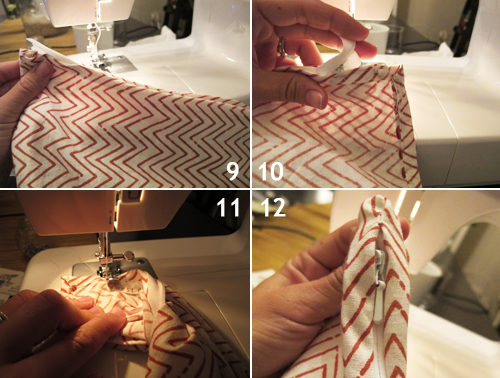
10. Lifting the zipper out of the way, pin together the two loose ends of the pillow.

11. Now sew the two pinned pieces together, don’t forget to repeat on the other side (don’t worry about the loose zipper portion, it’s hidden inside your pillow).

12. Flip the entire pillow inside out and you should have a clean, finished end and an invisible zipper!

Stuff your insert in your cover and your throw pillow is done!
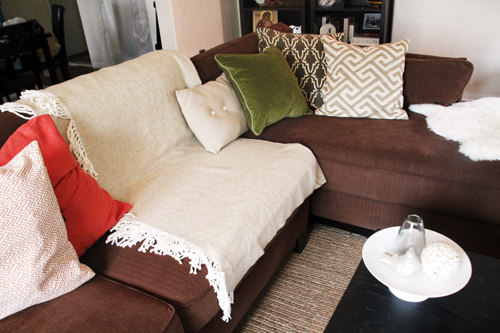
Love how the new pillows look, the added patterns were just what the space needed.

- posted on August 11, 2011 Filed Under: Crafty Solutions, DIY, Home, Our Living Room, Projects, Renovating Adventures, Tutorial Tagged With: Crafty Solutions, Decorating, DIY, Fabric, Home, Living Room, Patterns & Color, Sewing, Tutorial

Cheery Pastels for an August Celebration

August 10, 2011 by Morgan

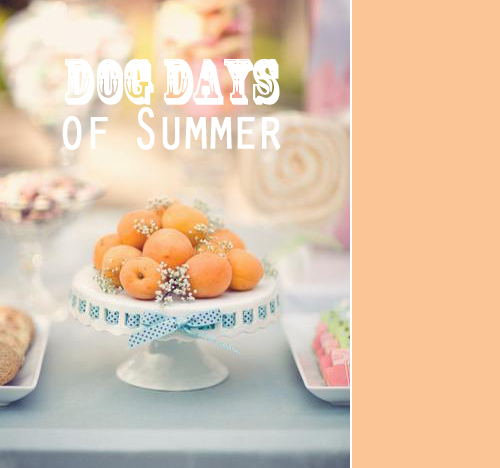
It’s starting to get a little hot. Okay, a lot hot. Some call these the Dog Days of Summer and I have a feeling we’re in for a good one.

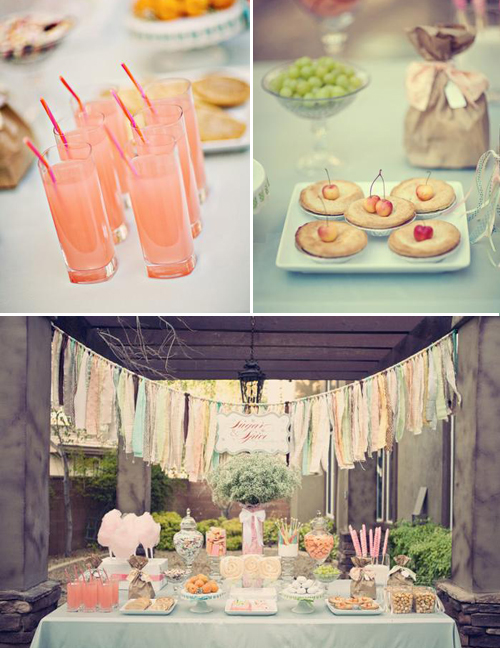
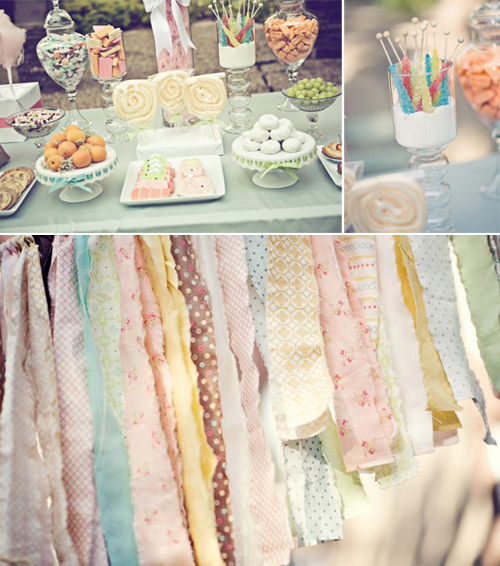
But right now all I can think about is pretty pastel fabric blowing in the breeze, as in this beautiful outdoor celebration that would make for an ideal excuse to throw a whimsical summer soiree.

Summer + cherry pie + vintage = favorite reason to throw an afternoon party. Lawn games, anyone?

Designed by Suzanne of She Paperie, this outdoor party was recently featured here at HWTM.com.

I’m especially loving the torn fabric garland, it makes the perfect backdrop for the dessert table and would look so pretty strung around any outdoor event.

Bring on the sunshine!

- posted on August 10, 2011 Filed Under: Parties & Entertaining Tagged With: Baby Shower, Birthday, Bridal Shower, By Color, Decorating, Dinner Parties, DIY, Fabric, Kid's Party, Outdoor Entertaining, Parties & Entertaining, Pink, Teal, Wedding, Yellow

Going Green: Baby-Led Weaning

August 8, 2011 by Morgan

Okay, so this isn’t really a Going Green post, but since it fits in with the idea of eating fresh, eating organic, I’ll add it to the series.

Have you heard of Baby-Led Weaning? It’s a new, well actually, old idea on introducing solid foods to infants. Way before we had baby spoons and Cuisinarts, babies learned to eat ‘adult food’ by handling, sniffing, tasting, gumming and squishing whatever they were introduced to.

That means big chunks of food for babies to ‘palm’ (since most don’t yet have a pincher grasp by 6 months) and play with. Big chunks might include a strip of toast, a slice of peach or a large chunk of chicken. Any food cut long enough that they can both grasp it in their fist and gnaw on it.

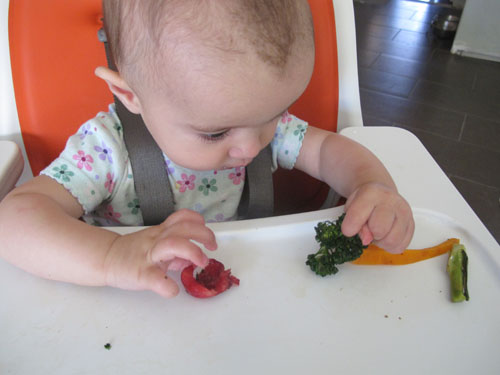
Some of Liv’s favorites? Sliced peaches, pears and apples (sometimes raw, sometimes a little cooked or stewed), strips of roasted carrots, broccoli, sweet potato, squash (roast all of the above with a little salt, pepper & olive oil – let cool), diced plums, blueberries, apricots (small pieces to practice grasping), hunks of chicken, pork, beef, ribs (really!) and sliced bread (loves it toasted), cornbread, avocado and eggs.

At this point she’s still 100% breastfed, so the quantity she takes in is up to her.

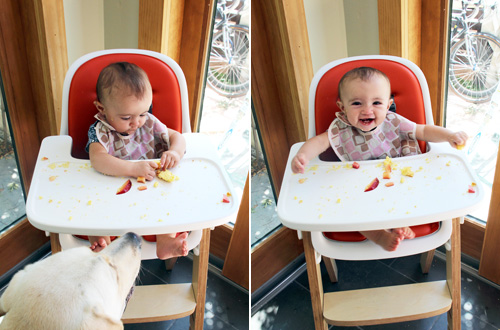
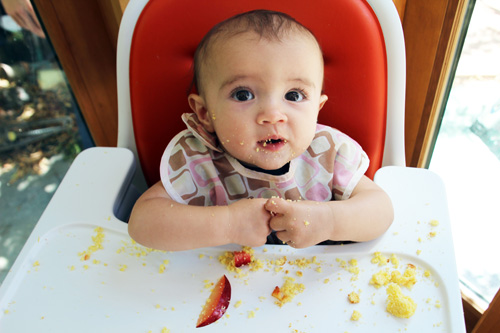
BLW means skipping pureed and mashed foods for ‘table foods’, or basically whatever the family is eating for dinner. We decided to experiment with the concept (no extra work pureeing everything? the opportunity for Liv to pick and choose her foods – and hopefully grow to love our dinners – herself? sounds great) and introduced Liv to roasted carrots and Italian broccoli (you know, the long kind that looks a bit like an asparagus) at about 6 months. She’s checking out sliced plouts (plum + apricot = yum) and cornbread above.

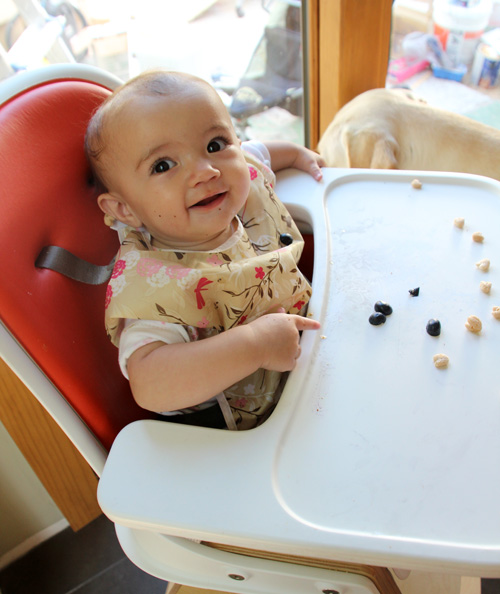
I still cut up food that is of choking size (such as these little blueberries which she devours) so she can feed herself.

No, she’s not really pointing :). Liv’s been practicing her hand eye coordination to get that pincher grasp (thumb and forefinger) down – all while playing with her food.

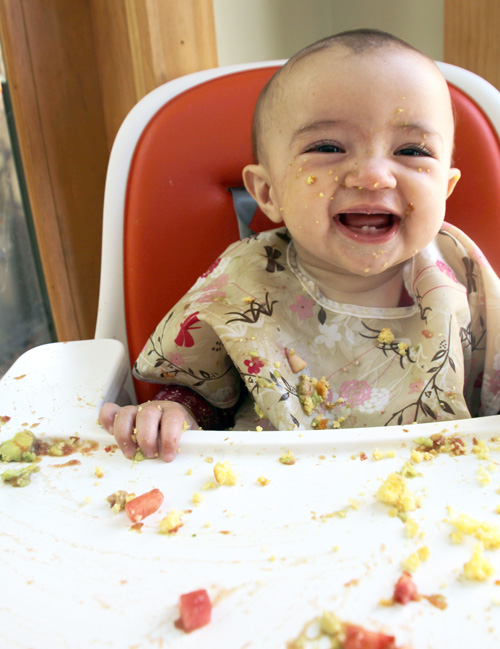
The one downfall? It’s so messy!!

As you can imagine, if baby gets to control where the food goes, it goes everywhere. Thankfully our yellow lab, Bodie, is quick to catch most of the chunks that go tumbling off of her tray!

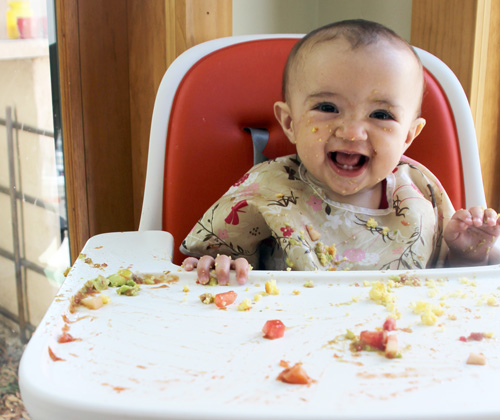
You have to get used to the idea that about 2/3 of the food that you first introduce will be wasted and in piles on the floor. Slowly that number drops and slowly babies begin to consume more of the food itself.

I think Liv might even love the clean up part just as much as the eating part.

We love it. BLW means I get to put a few choices of food in front of her and she gets to feed herself. I can eat lunch, make dinner or otherwise work with her right next to me. If you’re interested in learning more, Google ‘Baby-Led Weaning’, there are a ton of great blogs and resources out there – including this book.

It’s a great option but we’re not strictly BLW and we also don’t discount purees for when they’re best, such as when we’re traveling (once Liv knows we’re eating she insists on being involved, so there’s no just waiting for a later time in the day to feed her). While out at restaurants we feed her right off of our plate but offer bite sized pieces of beef tenderloin or potatoes so that she doesn’t need to grasp everything (because let’s face it, sometimes a crazy mess of food in every direction just won’t fly).

What we do love is that she gets to participate in our meals! And she totally digs it.

Update: Another helpful post that has been written more recently for reference.

Related Posts Plugin for WordPress, Blogger...

- posted on August 8, 2011 Filed Under: Family & Friends, Going Green

  • « Previous Page
  • 1
  • …
  • 267
  • 268
  • 269
  • 270
  • 271
  • …
  • 438
  • Next Page »

Welcome to my little slice of the web where I practice finding family, career, homemade & inspired balance on a daily basis. This is where I capture my happy moments, and I'm honored that you're here to join us. Home + creativity + good eats + journaling + life as a working mom. Read more...

  • Email
  • Facebook
  • Google+
  • Instagram
  • Pinterest
  • RSS
  • StumbleUpon
  • Twitter

Search

Categories

Craft Projects CategoryCrafty Projects Good Eats & Recipes CategoryGood Eats Entertaining Ideas CategoryEntertaining Ideas Decorating Projects CategoryDecorating Style Boards CategoryStyle Boards Everything Holiday CategoryHolidays

Daily Dose

Favorite Posts

Dog Days of Summer: Craft Kits for Kids

Summer Craft Kits for Kids

August is a slower month for our family. Preschool summer school is out, dance lessons are taking a brief break for the month, our family vacation is

Our Double Stroller: Mountain Buggy +One Review

A Mountain Buggy +One Double Stroller Review

I'll preface by saying that this is not a sponsored review - we've found an awesome double stroller and we love it! Our Mountain Buggy + One has served

Wardrobe Style Board: A Work-From-Home Uniform

Wardrobe Style Board: A Stay-At-Home Mom Uniform | Cropped Light Jeans, Tan Sven Clogs, White Madewell V-Neck T-Shirt, Colorful Necklace, Gold Earrings | PepperDesignBlog.com

tan clogs | pocket tee | light jeans | gold disc earrings | colorful necklace It's not uncommon for people to come and go from our house all day long,

Happy 2nd Birthday, Taylor Rose!

Happy 2nd Birthday, Taylor Rose! An Infographic for My Girl | PepperDesignBlog.com

This weekend Taylor turned two. Taylor is such a bright, wonderful light in our lives. She is our funny, spunky little daughter that will do just about

How to Listen to Audiobooks on OverDrive

Intro to Audiobooks on OverDrive Public Library | PepperDesignBlog.com

Liv has developed a big interest in audiobooks as of late. One of my favorite ways for her to spend her 'quiet time' while Taylor and Marley nap is for her

Pistachio, Caramel & Sea Salt Chocolate Bars

Pistachio, Caramel & Sea Salt | Father's Day | PepperDesignBlog.com

Father's Day is not so far away, so here's an easy gift idea that can be made in advance or (literally) the night before. Homemade chocolate bars can be

Liv & Taylor-isms

Liv & Taylor-isms | Funny Things Kids Do & Say | PepperDesignBlog.com

Sometimes I capture something so funny/adorable/sweet that I can’t help but make note of it. Because Taylor is now expressing herself in full sentences, I

30 Things That I’ve Learned By 30

30 Things I've Learned by the Age of 30 | PepperDesignBlog.com

Today is my 30th birthday. I don't feel much older, but hearing that number roll out of my mouth feels as though I'm closing on a big chapter in my

Featured

Featured
VRBO San Diego Flying Bridge Vacation Rental cool toys for kids

Favorite Topics

Welcome to my little slice of the web where I practice finding family, career, homemade & inspired balance on a daily basis. This is where I capture my happy moments, and I'm honored that you're here to join us. Home + creativity + good eats + journaling. Read More…

  • Email
  • Google+
  • Instagram
  • Pinterest
  • RSS
  • StumbleUpon
  • Twitter
May 2025
MTWTFSS
« Feb  
 1234
567891011
12131415161718
19202122232425
262728293031 

Copyright © 2025 · Foodie Pro Theme by Shay Bocks · Built on the Genesis Framework · Powered by WordPress