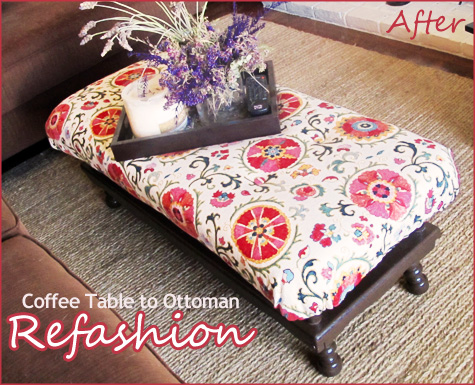
The living room redecorating project is slowly coming along… and this week I had the chance to finish one of my big diy refashions. Using one of my favorite fabrics I turned a vintage coffee table into a tufted ottoman.
Here’s a quick recap of the inspiration board for the room (to see the before photos and painting project, check out this post):
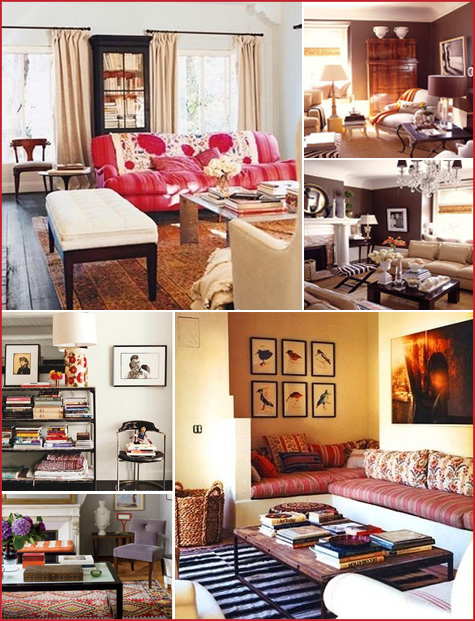
I love the soft colors and the cozy-yet-modern feel each of these rooms exude (for image credits, check out this link). To bring that same warmth and coziness to our new living room, I wanted to introduce strong textiles to play up favorite colors and add pattern to the space. A big, soft ottoman fit the bill.
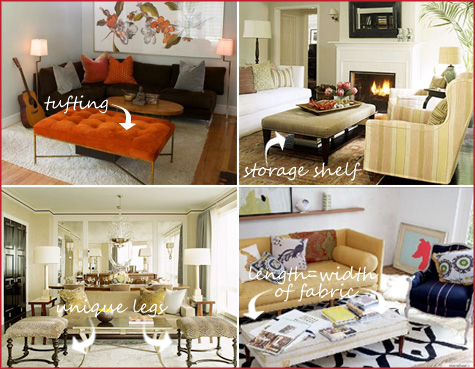
And so the search began… my mission was to find a coffee table that would allow for the finished ottoman to meet the following requirements (images from DecorPad):
*Storage space for coffee table books, photo albums and the like
*Tufting along the top of the cushion
*Unique/vintage-y legs
*And most importantly, the length had to be shorter than the max width of my fabric (most fabric bolts are somewhere around 54″ and it sure was tough to meet this criteria)
I searched and searched and searched… and found the perfect coffee table in the most unlikely of places! While at a friend’s house, I happened to notice an in-the-process-of-refinishing table sitting out on the patio. Would they mind if I took a stab at making it over? When they said yes I was beyond thrilled.
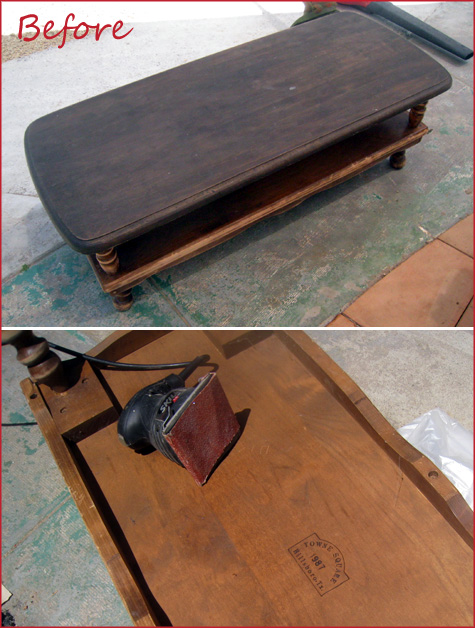
It’s a beautiful vintage table that’s made of solid wood and is incredibly sturdy – the craftsmanship definitely dates it back a few decades.
Here are my step-by-step directions just in case you decide to tackle something similar in the future. I used this very helpful guide from Little Green Notebook as my start but modified and built on to it as I went.
*********************************************************************************************
{Coffee Table to Ottoman Refashion}
a
Materials:
*Older coffee table
*Sanding paper and power sander
*Drill
*Staple gun
*Brown paint (I like a foam brush for the crevices)
*Sealant (bristle, everyday painting brush for a clean finish)
*2″ foam/cushion material
*Quilt batting
*Strong thread and needle
*Upholstery fabric (my table required a 36×54″ cutting – or just one yard of fabric)
*Lining (optional): additional fabric, spray glue
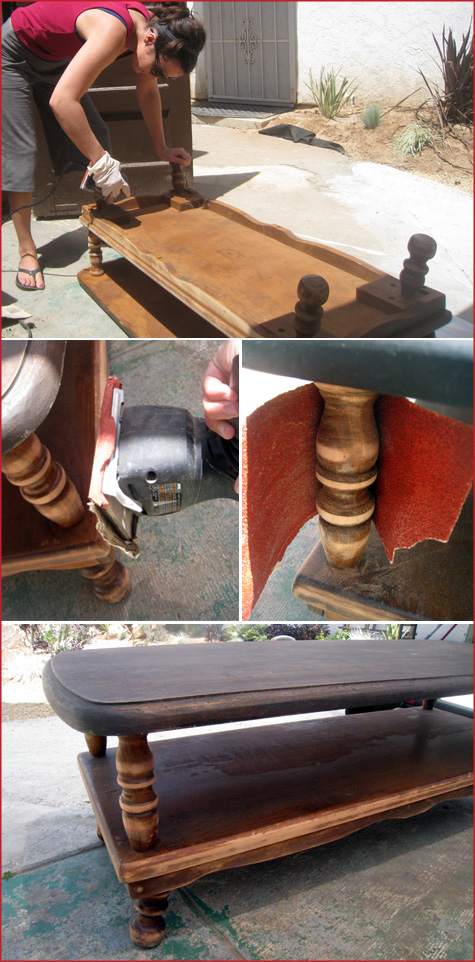
{Step 1} My ‘before’ piece had plenty of varnish and sealant on it and needed a thorough sanding to rough up the surface enough to hold paint. I used a power sander for the majority of this step but broke out the individual sanding sheets to really get around the details. I don’t have a picture of how sanded the table was before moving on, but really spend time here and you won’t regret it.
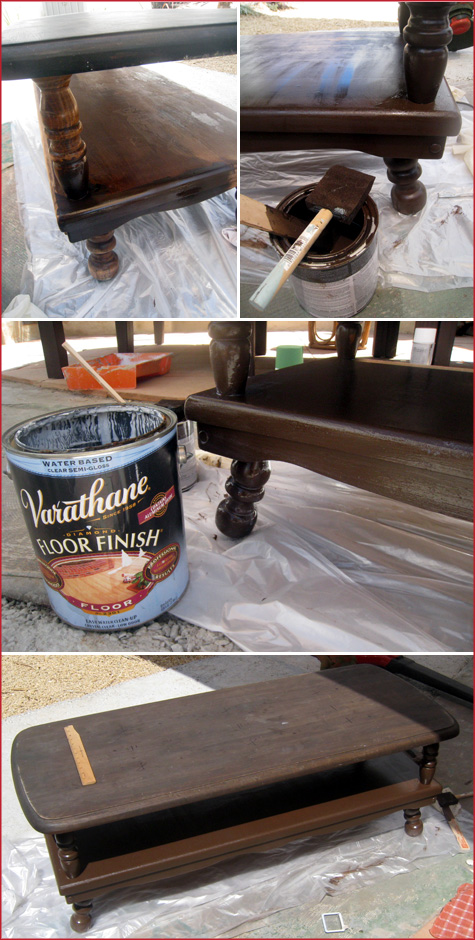
{Step 2} I chose to use a dark brown paint on the base of the table (remember that the top will get fabric and so no need to paint here) instead of staining the piece again – but that’s always an option. I applied two coats of paint and one layer of sealant, letting each layer dry completely between applications. I tested each of these products (they were leftovers from the garage, actually) before beginning to be sure that the look was what I was aiming for.
I hate to chop up this post… but it’s so darn big! In an effort to keep the home page loading quickly and from really dragging on… follow the jump to find detailed directions for adding cushion, batting, tufted buttons, fabric and upholstering it all together with nothing more than a staple gun.
I do hope you come check it out!
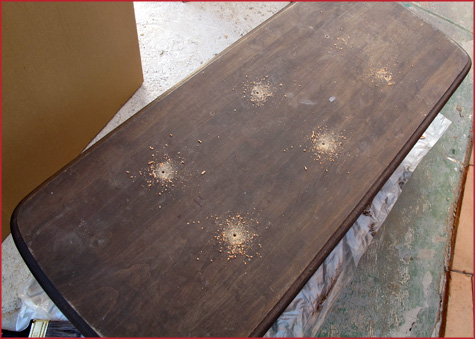
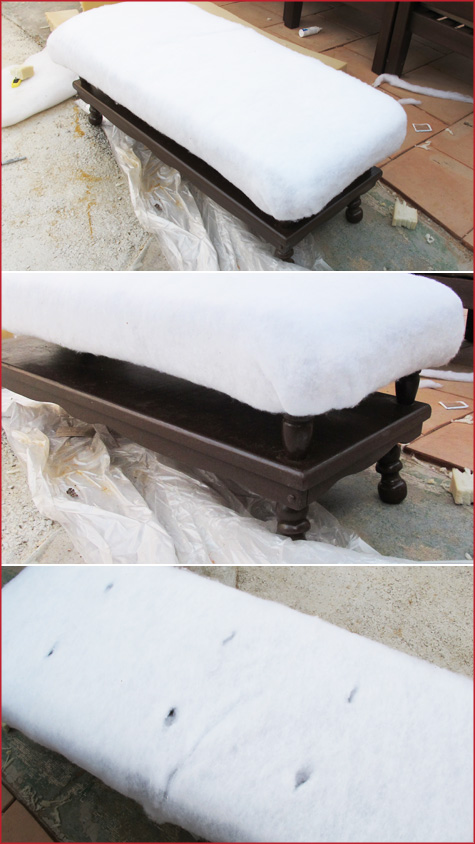
{Step 3} Carefully measure your surface space and divide up equally for tufted buttons. I marked my button spots with permanent marker and used a drill for a smooth and even hole.
{Step 4} To keep the ottoman soft all the way around, I filled in the side gaps with 2″ foam padding (found at your local fabric store). Measure, cut and secure into place with a staple gun – perfection is not required here since the ottoman will get one final wrapping in a thick batting to smooth everything out.
Since I was wary of running out of enough fabric to completely cover ottoman, I kept the top layer minimal by adding no foam but two layers of batting. I would recommend plumping it up here if you can!
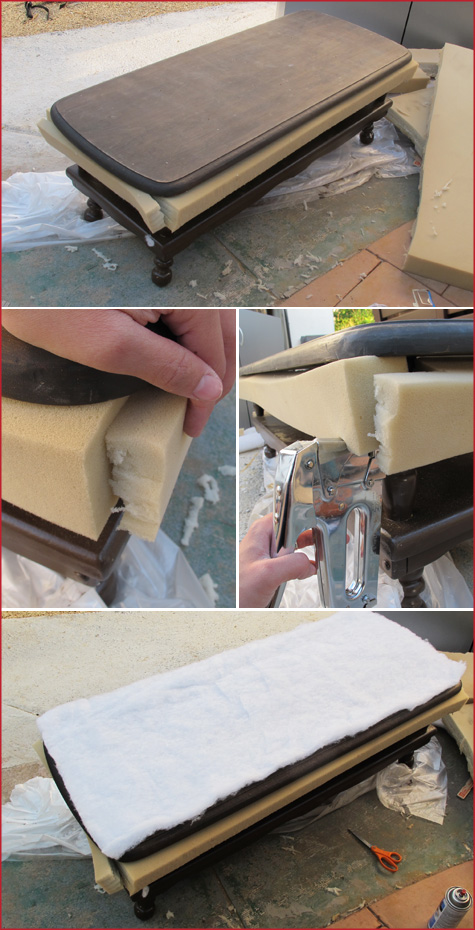
{Step 5} Using basic quilt batting, the ottoman received a full shell to soften all edges and provide added cushion. This layer was stapled into place before button holes were cut through for tufting.
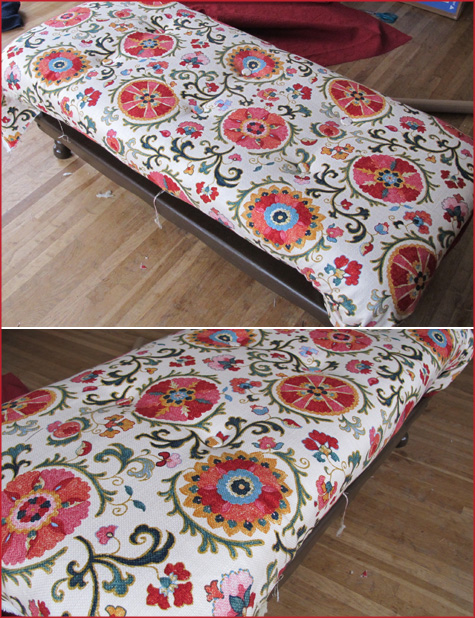
{Step 6} Using button kits from Joanns, I made six matching buttons for the top of the ottoman. Each was secured through the fabric, through the batting and through the wood table top with a needle and thick, clear thread (look for something similar to the consistency of fishing line). You can use everyday buttons on the bottom side of the table to help keep your tufts tight and secure, I found that linking them all together and consistently pulling tightly worked well for me.
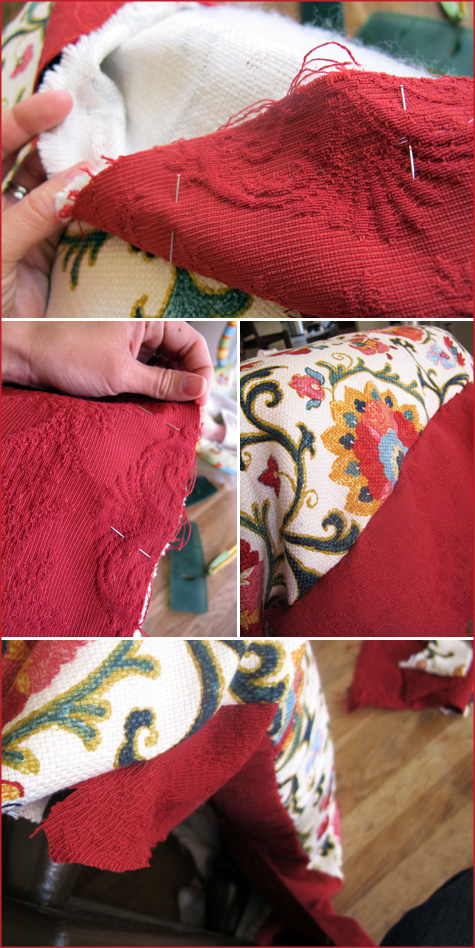
{Step 7} Despite my best efforts to ensure my fabric would be wide enough for the table, I was just a couple of inches short on each side. If you run into this problem, here’s a quick fix: hem a strip of complimentary fabric (I used Calico Corner’s Savannah in Chili) to each edge that is not long enough. My seam fell perfectly on the fold and the table looks like I intended for the bottom half to be red – perfect!
{Step 8} Corners are tricky. Your basic choices are to fold the corners over and staple on the underside (like a hospital bed fold) or to gather the corners and staple carefully as you go. I opted for the second option hoping it would give the most professional look – in the end it was a careful blend of folding, scrunching and gathering that did the trick.
Here’s the breakdown: 1. Trim fabric so that you have no more than two or three inches of excess. 2. Fold fabric until you have desired look keeping frayed edges facing down. 3. Carefully fold edges under while stapling fabric directly to legs of table. Pull fabric down to cover staples. 4. Work your way around each leg until your corners are finished. You can always staple excess fabric back underneath the table – we’ll hide all of that in the next step!
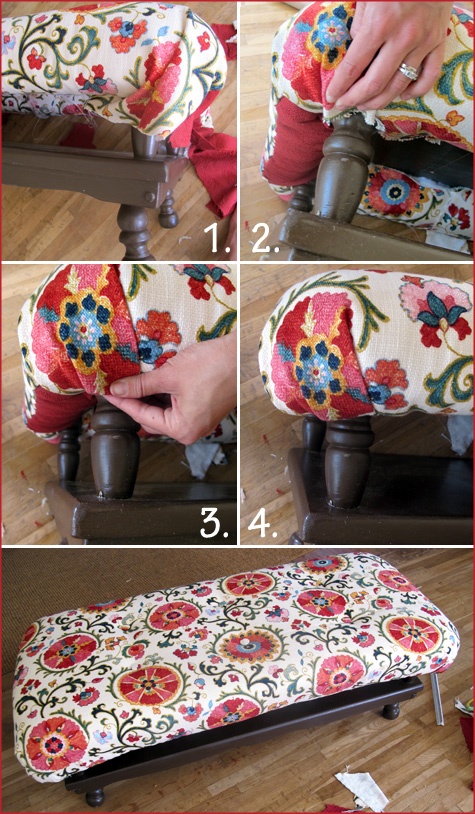
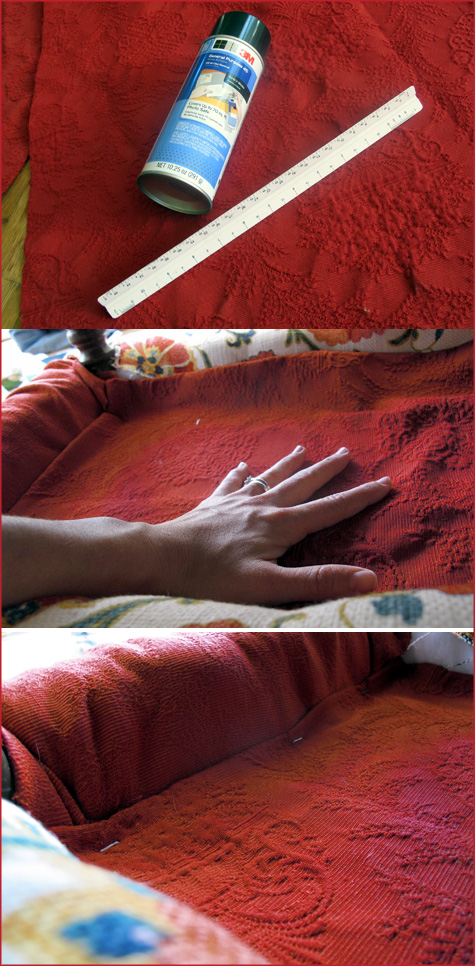
{Step 9} The outside of the table is done! But the inside looks a bit ragged and I was worried that stray upholstery edges may begin to fray since we didn’t hem the fabric initially. My solution was to add a basic lining to the underside of the table, sealing in the edges to the fabric and especially the corners.
I cut a length of fabric that was roughly 4″ longer and wider than the final liner. I then used my favorite spray glue to create a basic 1″ hem around the entire rectangle so that my finished piece of fabric fit as snugly as I had hoped. With the table on it’s belly, smooth your liner on the underside of the table top and staple securely. If you ever have to repair a button or fix an edge, you’ll only have to pull on the fabric to release the staples. A glue gun would work well here too.
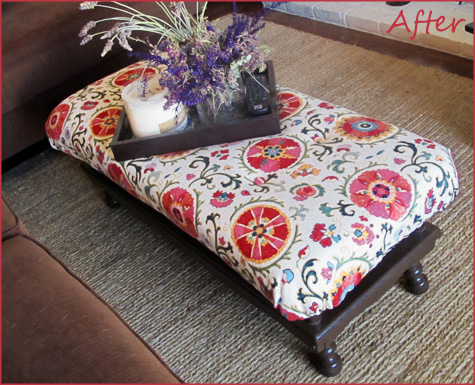
Tada! And we’re finished. For the cost of a thrift store table, a bit of paint, some cushion and a yard of fabric, you can create a new ottoman for your living room, the foot of your bed or as a soft bench around the dining room table.


Wow that looks great! A lot of work put into it though, I don’t know if I have that patience ;)
THanks, Sofia!
Hi! Great job on this, it has inspired me to attempt to do the same thing with my coffee table… I wondered why you added the foam underneath. Is that just for fluffyness? And did you add it to just the edges, or did you use a whole big piece?
Hi Meghan,
I added the foam to the top and sides of the coffee table so that it would be soft and cushiony to the touch. It gives it a more soft ottoman look than just covering the coffee table in batting and fabric (which would mean a harder surface and less of a plushy visual appeal). Adding the foam to the edges helps to balance out the top and prevents sharp corners and sides. I’m excited that you’ll get to use the tutorial for a piece of your own and I’d love to see the pictures! :)
~Morgan
thanks for sharing! I’ve been contemplating on doing this with an outdoor coffee table and some outdoor fabric!
Te ha quedado genial!! Que buena idea!
Wow… so good! I’ve been wanting to tackle this project myself, but it still feels daunting. And that fabric has been a fave of mine for a long time!!