Pepper Design Blog

A Little of This & That... Renovating, Decorating, DIY Projects & Family

pepper_header_flower

The Wedding Cake Saga Part 1: Baking the Cake

July 23, 2012 by Morgan

This past weekend I had the honor of creating a wedding cake for my friend, Katie. Boy, what an undertaking that was! But because I’m always up for a good challenge and because I love to create personal gifts for those that I care about, I gave her an enthusiastic ‘yes’ at the request.

I’m breaking this saga into three parts: baking, filling & fondant, and assembly/wedding. Join me over the next three days to partake in the journey! If you’re not really interested in the art of novice cake baking, feel free to head right on back here Thursday. If you love up close pictures of  chocolate ganache (that’s so good you could just eat it right off of the computer screen) or are slightly amused by such a ginormic challenge, then I invite you to join along ;).
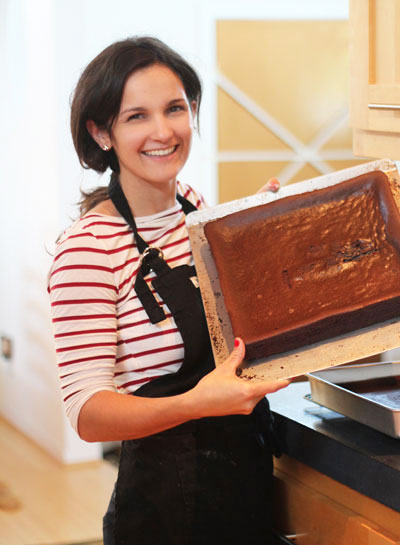
Let’s begin. My mission was to design a wedding cake that melded the bride’s organic, rustic-themed wedding (rustic might not be the right word, but think beautiful lace + rugged burlap) while also baking a deliciously yummy dessert that could feed the 150ish guests. Inspiration from the bride included:
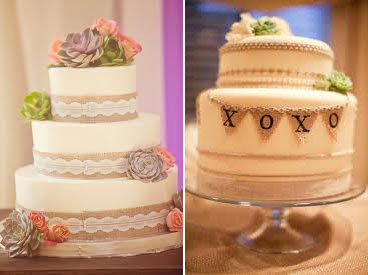
Beautiful! I was immediately smitten with the entire look and feel of this future cake.

But gah, I am no cake expert and wedding cakes are a category of their own. I have just two wedding cakes under my belt: the daisy covered cake I baked for a friend a couple of years ago (where I learned that buttercream and I are not best friends) and the beast of a cake that I did for my own wedding – which I really, truly loved (you can see pics of both by scrolling through this post). But even these two projects (years apart, really) make me an absolute beginner at the art of giant cake baking. You will find a million excellent tutorials on the proper baking and styling of wedding cakes from the galore of tasty food blogs out there (one such that I depended heavily on was this one) – but you might also enjoy the ramblings (fortunes and misfortunes alike) of me creating this special dessert. Just please don’t judge (wink, wink).
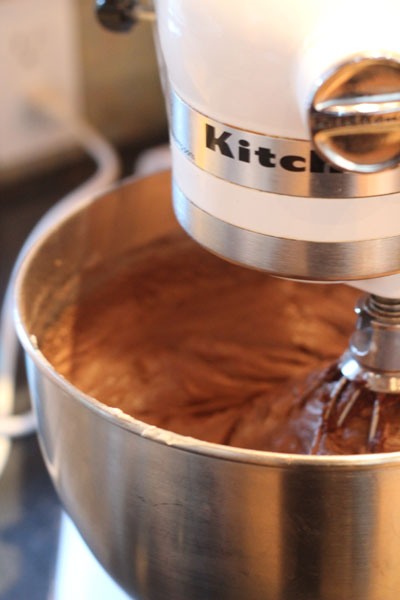
Let’s start off with the world’s tastiest cake recipe. I made a very similar version for my wedding, but I can report that this one is that much better. It is rich but not overwhelming, it is deliciously moist (in that dense sort of way) but also holds its form well. We went through the entire cake (the below is supposedly enough for 149 people, but maybe I cut too big), and I am hoping that that means I have finally found a good recipe. If you are in need of such a chocolate (with just a hint of of espresso) recipe, look no further. It’s so good it’s worth bookmarking.

Rich Chocolate Espresso Four-Layer Cake
Adapted from Smitten Kitchen’s Chocolate Butter Cake (which was adapted from Sky High: Irresistible Triple-Layer Cakes)

I sought out this recipe because I was searching for a tried-and-true wedding cake story (not recipe but blog story, with plenty of reviews and suggestions included). I’ve found that there’s a big difference between chocolate cakes and wedding chocolate cakes – the latter being sturdy, holding its shape well and still being tasty, just any ol’ chocolate cake recipe won’t do. Deb highly recommended this guy on her blog so I gave it a go.

Another huge plus is that this cake recipe is made nearly entirely in one bowl without the usual separating out of dry and wet ingredients. Convenient. Because of this unique assembly, Deb shared that she had issues with deposits of unmixed butter and flour that she had to scrape down often in her mixer bowl, I used very room temperature butter and didn’t run into this issue at all, but it’s worth noting just in case.

Makes one 12-inch square cake layer (or two 8-inch layers). My total cake is three tiers high with a 12″, 8″ and 5″ tier – four layers per tier.

3 cups flour (some use cake flour but I find the regular stuff works just fine and is quite a bit more economical)
3 cups sugar
1 1/2 cups unsweetened cocoa powder (not Dutch process)
3 teaspoons baking soda
3/4 teaspoon ground cinnamon
3/4 teaspoon salt
3 sticks (12 ounces) unsalted butter, at room temperature
1 1/2 cups buttermilk
3 eggs
1 1/2 cups freshly brewed coffee, cooled to room temperature

1. Preheat the oven to 325 degrees F (I should note that the original recipe calls for 350, but I have come to prefer to bake my cake layers for much longer than a recipe traditionally calls for and at a lower oven temp, and have found that this results in a deliciously rich, flat cake layer that is ideal for stacking). Line the bottom of a 12-inch square baking pan with parchment paper and butter/cooking spray the paper and edges of the pan.

2. In a large mixer bowl, combine the flour, sugar, cocoa, baking soda, cinnamon, and salt (because I’m making so many layers, I prefer to have these ingredients premixed in ziplock gallon bags. One recipe batch per bag and one more step that can be completed a day or two earlier). With the electric mixer on low speed, blend for about 30 seconds.
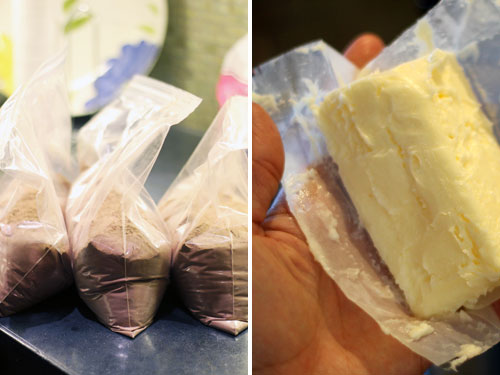
That butter should be soft.

3. Add the butter and buttermilk and continue to blend on low until moistened. Raise the speed to medium and beat until light and fluffy, 2 to 3 minutes (now’s a good time to taste! Your batter should be amazingly delicious and sans eggs)
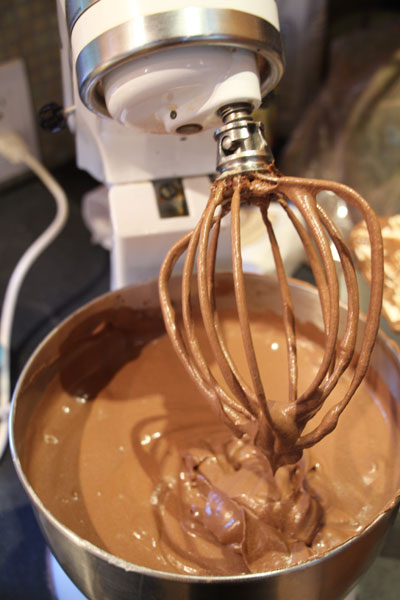
4. Whisk the eggs and coffee together (both should be room temp), and add to the batter in 3 additions, scraping down the sides of the bowl and beating only until blended after each addition. Pour into prepared baking dish. If using 8-inch pans, split between two.

5. Bake for 40+ minutes and watch carefully. 8-inch layers may take close to 40 minutes while 12-inch as much as 50-55, the lower 325 temp means that baking time is increased over the average cake but be sure to not over cook! Cake is finished when a wooden toothpick comes out clean. Carefully turn them out onto wire racks and allow to cool completely. I prefer to keep the cakes right side up (to prevent any breaking if the edges or center rises higher than average), so I flip them twice. Once to remove them from the pan (the layer is now upside down) and once again onto a wire rack for cooling (now it’s back right side up). Leave those parchment paper liners on for refrigerating later.

*A couple of thoughts on baking a flat cake. I have used both a heating core (if you use, grease well!) and baking strips in the past and I find both to be helpful (especially at calming the nerves – so if you’re that type I highly recommend), but the best tip I have ever received is to drop the temp of a recipe and bake for a longer time. As mentioned above this is already a step I suggest to create a dense cake, but it also yields near flat results as well. I baked near all layers above with neither the core nor the strips, but that’s mostly because I forgot the former at my house (baking at my parents which is in the same city that the wedding is) and forgot to apply the latter to most cakes prebake.
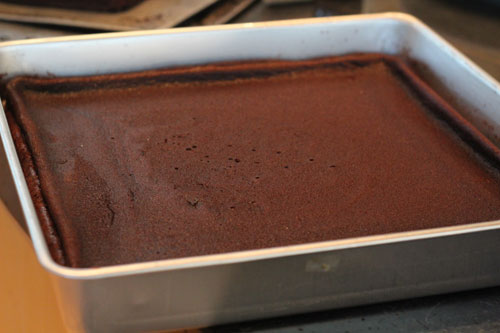
If you do end up with a tiny extra lip like above, a simple serrated knife should do the trick. Start at each corner and work your way towards the center.
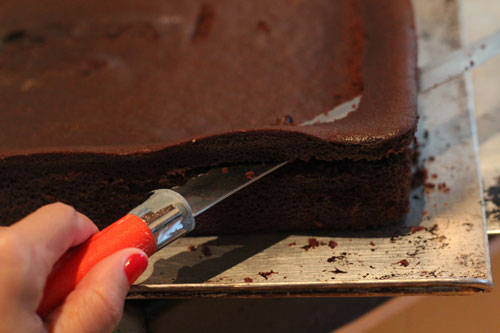
You can use this technique to slice thick layers in half (my ideal cake layers are 1/2-3/4″ tall and four layers thick per tier).

If you’re keeping track, this three-tier, four-layer-per-tier cake calls for about 6lb of butter, a 5lb bag each of flour and sugar, 3lbs of cocoa, 2 dozen eggs, a half gallon of buttermilk and 12 parchment squares. Dang.

Next, I cut out foam core bases for each layer of the cake. This is crucial if you make the cake in advance and require refrigeration or freezing. Even if you’re brave enough to bake the entire thing the day before, you’ll want at least one foam core (or store bought cake board) per tier to serve as your sturdy cake tier base.
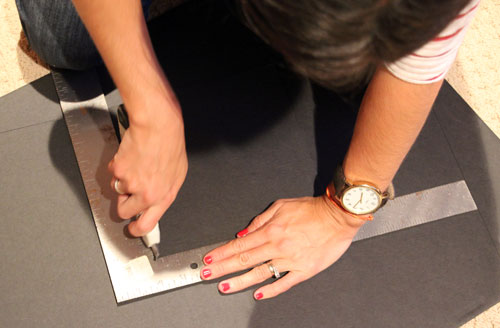
An exacto knife is super for this.
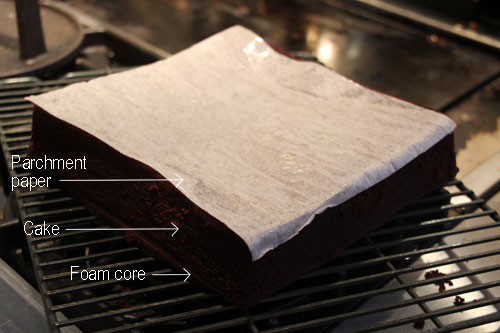
Each layer of each tier received a foam core base and a healthy wrapping of seran wrap before they were stacked in the fridge. I baked nearly all layers on the Wednesday prior to the wedding which meant that the plastic wrap didn’t have to be terribly tight or thick, but if I were baking cakes a couple of weeks in advance (as I had originally intended) I would opt for at least three layers of wrapping and zero exposure of cake before freezing and finally moving to fridge five-seven or so days in advance.
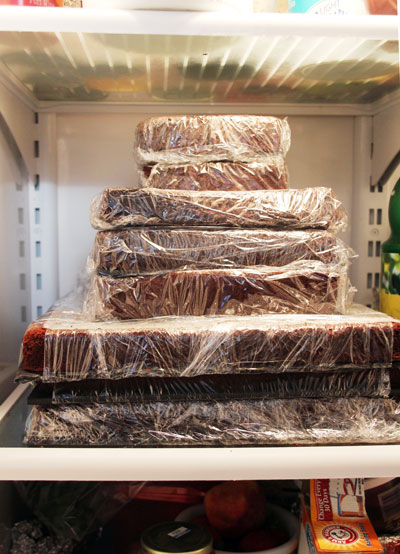
The above was my stash as of last Wednesday, Thursday brought with it the baking of at least one more layer for each tier plus a whole lotta buttercream and ganache. Oops on that little corner peeking out.

See you all here tomorrow! Where the baked cake gets its delicious raspberry ganache filling (another to-die-for recipe), buttercream crumb coat and fondant shell.

- posted on July 23, 2012 Filed Under: Desserts, DIY, Family & Friends, Projects, Recipes, Tutorial Tagged With: Desserts, DIY, Tutorial, Wedding, Wedding Cake DIY

Curb Appeal: Our Saltillo Tile Porch

July 20, 2012 by Morgan

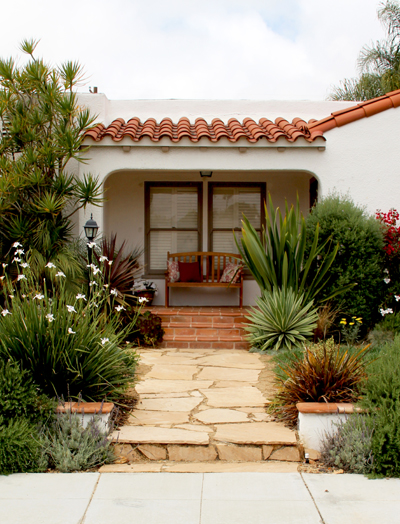
It is officially curb appeal month at the Spenlas. Make that season. I’m sure all of these projects will take us at least the rest of the beautiful summer season :).

Kevin is traveling for a crazy project that he is undertaking (more details soon… crazy is the only word I have for it right now) but before he left we worked a bit more on the front of the house. This particular project is one that he finished up a while ago but that I haven’t had a chance to mention here on the blog just yet, and being Curb Appeal month it fits right in!

Our front yard has always been high on our priority list. When we first moved in the very first task we took on was transforming the entrance and street level view of our home into something warm, inviting and well-loved. It’s a great way to meet new neighbors (nothing like working outdoors to meet dog walkers, bikers and stroller mommas), too!

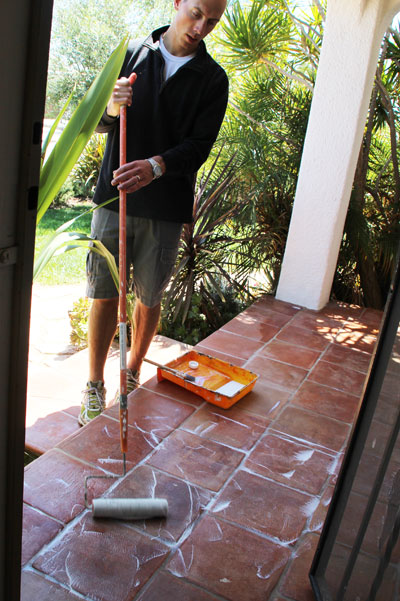
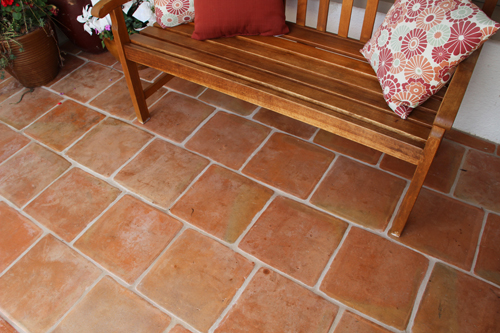
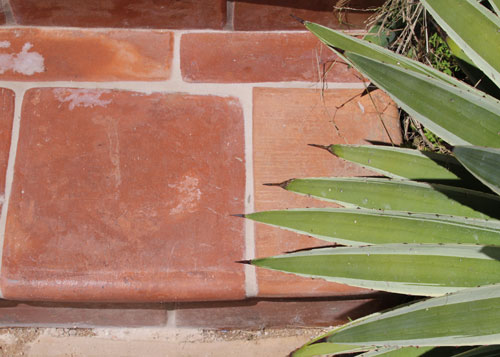
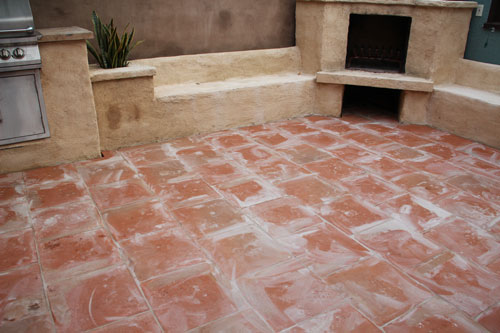
The most recent updated may not appear to be all that exciting… but it has made a world of a difference when you’re walking up and down those front steps everyday. Kev’s new weekend project was to grout and seal the saltillo tile on our front porch.

I know, I know, exciting stuff. But finishing a project is always a plus (especially when it was started four years ago) and a grouted front porch landing has made all of the difference! Sometimes it really is that last 10%.

This project involved renting a power washer to really clean the tile and clear out any debris from the cracks. Next a wet gloss sealer was applied directly to the tile, a roller brush is helpful for application. Grout is prepped and smoothed over all adjoining tile spaces and any excess is wiped away with a wet rag. Last but not least, another coat of wet gloss sealer after the grout has cured.

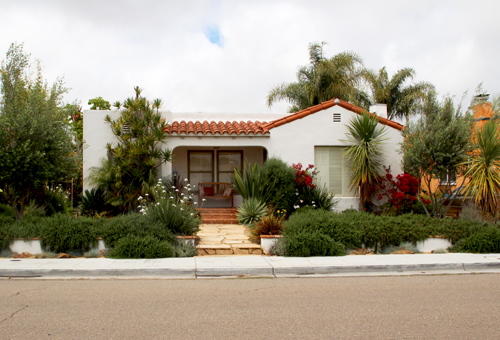
I was not on top of it and completely forgot to take pictures of the naked cement porch and the porch with just tiles. But here’s another shot of the house a couple of months before we bought it and you can kind of see the bare brown slab that originally occupied this space.

The beauty about saltillo tile (which is very traditional Spanish and will look great with the new paint color! on our little Spanish bungalow) is that it looks better and better with age. It’s supposed to be weathered, a bit messy, not-so-perfect.

All great features for a front porch that will see plenty of wear and tear.

While grouting the front, Kevin went ahead and tackled the back patio as well. Here’s a shot post-grout, pre-wiping down the tiles of excess wet grout shot.

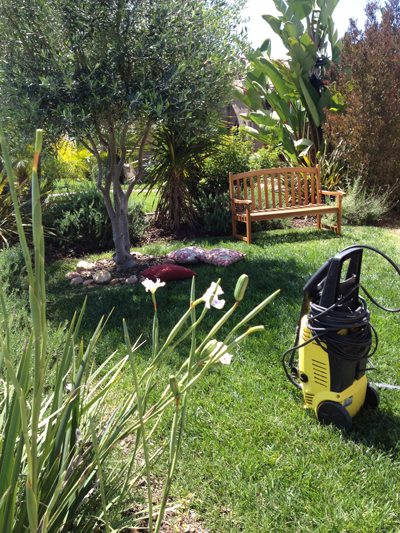
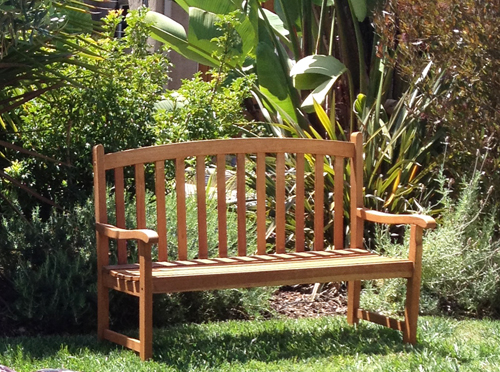
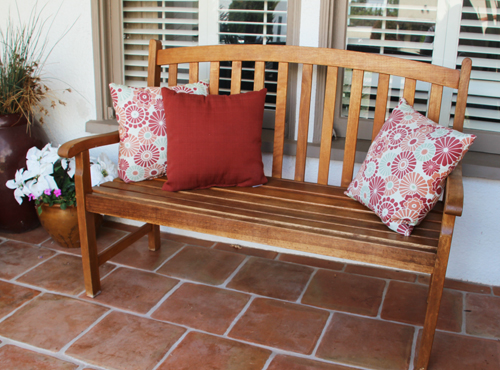
Keeping up with the theme of front porch, Kev also pulled our wood slatted bench out of the entrance and applied a honey shade of stain followed by a coat sealer.

(That’s the power washer in the foreground.)

The bench was a housewarming gift from my parents and I love how it looks on the porch, especially with its fresh coat of glaze.

One more curb appeal project down! Plenty to go through summer, but you can read all about that here.

Have a great weekend.

PS More Curb Appeal projects right here.

- posted on July 20, 2012 Filed Under: Curb Appeal, DIY, Home, Our Yard, Renovating Adventures Tagged With: DIY, Home

Tips for Traveling with Babies

July 18, 2012 by Morgan

I mentioned a while back that I travel quite a bit for work. The plus is that I have the awesome opportunity to work from my home office 90% of the time. The downside being that I do pack up my office, Liv and myself for a week every month/every other month to travel up to the Monterey Bay area (Northern California) to touch base with our corporate location. BUT Liv travels with me! How fun is that? And she gets to play with her grandparents while I’m at the office (I hail originally from Santa Cruz which is in the Monterey Bay area).

Over the past six weeks alone I’ve made three trips up to Northern California and back down to San Diego (for various work, weddings and family related events) and it occurred to me that I might share a few tips that I’ve learned over the past year and a half (and 40+ flights!) on traveling with an infant and then a toddler solo. Feel free to share your thoughts and your own tips in the comments below! Let’s get a little group think going on the best traveling dos and don’ts with kids.

My rules:

1. Carry as little as possible. I’m sure this is true across the board, but when traveling alone with a baby carrying the bare minimum is really a plus. I can say with a slice of humble pie that I’ve been that crazy lady wheeling carry-ons, a diaper bag, individual brown bag sack lunches, baby on hip, stroller filled with my laptop and camera bag, coffee perched in one hand, boarding pass in the other while hurriedly weaving my way down to a various gate. Stressful.

About five flights in as a new mom I figured it out. Now I always check my one carry on (and it’s always one for a reason, see #3), take advantage of priority family boarding and bring just one small bag with me on board (sometimes two if my destination calls for my camera). We’ve really nixed toys, reading materials for Mom, pack n’ plays (though I do try to arrange one at my destination, otherwise we co-sleep) and travel high chairs for a very simplistic load. But I haven’t given up my brown bag lunch, coffee, diaper bag and laptop case, I’ve instead consolidated them into one easy solution.

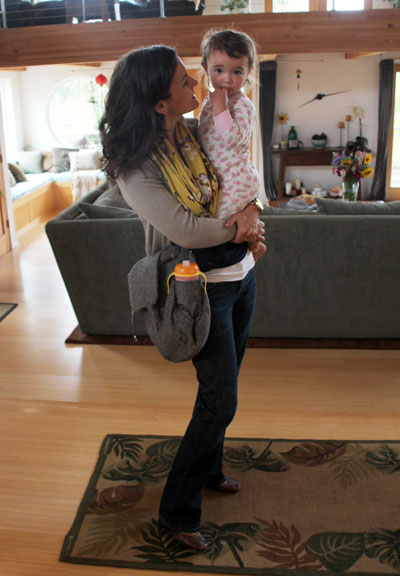
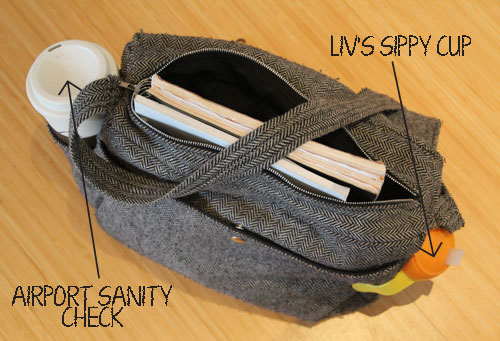
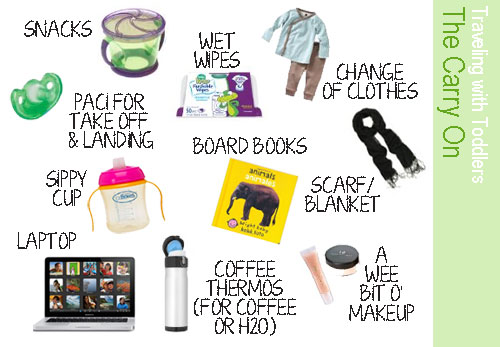
Here we are at my parents with my travel/diaper bag. I worked with Etsy artist ThreadBeat to customize a herringbone patterned messenger bag that fits my laptop, notebooks, a few board books for Liv, snacks, lipgloss, keys, a change of clothes, a paci for take off and landing, a spare diaper, a small pack of disposable wipes (for everything), a loose scarf that acts as an impromptu blanket – each with their own little spot. The bag is usually quite stuffed when it’s at full capacity! The best part is that when we arrive at our destination the messenger bag transforms into a briefcase.

And the most important customization? Pockets on the outside large enough for a sippy cup for Mom and one for Olivia.

Traveling can get a little stressful (long layovers, bumped flights) and my travel coffee mug (with extra snug lid) is a necessary treat. Sometimes I swap out a skinny thermos for an even tighter lid on long, cross-country flights when there will be lots of marching through airports and plenty of Starbucks.

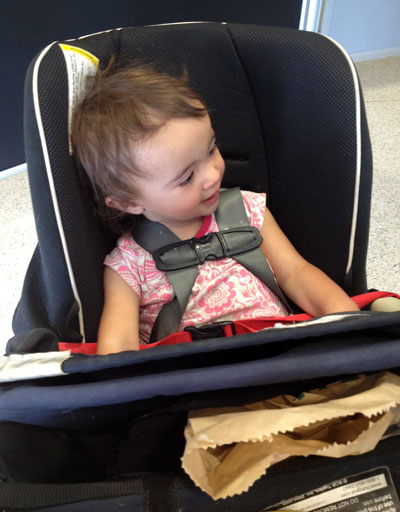
2. Be prepared. My favorite flights are the Southwest one hour hops with a plane that is less than half full. These are the flights where the attendants happily let me bring my Combi Cocorro on board (gushed all about why I love this guy for toddlers and traveling here) and I’m able to schedule a flight around Liv’s nap time. When she’s hooked into a car seat there’s a 50-50 chance she’ll be snoozing for the trip and that can make all of the difference! Note: falling asleep happens during take off and the rise in elevation – don’t miss the opportunity to offer a pacifier, sing soothing songs softly and drown out light.

I have yet to buy a seat for Liv and when she’s a lap child flights tend to take on a new challenge entirely. When I suspect she’ll be riding with me for a long flight I avoid nap times like the plague because sleeping while sitting while on Mom’s lap is out – and a whiny, tired toddler makes the entire flight tougher on everyone. Thankfully traveling is becoming second nature to Liv and she doesn’t mind the change of scenery so much.

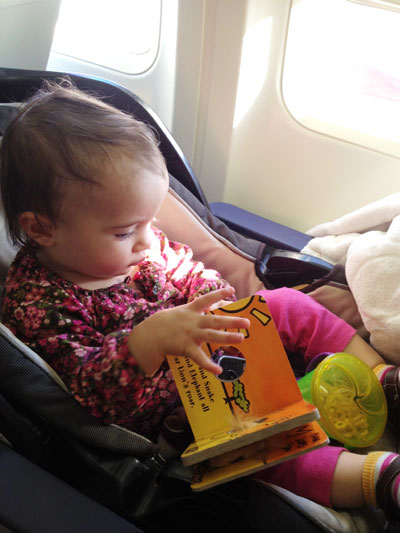
These days I realize that catching up on my latest This Old House and Martha while in flight is a thing of the past, so instead I pack useful travel tools such as toddler-friendly books (best, easiest toy! we can flip through the same board book five times picking out first shapes then colors then animals then counting the animals…) to keep us all entertained.

3. Pack like a pro. This is two fold: it’s extra important for me to have an organized checked bag as it is for my carry on to be well-stocked.

I’ll start with the carry on. As mentioned above, my staples are minimum but mandatory (nothing like being stuck in a city overnight without a few bare minimums). For Liv, that includes: change of clothes, diaper, wipes, snack trap with dry snacks, easy meals (string cheese + cheerios + apple slices), board books, paci (for take off and landing to help her ears – suckers, a bottle or nursing works equally well depending on age), sippy cup full of water (can be switched out with milk at destination but not while flying since liquid will inevitably end up on Momma). For me: light scarf (impromptu blanket – no jacket necessary since lugging child + car seat down airplane aisle = sweat), similar snacks to Liv, travel coffee cup (I fill it with water once on my flight to rehydrate and to avoid little plastic cups on the seat tray with swinging toddler arms), light make-up (what I could survive with if my bag didn’t make it).

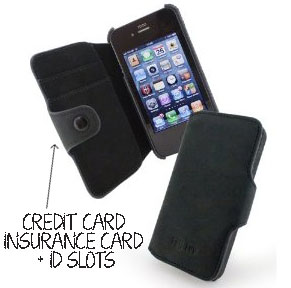
Oh, and of course my favorite accessory. Have I ever introduced you to my purse for the last two years? It’s an iphone case + wallet (best invention ever – until it slips out of your bag during landing and is left on the plane floor) and it’s this plus a lip gloss in my back pocket. That’s it these days. Other odds and ends can go in the diaper bag or purse or briefcase or whatever else I’m toting that day – but because this wallet makes me carry just the bare minimum, it’s pretty much what makes getting out the door for me possible hands free:

Items I avoid in my carry on: toothbrush/paste (if I get stuck in a city overnight the hotel will have these staples), gooey snacks (most fruits, yogurt, etc that result in sticky hands, faces and clothing :)), bags or purses without shoulder straps, games that require noise or moving around, crayons (that roll easily from a tray).

Next up is my actual checked bag. I limit myself to one piece of checked luggage because even the short distance from the car to the gate check-in area and vice versa can be quite a bit of work for a mom with a stroller, carry on and one piece of roller luggage. Any more and I’d surely tip over.

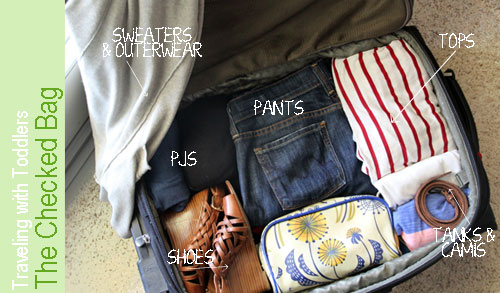
My checked bag usually consists of work-related outfits as well as down time/casual wear and sometimes even dresses for events and what not so I try to pack strategically. One outfit per day, one or two extra just in case. One pair of long jeans with heels and another shorter version with flats (jeans and blouses are work appropriate, thank goodness). PJs, toiletries, curling iron, a couple of rolled summer dresses. On top of that is a layer of Liv clothes and a few more toys, I purchase disposable diapers at my destination and we use the snack trap and sippy cup all week from the flight for Liv’s eating utensils (though sometimes I throw in a soft spoon or kid’s plate/tupperware, too).

I’ve developed a little packing trick that makes it easy to see that I have everything that I need and to find a certain item in a jiffy. On my frequent trips I always pack the same item in the same place. Always. PJs are upper left corner, tops upper right. Miscellaneous tanks, camis, belts in the lower right and shoes in the lower left. When Liv is fast asleep at night in our room I can reach into my bag in the dark and find my pajama pants easily! Items are stacked, rolled or wedged in, outer wear is draped across the top.

You’ve all heard of the color rule, right? Sticking to a few different shades (such as blues and greens) so that everything in your bag goes with everything else? Well I’m not that packing savvy but I do tend to stick to brown or black. Black shoes, black belt, black jacket, or the opposite. I don’t think we’re nearly as matchy-matchy today so matching brown pumps with a black cardigan is really no biggie to me, but if you’re nervous of over packing choose one and stick to it.

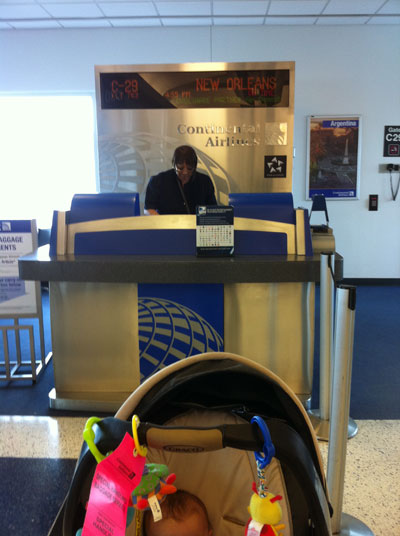
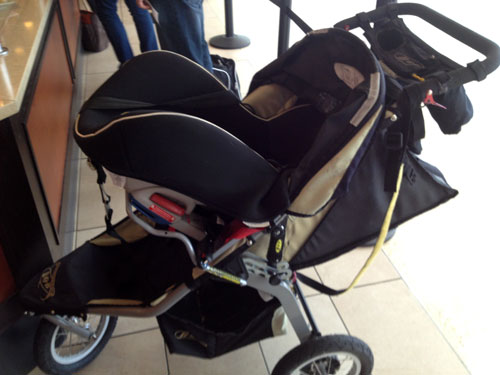
As far as airport-friendly accessories, this is the set up that I roam airport terminals with.

Our BOB stroller easily holds the toddler Combi car seat (with the safety harness and all), delivering us quickly to our gate destination. I gate check the stroller and sometimes the car seat (when there’s no room for a freebie seat) and bring Liv and my tote down the aisle. This awesome car seat is light enough for me to carry and snap in too, if that allows.

There you have it! My thoughts on traveling with a baby and how easy it can be! Just a few steps that help to make traveling slightly less stressful – then it’s time to enjoy the ride :).

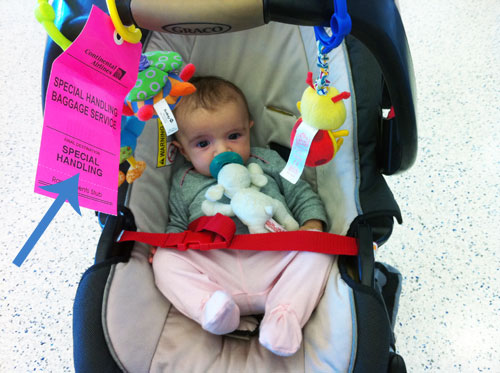
Here we are on our first cross-country trip. This was back when I could carry Liv around the airport in a sling! (A huge plus when a baby can’t yet hold her own head up.)

Any travel tips to add? We might have a pretty lengthy plane trip coming up and I’m in need of a few successful strategies for keeping an 18-month-old happy for hours on end in a confined space ;).

Happy travels!

Related Posts Plugin for WordPress, Blogger...

- posted on July 18, 2012 Filed Under: Family & Friends, Favorites, Tips & Ideas, Travel Adventures

  • « Previous Page
  • 1
  • …
  • 207
  • 208
  • 209
  • 210
  • 211
  • …
  • 438
  • Next Page »

Welcome to my little slice of the web where I practice finding family, career, homemade & inspired balance on a daily basis. This is where I capture my happy moments, and I'm honored that you're here to join us. Home + creativity + good eats + journaling + life as a working mom. Read more...

  • Email
  • Facebook
  • Google+
  • Instagram
  • Pinterest
  • RSS
  • StumbleUpon
  • Twitter

Search

Categories

Craft Projects CategoryCrafty Projects Good Eats & Recipes CategoryGood Eats Entertaining Ideas CategoryEntertaining Ideas Decorating Projects CategoryDecorating Style Boards CategoryStyle Boards Everything Holiday CategoryHolidays

Daily Dose

Favorite Posts

Dog Days of Summer: Craft Kits for Kids

Summer Craft Kits for Kids

August is a slower month for our family. Preschool summer school is out, dance lessons are taking a brief break for the month, our family vacation is

Our Double Stroller: Mountain Buggy +One Review

A Mountain Buggy +One Double Stroller Review

I'll preface by saying that this is not a sponsored review - we've found an awesome double stroller and we love it! Our Mountain Buggy + One has served

Wardrobe Style Board: A Work-From-Home Uniform

Wardrobe Style Board: A Stay-At-Home Mom Uniform | Cropped Light Jeans, Tan Sven Clogs, White Madewell V-Neck T-Shirt, Colorful Necklace, Gold Earrings | PepperDesignBlog.com

tan clogs | pocket tee | light jeans | gold disc earrings | colorful necklace It's not uncommon for people to come and go from our house all day long,

Happy 2nd Birthday, Taylor Rose!

Happy 2nd Birthday, Taylor Rose! An Infographic for My Girl | PepperDesignBlog.com

This weekend Taylor turned two. Taylor is such a bright, wonderful light in our lives. She is our funny, spunky little daughter that will do just about

How to Listen to Audiobooks on OverDrive

Intro to Audiobooks on OverDrive Public Library | PepperDesignBlog.com

Liv has developed a big interest in audiobooks as of late. One of my favorite ways for her to spend her 'quiet time' while Taylor and Marley nap is for her

Pistachio, Caramel & Sea Salt Chocolate Bars

Pistachio, Caramel & Sea Salt | Father's Day | PepperDesignBlog.com

Father's Day is not so far away, so here's an easy gift idea that can be made in advance or (literally) the night before. Homemade chocolate bars can be

Liv & Taylor-isms

Liv & Taylor-isms | Funny Things Kids Do & Say | PepperDesignBlog.com

Sometimes I capture something so funny/adorable/sweet that I can’t help but make note of it. Because Taylor is now expressing herself in full sentences, I

30 Things That I’ve Learned By 30

30 Things I've Learned by the Age of 30 | PepperDesignBlog.com

Today is my 30th birthday. I don't feel much older, but hearing that number roll out of my mouth feels as though I'm closing on a big chapter in my

Featured

Featured
VRBO San Diego Flying Bridge Vacation Rental cool toys for kids

Favorite Topics

Welcome to my little slice of the web where I practice finding family, career, homemade & inspired balance on a daily basis. This is where I capture my happy moments, and I'm honored that you're here to join us. Home + creativity + good eats + journaling. Read More…

  • Email
  • Google+
  • Instagram
  • Pinterest
  • RSS
  • StumbleUpon
  • Twitter
May 2025
MTWTFSS
« Feb  
 1234
567891011
12131415161718
19202122232425
262728293031 

Copyright © 2025 · Foodie Pro Theme by Shay Bocks · Built on the Genesis Framework · Powered by WordPress