Pepper Design Blog

A Little of This & That... Renovating, Decorating, DIY Projects & Family

pepper_header_flower

Easy Envelope Pillows

February 2, 2012 by Morgan

Back with a quick example of how easy it is to make envelope pillows (no zippers, no buttons) out of cloth napkins and remnant fabric. I made four new pillows in a couple of hours last Saturday morning and featured them here in my Spring living room update.

The truth is, I’ve had several of these cloth napkins lying around the house for months if not years! They were waiting for the perfect opportunity and new throw pillows fit the bill.
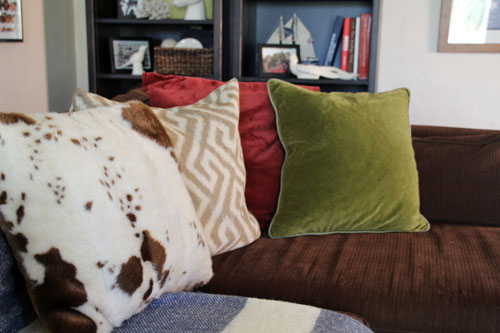
These raspberry red velvet guys are from a yard of fabric from my local discount fabric shop. The store is actually called Discount Fabric and it’s in an old movie theater about a mile from our house – such a treasure so close by! The tan pillow was from a previous project and you can find its invisible zipper tutorial here.

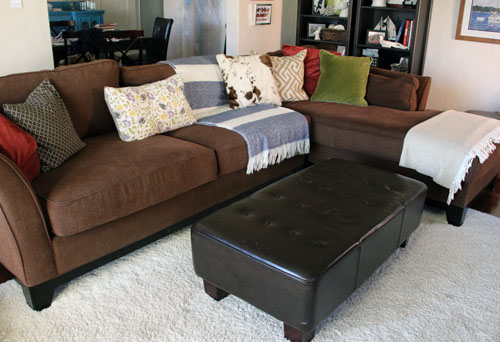
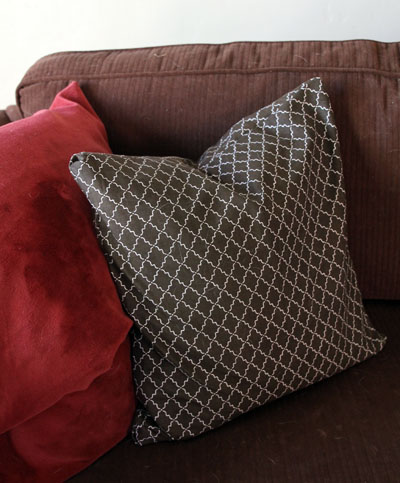
My two new cloth napkin envelope pillows are over here on this side. Kev was seeing Christmas with my green and red mix (even though I tried to insist they were more kelly meets raspberry) and my horizontal floral print pillow helped to bring Spring back in. Next to that guy is a smaller brown trellis pillow made from three Target cloth napkins (still can be found in store, bought these around Thanksgiving). Yes, that raspberry red pillow needs a 20″ insert and not the current 18″– it’s definitely on the to-do list.
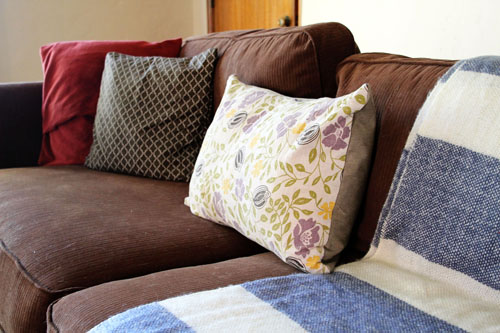
When mixing so many pillows, I try to throw a couple over-sized ones in the mix (wish I had one BIG one), a few medium throw pillows, a horizontal size and maybe a little guy. But with pillows I really think that anything goes–mix patterns, colors and sizes and when you get bored invest in a few more cloth napkins. ;)
But really, cloth napkins are pretty genius as pillow covers. Since napkins already have a hemmed edge and are roughly the size of a throw pillow, they make for an easy solution – especially when there are no zippers involved!

******************************************************************************************

Easy Envelope Pillows

m
Materials: fabric, pillow insert, pins, fabric scissors (a dedicated, super sharp pair is always a plus to have around and will make fabric cutting SEW much easier. hehehe), sewing machine

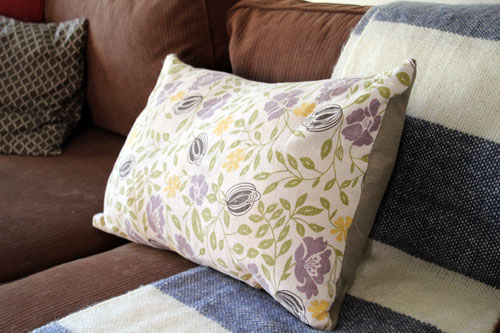
I’ll go through all four pillows, but let’s start with the horizontal botanical print pillow. This is the cloth napkin that I’ve had for years – it’s so pretty but it gets very little use buried in my linen basket! The back of the pillow is just a tan fabric scrap from my remnant box.
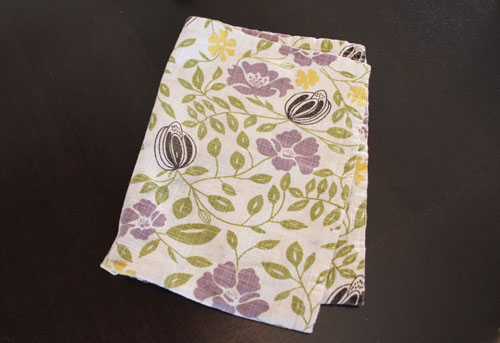
1. I began by laying out the napkin right side up to cut my fabric to size for the backing.
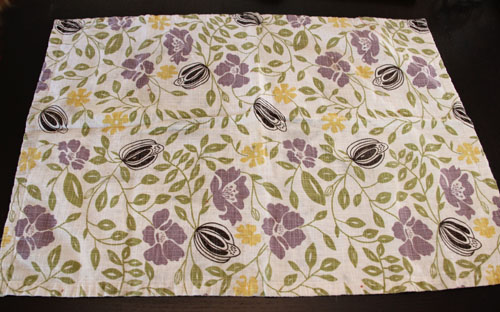
2. Using the cloth napkin as my template (I didn’t alter the size or shape at all), I cut out a panel for the right side of the pillow that was roughy 2/3 the size of the front side of the pillow and folded over the inside edge about 2″. You could seam this edge but if it’s folded over a far enough amount (and the raw edge is buried deep within the pillow) no one will be the wiser. These top pieces should be facing down (we’re pinning and sewing this inside out).
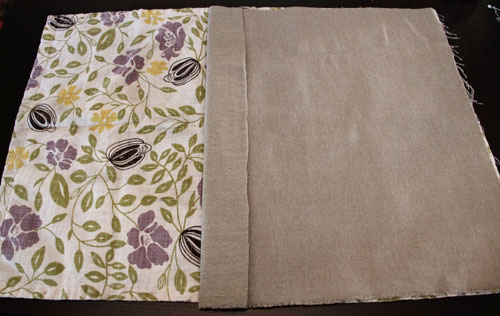
3. A similar panel is cut and folded in for the left side.
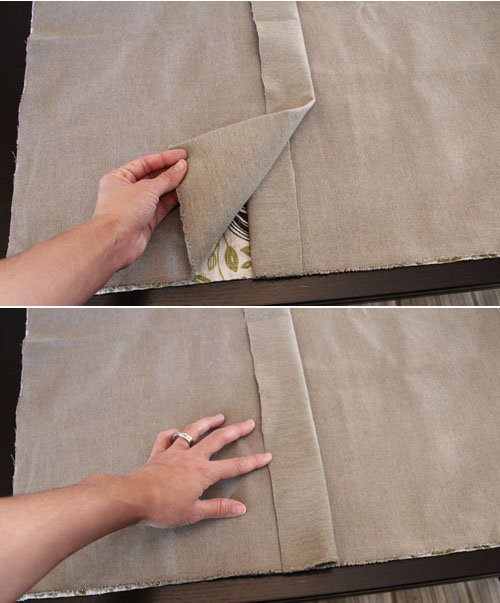
4. Time to pin!
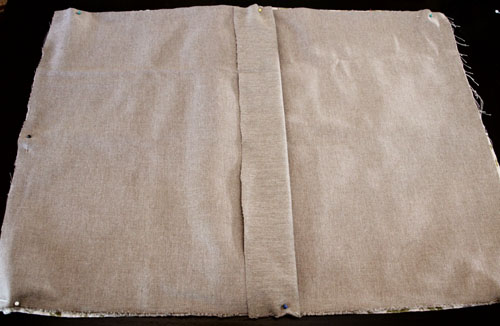
5. and over to the sewing machine we go.
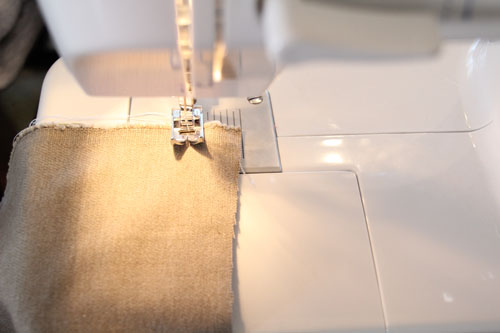
The entire pillow cover gets a simple stitch all of the way around the outer edge
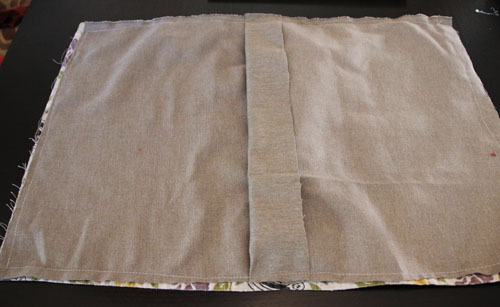
And while even cloth napkins don’t have even edges, I tried to stay as close to this edge as possible. This is especially true if you’re making a pillow cover for a specific size insert size (16″, 18″ or 20″ for example).
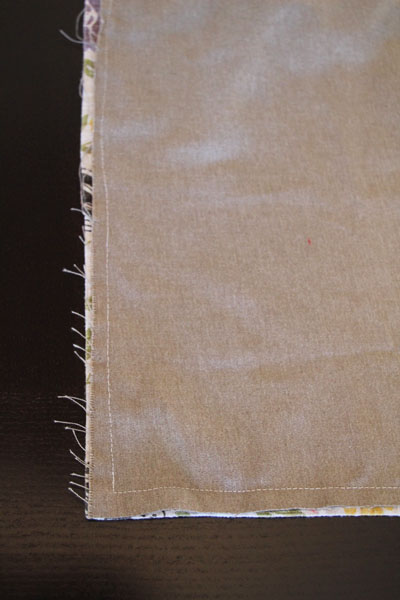
6. Flip your pillow cover outside in to reveal its final shape:
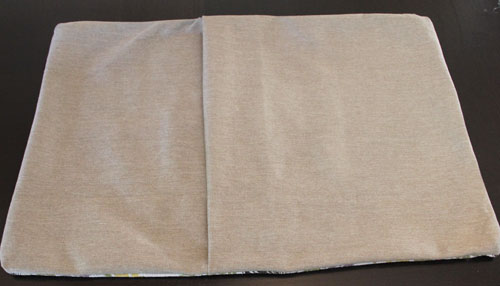
You can see here that hemming each of those folds isn’t really necessary as mentioned above. The raw envelope edges are buried inside the pillow cover.

As mentioned on Monday, I used a standard bed pillow to stuff this guy (it was the perfect length and nearly the right height – but that extra stuffing added the right amount of soft ‘pouf’). When it comes to buying and reusing pillow insets though, I highly recommend West Elm inserts. I’ve tried everything from buying my own fiber fill to upcycling old pillows (great solution if they have great inserts) but in the end I’ve found that the $12 investment in a good insert will be comfortable and cozy on the couch, will hold its form and will stand up to the abuse of constantly switching out covers.
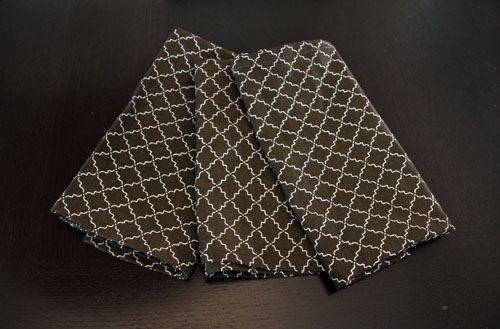
Moving on to the square trellis pillow which is actually even easier since we’re starting with three cloth napkins with hemmed edges.
Picked these guys up at Target and actually did a test run by washing the fourth napkin first. It came out significantly faded so I didn’t prewash this batch and I’m secretly just hoping that this pillow won’t see any spills or stains in the near future (or perhaps I’ll just let it sun dry if I must wash…).
1. Following the same steps above, cut panels for the envelope backing out of two of the napkins (2/3 the size of the actual napkin should do the trick).
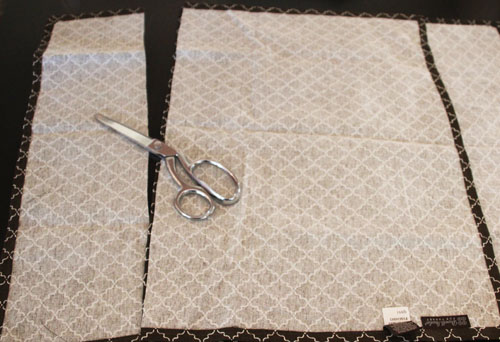
and now the other side…
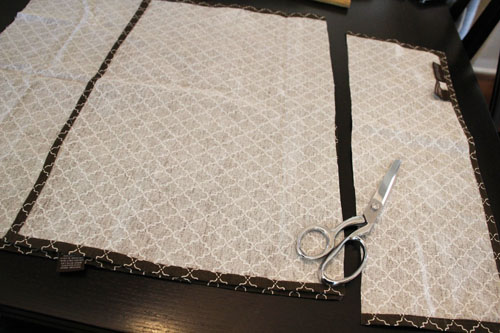
So that I am ultimately left with one whole napkin and two 2/3 napkins that were laid on top of each other and overlapping. Because the edges are already hemmed there’s no folding necessary.
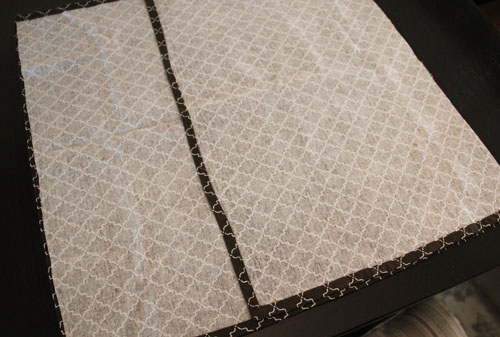
2. Pin and sew around the edges!

Wait… this is not how it’s supposed to look on the other side. Bah! I forgot to start with my top piece facing up and not down! :) Just keeping it real…
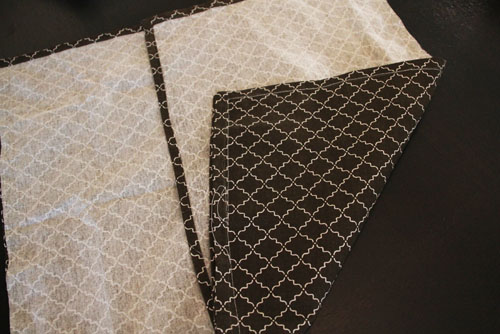
I ended up just cutting off my recently sewn edges and made a 16″ pillow instead of 18″ rather than pull out the seam ripper. It actually worked out well since the other pillows were on the larger 18″ side – a little variety is nice!

And here she is again finished:

The last set of remnant pillows I made were from a yard of raspberry colored velvet that I picked up at the fabric store.

1. No need to repeat the above photos, but what essentially made this project even easier is that I was able to cut down on two hems by cutting out one long strip of fabric (my pillow was to be 20″ so my long strip of fabric ended up being 21″ in height (to account for the hem) and ~45″ in length) and then folding in each side to create a 20″ front and an overlapped envelope in the back.
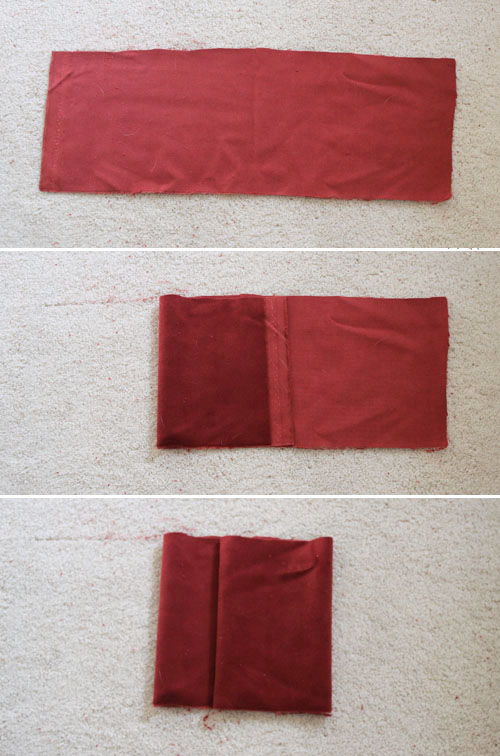
2. A simple stitch along the top and bottom and I had a cover! The above would of course need to be turned inside out before this step.

I didn’t hem the envelope edges because I didn’t want a stitch across the thick velvet (and I didn’t want to change out the thread in my machine!), so I folded each edge and when sewing the top and bottom included the folded over piece in the hem just like the first pillow (so that it was nice and secure).
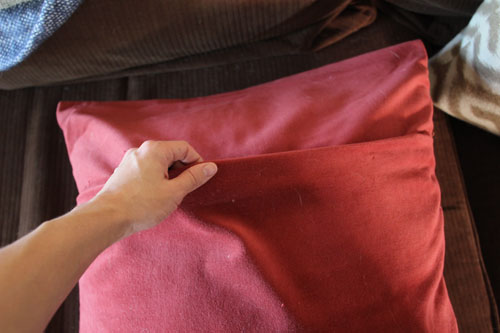
In hindsight, I should have made the envelope pocket even deeper,
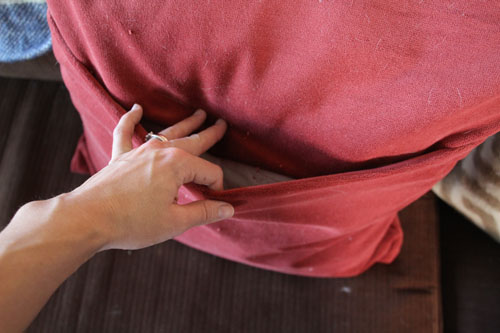
because that raw edge of the envelope overlapping piece began to sneak out of the envelope every so often (see above photo on couch as an example).

3. I added a few basic cross stitches in matching thread to keep the flap in place. I didn’t close the envelope up so that I wouldn’t interfere with stuffing and sliding the insert in and out but just to keep a clean folded edge on that flap. (the cross stitch is barely visible but it’s there!)
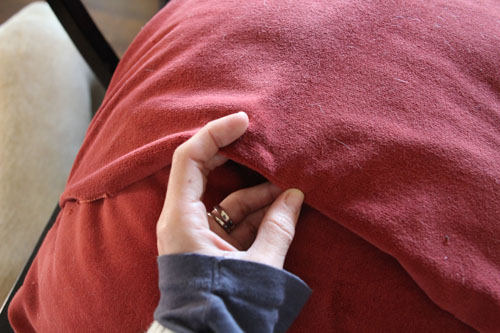
One of the velvet pillows was designed for the front to face outwards and one was designed with the envelope side facing outwards.

4. For the envelope out version, I sewed a big button from one of my previous pillows onto the lower overlapping piece of the envelope and created a slit on the top piece of the overlapping envelope with sharp fabric scissors.
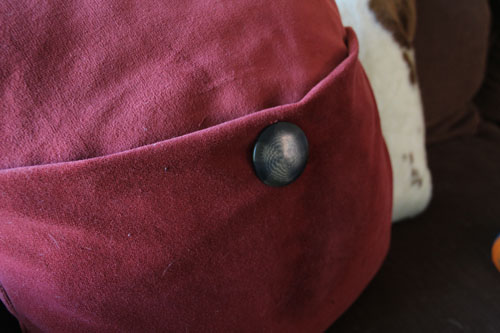
And here she is finished:
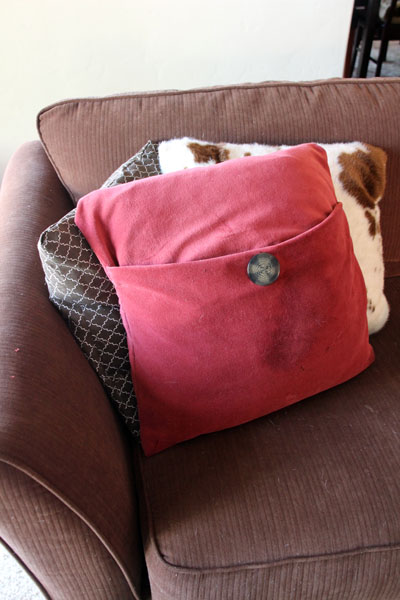
There you have it! Four new easy pillow covers for under $20.

The entire project took me a couple of hours of cutting, pinning and sewing machine time but I love the finished pillows and they’re sure to last me at least a few months (in all seriousness).

More living room posts can be found right here.

- posted on February 2, 2012 Filed Under: Crafty Solutions, DIY, Home, Our Living Room, Projects, Renovating Adventures, Tutorial Tagged With: Accessories, Brown/Tan, Crafty Solutions, Decorating, DIY, Fabric, Green, Home, Living Room, Pink, Red, Sewing, Tutorial

Wardrobe Style Boards: Spring Pastels!

February 1, 2012 by Morgan

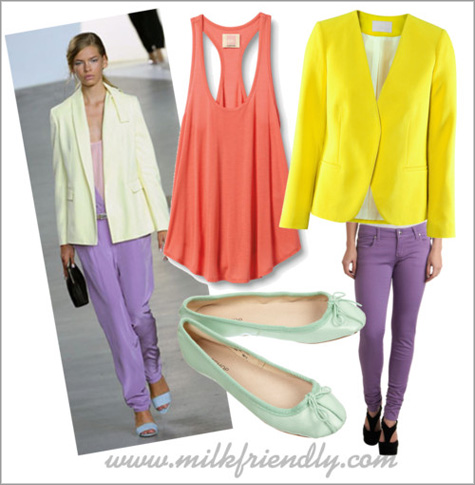
Spring and its gorgeous palette of brilliant pastels is sneaking up on us be it for wardrobe or home design (check out this article on Houzz for more fun proof) and I’m so excited to welcome Maryam back to share her take on this coming season’s fashion favorites (you can catch the full style board gallery over here). Take it away!

******************************************************************************

Hi there!

Maryam here, dropping in to give a little peek on one of this spring’s trends that is sure to brighten up your coldest winter days! I am talking about PASTELS!

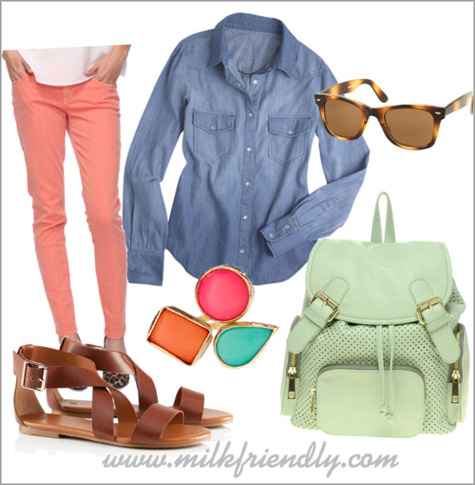
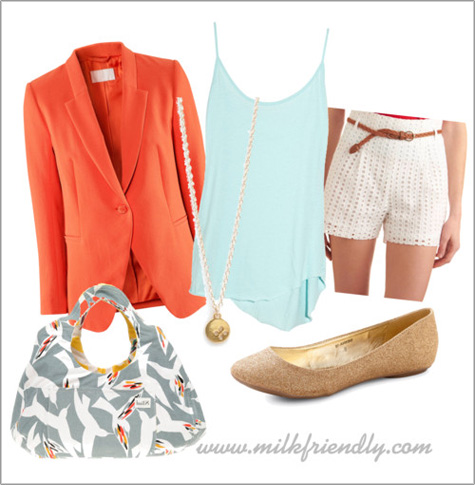
Heaps of sorbet and pastel color pieces are popping up all around the fashion world. Colors like cantaloupe, honeydew, peachy pink, lavender, mint, sea foam (sounds like dessert time. huh?) are all adorning anything from skinny jeans, heels, tanks, blazers, backpacks, rings- truly, the possibilities are endless.

This is a color trend that doesn’t have to stop with one accent piece. Don’t be afraid to mix and match colors and shades to create a cohesive outfit. The neutral tones compliment each other quite nicely… a lot like the sorbet section in the ice cream shop, so I say, go all out!

If you just want to just try a little taste of this sorbet-lovin’ trend, buy yourself a great pair of colored skinny jeans. Almost every online and in-store boutique is carrying them, and it’s a great way to ease into this color trend. Pair them with a chambray or denim button-down (one of my closet staples) and you got yourself a great looking outfit if I do say myself. And I could go on for days on that minty backpack… so very dreamy.


If you’re a gal who likes to dress it up or down, I adore the boyfriend blazer. The blazer is so very versatile, wear it with jeans, shorts, a mini or maxi skirt, over a dress- truly there are so many ways to style it. My favorite is to pair the blazer with a textured short. This look is classy, but you don’t have to worry about matching your shorts with the blazer, because its special feature is the texture. Eyelets or lace give a great contrast while still looking put together.

So what do you think about this year’s pastel trend? Are you going to eat it all up?

Maryam

******************************************************************************

As always, you can visit the slideshow gallery for sourcing info to track down any of the above.

I have always loved Maryam’s LOVE for bright and beautiful colors, these style boards are the perfect example of how well and easily she mixes her favorites – be it an outfit of pastels, primaries or saturated colors – so wonderfully. I am in awe, being the neutral gal that I am. As hinted at yesterday, I’m working on taking the leap into brighter signs of spring for the house, too (a slow leap… but working my way up that color confidence ladder). Thanks again for visiting, Maryam! (PS You can always visit her right here.)

- posted on February 1, 2012 Filed Under: Wardrobe Tagged With: Fashion, Wardrobe - Fall, Wardrobe - Spring, Wardrobe - Summer

Making Room for Spring! A Living Room Update

January 30, 2012 by Morgan

Yes… it might be a little early to be thinking about Spring, but our living room was feeling a bit down and I’ve been itching at the bit to infuse a little color.

Actually, bright and cheery color might be a theme here this week now that I think about the DIY projects I’ve recently been working on and the awesome styleboards Maryam put together (her post soon to come).

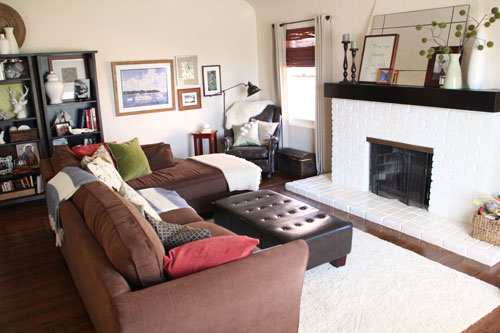
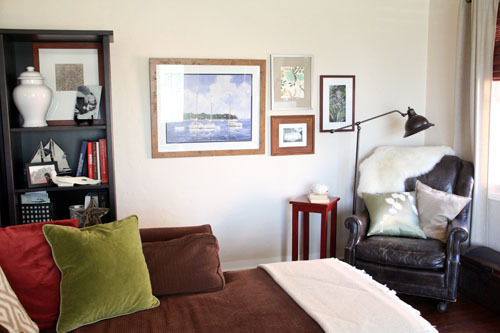
Here’s our living room with its ‘Spring Infusion’ in full swing. It might not look that different from our previous set up but it’s four DIY pillows (+ two store bought versions), a new striped throw, a new addition to the wall collage, bookshelf revamp and mantle update away from how it used to be.

Go ahead and ignore that giant hole in the wall in our dining room (it’s the old door to the new bathroom that is getting plastered up soon). But! Check out the new pillows.

Let’s start with the pop of raspberry red. I found the beautiful velvet at our local discount fabric shop and made two easy pillow covers out of it for less than $12. The color is actually very similar to the coral West Elm versions I had there previously, but those guys were showing major sun wear-and-tear and were beginning to look tired and haggered (is that a word? spellcheck says no). These ones are more pink than they are coral and I love how they look with the other green accents in the room.

The brown and white trellis print is a new addition too. He’s from three cloth napkins from Target (bought them as part of my stenciled Christmas present kit and ended up not using them). Love the modern print!

Next to the velvet and trellis print pillows is another cloth napkin number. I’ve had this solo floral napkin in my collection for some time (why just one? not sure… maybe I thought it would work for a bread basket or something :)), but it’s getting much more use now as a horizontal pillow on the sofa! The backing is a tan linen from my remnant pile and the stuffing is just an everyday standard bed pillow (perfect length horizontally and a bit ‘stuffed’ vertically, but that lends itself to a nice soft ‘pouf’).

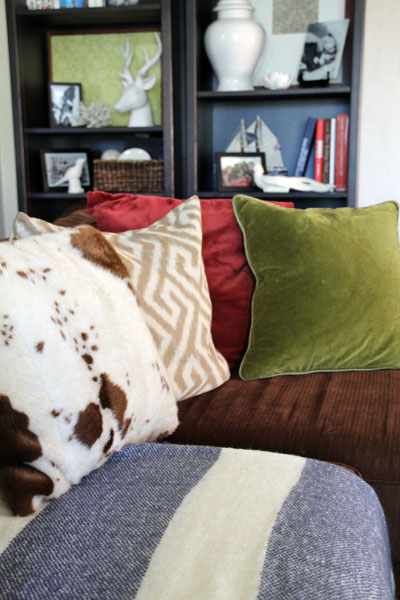
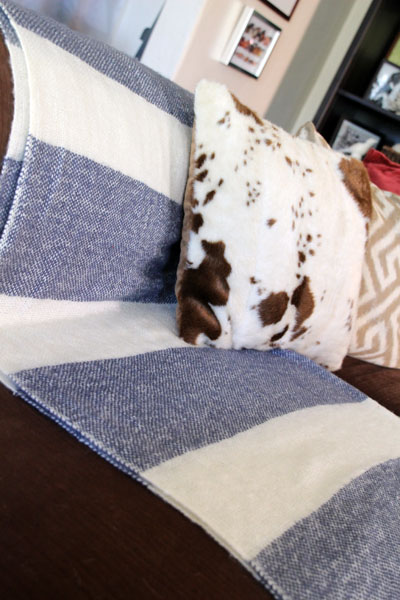
On the other side of the sofa is my World Market cow hide find (but a much softer version than a hide material) and my invisible zipper tan pillow from this tutorial. The green velvet version (love that texture! and mixing textures in pillows in general) is a C&B addition from a while back.

That new striped throw was from my holiday gift guide list (the rusty pink, green and brown versions are on sale for $13 right now in store!) from West Elm – it is sooo soft and the pop of blue balances out the pinks and greens and browns.

Other new room changes include moving a floral print (recognize one of my favorite artists from this post?) from the bookshelf to the wall collage along the back wall. (Looking at this photo I’m now thinking that the wall collage is way off center–note to self that I need to bump the bookshelves over about 6 inches).

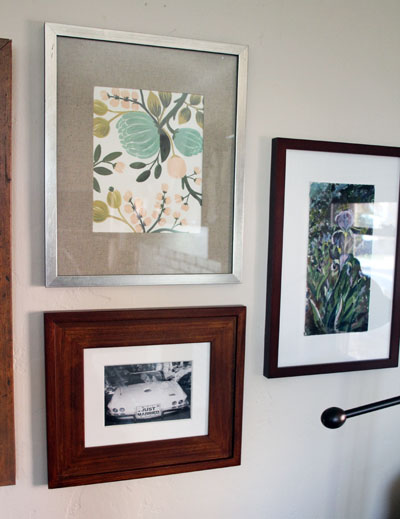
A close up of the addition–I moved a few pieces around  to create a new layout, too. Love the silver frame and how it breaks up my traditional (and favorite) warm brown frames. Here’s another example of how linen mattes have become my second go-to after white! This frame/matte combo is actually from West Elm (I’m beginning to sound like an advertisement for them but we have one locally here in San Diego so I stop in periodically to check out the sale racks), but I’ve also had linen mattes made (like this set from the office) at Michaels, too.

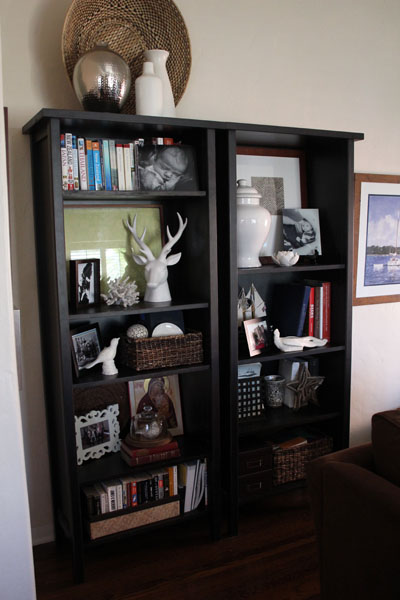
Speaking of bookshelves, I like to use frames in bookshelves to help break up the solid brown backing (or whatever backing color is in the bookshelf I’m working with), so I replaced the silver frame with a framed piece of bright green handmade paper from Paper-Source (you might recognize it as my ‘pop’ of green on the mantle at Christmas).

I also added a white ceramic bird (the one with long tail feathers on the second shelf down on the right–found him at a second hand shop in Iowa) and a white bird candle to my accessories. I find that a commonality (i.e. the white color) amongst a handful of accessories brings unity to a shelf that could otherwise be too messy. Despite a consideration towards design with these shelves, this bookshelf is still functional for us with all of the books that we actually want to access on a regular basis stored in various baskets or by color (like those on the top shelf).

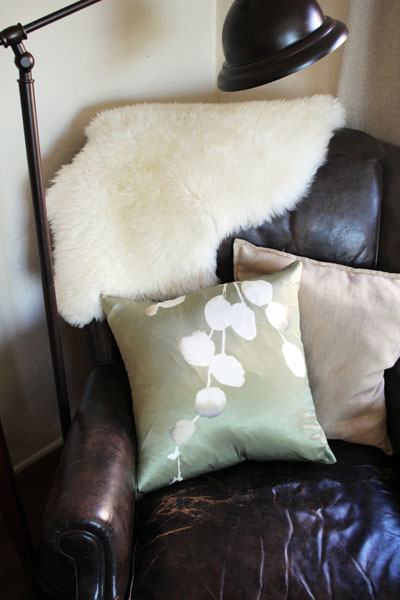
Moving further down the wall from the bookshelves, our rustic leather smoking chair (he’s been in the family for over 4o years) received a new silk green pillow that I found on sale.

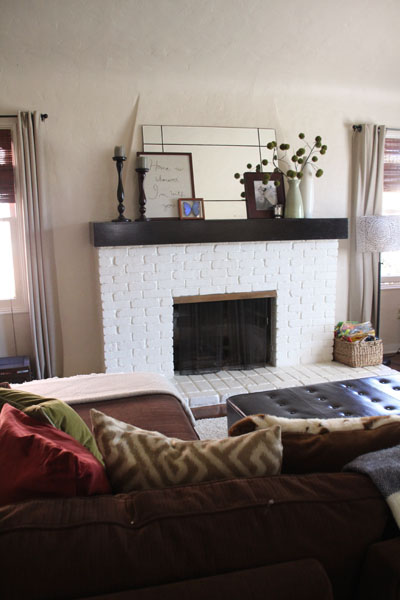
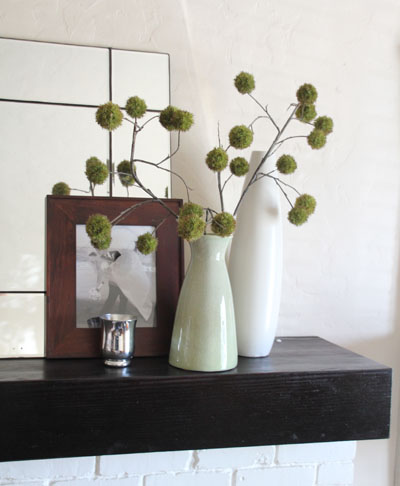
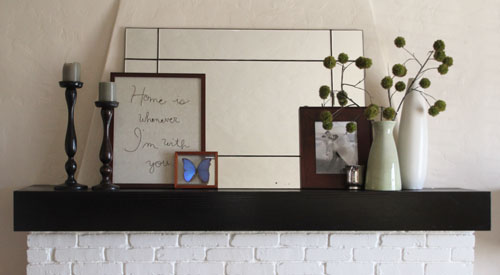
Last but not least, the mantel received a little makeover post-Christmas. Instead of redressing it with my usual look, I took the opportunity to find new pieces to feature (plus, over the holidays I found better homes for most of the other photos that were up there originally).

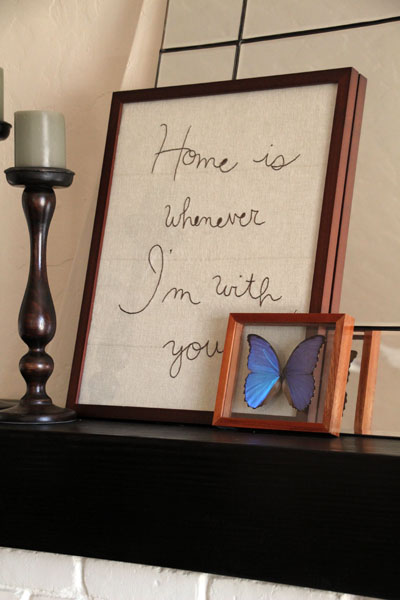
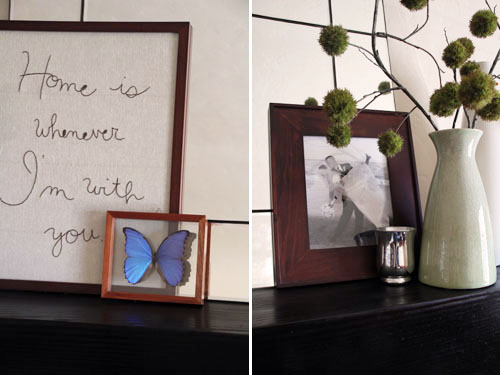
My favorite new piece is the beautifully (and simply) embroidered print by Etsy artist Avery of Dear Night. It’s inspired by this print from Secrets from a Stylist (my favorite HDTV show) and despite my best efforts to track down the actual artist and to purchase a similar piece of embroidered art (which included unanswered emails and lots of tracking), I worked with Avery (who is Awesome! And so talented–I’m so lucky to have found her randomly on Etsy while searching) to create our own version on a linen fabric based around one of my favorite ‘home’ quotes that was unique enough as not to be a replica. I LOVE it. So much.

It was sort of a Christmas present for Kevin. But mostly one for me.

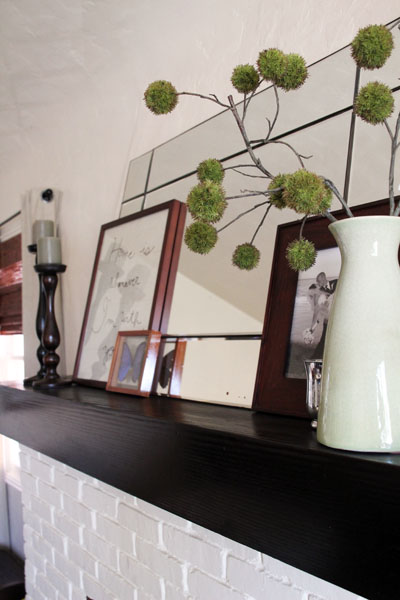
On the other side of the mantel are two branches of giant green billy balls! Yes, I believe that’s what they’re called, though Crate & Barrel calls them ‘Chestnut Branches‘ (which is admittedly a little more attractive). I began regretting my decision when the lady at check out referred to them as ‘very Dr. Seuss-ish’ but immediately retracted on that when I saw them in the house replacing the branches on the mantel. I think they look so cool!

I was ready for a change from the birch branches that originally filled this vase. I love the branches and I’m still looking for a new location for them, but they didn’t always look super on the mantel (they’d slip out of their arrangement and would poke out in random directions) and these guys are a bit more mold-able without looking and feeling like fake wire flowers (because they’re not really flowers). Plus, any opportunity to add a little green life to a room is one I’m happy to take.

A few more shots of the mantel:

The last update is moving our big brown ottoman from the dining room (used as extra seating as a bench) into the living room as an alternative to a coffee table. I loved the free space of not having anything in front of the fireplace and plenty of room for Liv to play, but it wasn’t realistic for hosting people, eating chips and guac in front of the football game, or for holding glasses of wine after a long day. This ottoman is sort of the best of both worlds, it has soft edges for Liv to bounce around, it’s light weight and can easily be pushed out of the way (under the front window behind me in the below shot) and it’s sturdy enough to hold plates of food or a wooden tray for glasses. I’m thinking I might reupholster it in something more creative than the store-bought faux brown leather though… we’ll see.

In every attempt to keep a somewhat normal living room set up, I try to limit Liv’s toys to just a single basket in each room she plays in outside of her room. You can see my World Market basket (which I snagged for $10-ish with a coupon) in the corner next to the fireplace.

And there you have it! My infusion of Spring into our neutral living room space. I’ll post more on those really simple envelope pillows I made (all four in just a couple of hours–no zippers required) later this week. Happy Monday!

More posts on our living room can be found right here.
Related Posts Plugin for WordPress, Blogger...

- posted on January 30, 2012 Filed Under: DIY, Home, Our Living Room, Renovating Adventures Tagged With: Accessories, Before & After, Blue, Decorating, DIY, Fabric, Green, Home, Living Room, Patterns & Color, Pink, Raspberry, Red

  • « Previous Page
  • 1
  • …
  • 236
  • 237
  • 238
  • 239
  • 240
  • …
  • 438
  • Next Page »

Welcome to my little slice of the web where I practice finding family, career, homemade & inspired balance on a daily basis. This is where I capture my happy moments, and I'm honored that you're here to join us. Home + creativity + good eats + journaling + life as a working mom. Read more...

  • Email
  • Facebook
  • Google+
  • Instagram
  • Pinterest
  • RSS
  • StumbleUpon
  • Twitter

Search

Categories

Craft Projects CategoryCrafty Projects Good Eats & Recipes CategoryGood Eats Entertaining Ideas CategoryEntertaining Ideas Decorating Projects CategoryDecorating Style Boards CategoryStyle Boards Everything Holiday CategoryHolidays

Daily Dose

Favorite Posts

Dog Days of Summer: Craft Kits for Kids

Summer Craft Kits for Kids

August is a slower month for our family. Preschool summer school is out, dance lessons are taking a brief break for the month, our family vacation is

Our Double Stroller: Mountain Buggy +One Review

A Mountain Buggy +One Double Stroller Review

I'll preface by saying that this is not a sponsored review - we've found an awesome double stroller and we love it! Our Mountain Buggy + One has served

Wardrobe Style Board: A Work-From-Home Uniform

Wardrobe Style Board: A Stay-At-Home Mom Uniform | Cropped Light Jeans, Tan Sven Clogs, White Madewell V-Neck T-Shirt, Colorful Necklace, Gold Earrings | PepperDesignBlog.com

tan clogs | pocket tee | light jeans | gold disc earrings | colorful necklace It's not uncommon for people to come and go from our house all day long,

Happy 2nd Birthday, Taylor Rose!

Happy 2nd Birthday, Taylor Rose! An Infographic for My Girl | PepperDesignBlog.com

This weekend Taylor turned two. Taylor is such a bright, wonderful light in our lives. She is our funny, spunky little daughter that will do just about

How to Listen to Audiobooks on OverDrive

Intro to Audiobooks on OverDrive Public Library | PepperDesignBlog.com

Liv has developed a big interest in audiobooks as of late. One of my favorite ways for her to spend her 'quiet time' while Taylor and Marley nap is for her

Pistachio, Caramel & Sea Salt Chocolate Bars

Pistachio, Caramel & Sea Salt | Father's Day | PepperDesignBlog.com

Father's Day is not so far away, so here's an easy gift idea that can be made in advance or (literally) the night before. Homemade chocolate bars can be

Liv & Taylor-isms

Liv & Taylor-isms | Funny Things Kids Do & Say | PepperDesignBlog.com

Sometimes I capture something so funny/adorable/sweet that I can’t help but make note of it. Because Taylor is now expressing herself in full sentences, I

30 Things That I’ve Learned By 30

30 Things I've Learned by the Age of 30 | PepperDesignBlog.com

Today is my 30th birthday. I don't feel much older, but hearing that number roll out of my mouth feels as though I'm closing on a big chapter in my

Featured

Featured
VRBO San Diego Flying Bridge Vacation Rental cool toys for kids

Favorite Topics

Welcome to my little slice of the web where I practice finding family, career, homemade & inspired balance on a daily basis. This is where I capture my happy moments, and I'm honored that you're here to join us. Home + creativity + good eats + journaling. Read More…

  • Email
  • Google+
  • Instagram
  • Pinterest
  • RSS
  • StumbleUpon
  • Twitter
May 2025
MTWTFSS
« Feb  
 1234
567891011
12131415161718
19202122232425
262728293031 

Copyright © 2025 · Foodie Pro Theme by Shay Bocks · Built on the Genesis Framework · Powered by WordPress