Pepper Design Blog

A Little of This & That... Renovating, Decorating, DIY Projects & Family

pepper_header_flower

Office Makeover: A New Tufted Linen Headboard

March 28, 2012 by Morgan

I’ve finally finished the upholstered headboard for the new office/guestroom! I knocked out the project over a couple of hours spread across two nights just this week, and I love how it turned out.
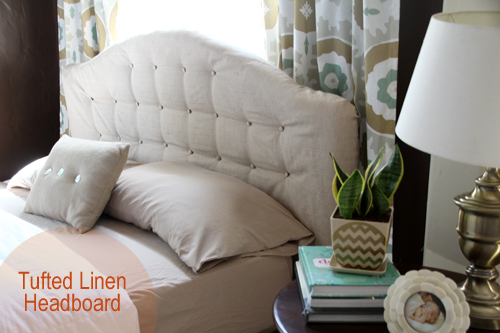
The fabric headboard that I first made a couple of years ago was originally intended for the  master bedroom and was covered in a silvery grey fabric that I loved. When we finished the guestroom space in 2011, it sufficed as a stand in while I decided the color palette and feel for that room.
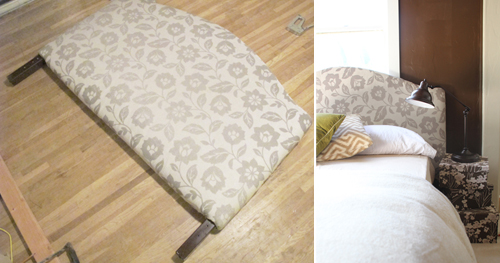
Ultimately new curtains won out and the headboard needed to be recovered to make it all work.

I considered building a new headboard from scratch but since I knew I wouldn’t want to put my current fabric headboard back into the garage (oh precious storage space!), I decided to give it a go in reinventing it by covering the backside in a different fabric.

This way I could always pull my current linen off of the headboard, flip it over and you’d find the original fabric waiting its turn to shine. Minus a few staple holes (which were inevitable to keep the linen side of the board taut) I thought the plan would work out pretty swimmingly.
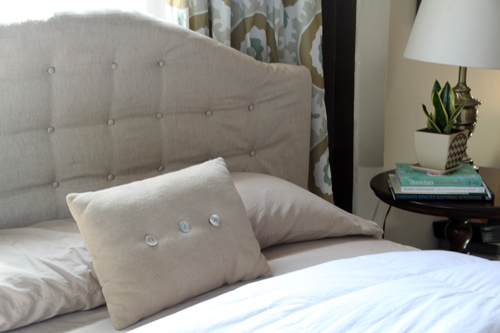
Don’t pay attention to the bedding in these photos – that’s on the to-do list.

If you’re creating  a headboard from scratch, start here with the original post that turned this guy (with the help of foam padding, quilt batting and a staple gun) into a fabric headboard.
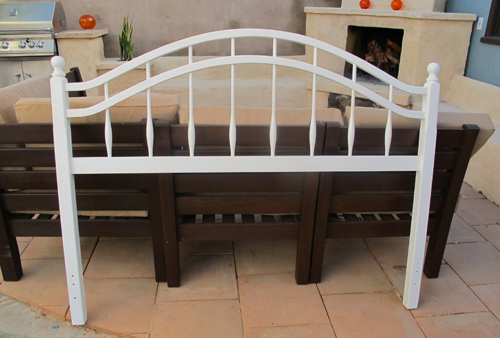
Those wooden slats worked out quite nicely as the base for my tufting and staple gun.

But back to covering the back side of my fabric headboard… The first step was to flip the headboard over and to carefully measure out my new tufting points. I used a solid color on the back of the headboard to avoid wasting $ on that beautiful Luxor fabric on the front side, hence the lighter fabric you’re seeing below (that’s the back of the headboard, not the new linen).
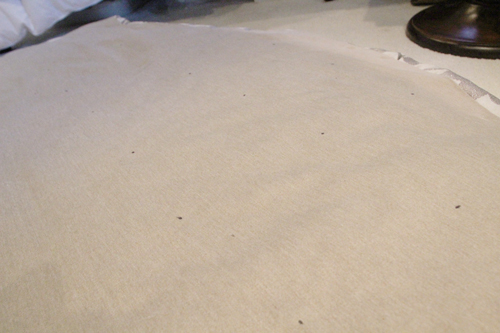
After I had made black marker dots for the new tufts, I pulled the new linen over the back side of the headboard and as I covered up the dots, I stapled on top of the linen to create the tuft.
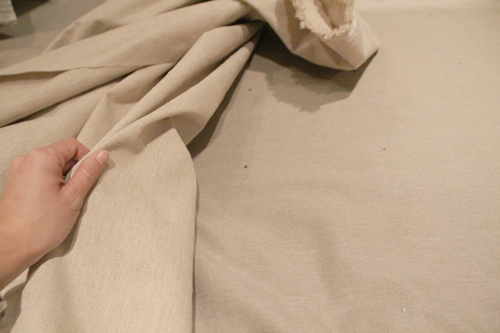
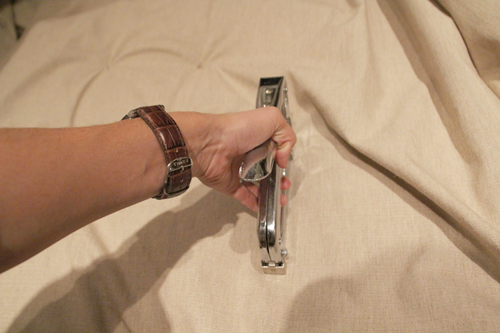
And repeated until the entire headboard was covered. As mentioned above, the staples are going right into the evenly spaced slats of the original headboard frame, but if you were covering a piece of plywood to create a fabric headboard you’d want to double triple check your measurements as you’re stapling to ensure the tufts are in a straight line.
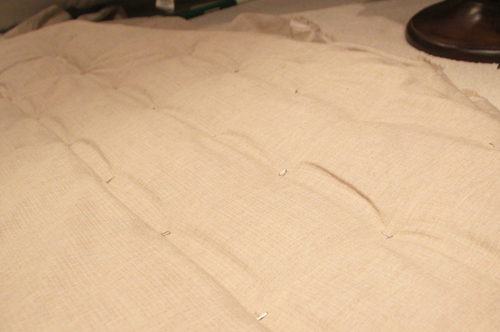
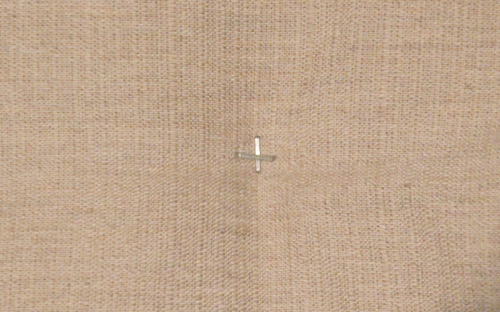
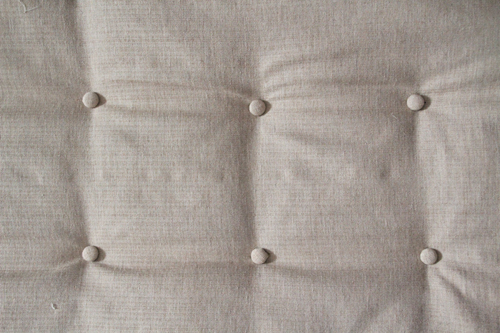
If you take a closer look at those tufts you’ll notice that I’m stapling twice in a cross pattern to really hold the fabric in place.
Another tip worth pointing out is to pull the fabric as taut as possible between staples to really get a creased, tufted look. The natural lines in the linen helped me to stay on track so that tufts were in a row, and following the same point on a patterned piece of fabric would serve the same purpose.
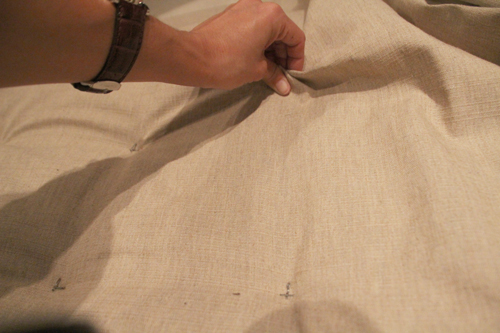
Sorry again about the night time photos! I rarely ever have time to get projects completed when it’s light out these days :).
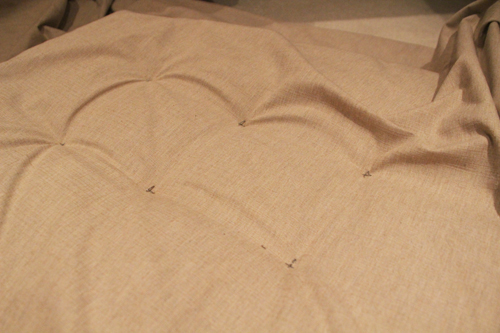
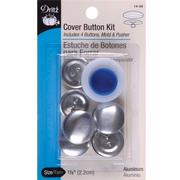
I used a simple 5/8″ button kit to make round fabric buttons out of scrap linen. 20 buttons later and I officially had no use of either thumb.
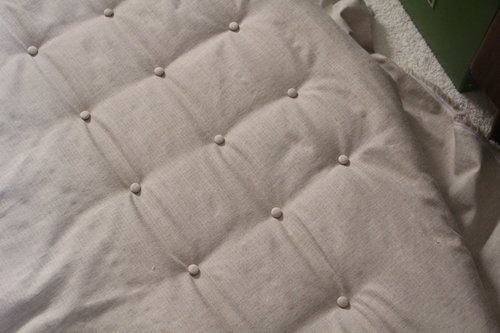
This next step was the easiest part! Inspired by the upholstered headboard created by Cre8tive Designs, I went ahead and just glued those buttons right over the staples. The next morning these guys were as secure as can be, and you really can’t tell that they’re not sewn on unless you pry your nail under one of them.
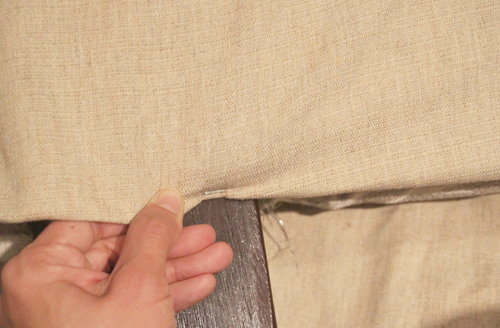
The last step was to secure the edges of the fabric to the entire headboard. To get rid of any slack I first pulled the fabric as taut as possible for smooth, rounded edges – and then stapled a few times along the opposite side (or where my pretty fabric is currently facing out). Again I found the wooden slats of the original frame to drive my staples into.

The fabric around the legs was simply trimmed, folded under and stapled. A bit of slack will allow me to pull fabric down over the existing staple so that it disappears.
I wedged my new linen headboard between the platform bed and the wall and I was finished!
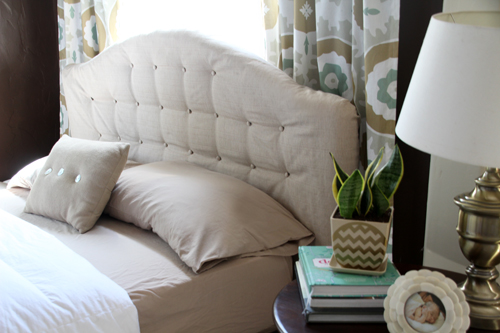
The back of the headboard is my fabric that I’m trying not to destroy, so I didn’t staple the edges as tautly and numerously as I could have to really achieve that smooth, rounded look. But that’s always an option if you’re not trying to be staple shy :).

By the way, I did a little round up of platform beds here before purchasing our West Elm frame below:
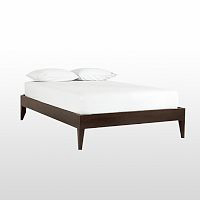
Platform beds are so versatile in that they’re pretty, relatively inexpensive and you can switch out the headboard any time you’d like!
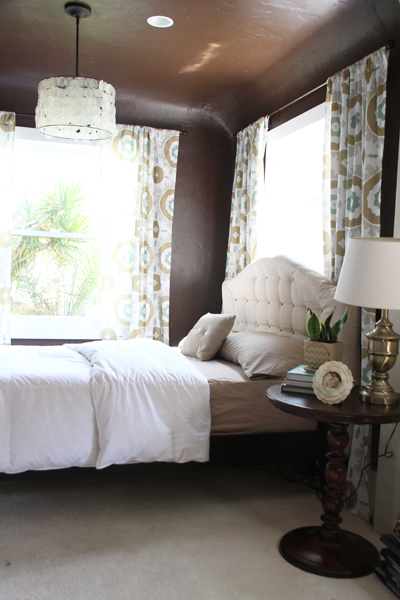
For more Office Makeover posts, check out: our floor plan, color inspiration, a new trellis print rug, stuck in a rut, designing and sewing the curtains, diy fabric bulletin board panels, handmade capiz pendant light, organizing the bookshelves, wall collage part 1, part 2, fabric bulletin board inspiration, (new) inspiration board, new lamps, wallpapering open shelves, finding the perfect credenza, new trim, dining table-to-desk, a new desk & bookshelves, installing remnant carpeting, grasscloth wallpaper, painting the office nook, finding carpet for the office, chocolate brown wall ideas, plastering progress, inspiration for a diy desk, back in action!, desking hunting for under $300, bookcases under $300,inspirational rooms, room layout options, demo part 1 & demo part 2.

- posted on March 28, 2012 Filed Under: Crafty Solutions, DIY, Favorites, Home, Our Guestroom/Office, Projects, Renovating Adventures, Tutorial Tagged With: Accessories, Bedroom, Before & After, Crafty Solutions, Decorating, DIY, Home, Office, Tan, Tutorial

Project Nursery: A Newly Updated Mobile

March 27, 2012 by Morgan

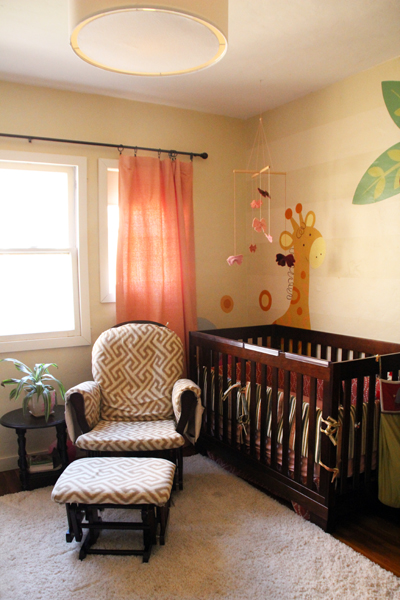
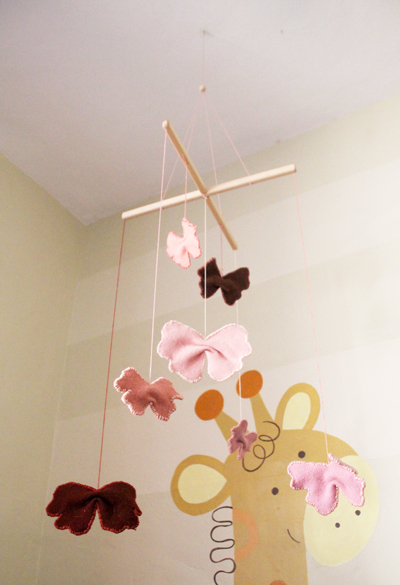
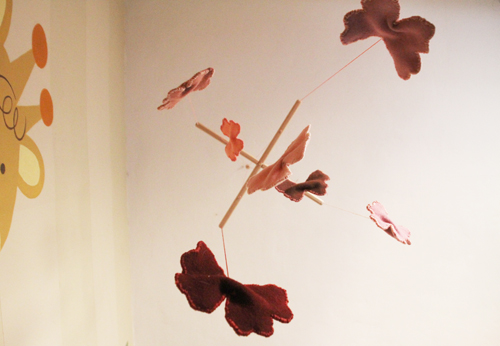
Sharing a quick update in our nursery today. I finally had some time to restring the butterflies from Liv’s felt mobile and to invest in a proper wooden hanger! My previous version worked for a while… and then decided it didn’t want to support the weight of the little floating felt butterflies any longer.

If you’re ever interested in creating your own unique mobile, I highly recommend purchasing a basic wooden frame/hanger from Seven Acre Toys as your base. I searched for quite a while to find something that would fit the look and design that I had in mind and was so happy I eventually came across their site on Etsy. They didn’t sell just the hangers at the time but after reaching out to them with my project they set up a custom listing and built the hanger to my 14″ specs with rounded edges, a wax finish and with drilling holes for hanging, all for just $10 + shipping.

I love the way it looks! And how the butterflies sway and spin casually as breezes enter the room.

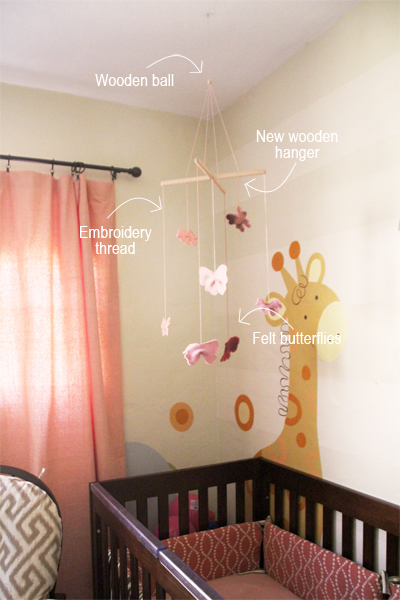
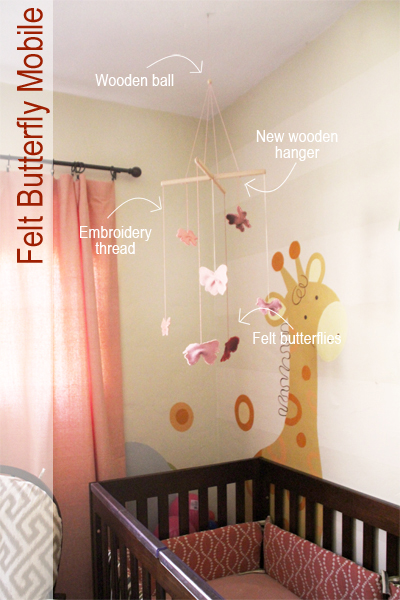
I used a small wooden ball bead from a craft store to hide the knot of the four adjoining embroidery thread supports that connect from each arm together. One of these supports continues on up to the ceiling where the entire mobile is supported by a threaded eye screw. Here’s that visual again so you can see what I mean:

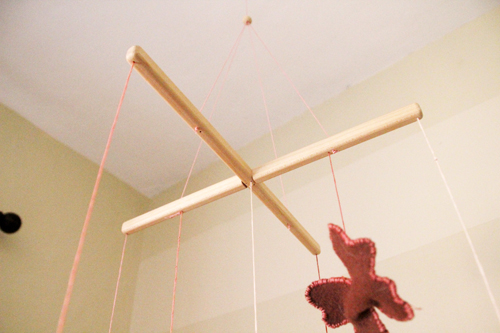
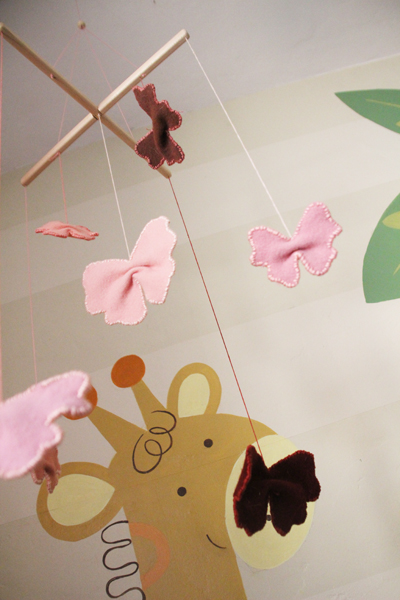
This underside image shows that each arm has three drill holes – one at the farthest end for a butterfly, two halfway between the center of the X and the end for the embroidery thread support that reaches up to that wooden bead and for a second butterfly. There’s also two holes in the very center for the butterfly that hangs down the middle, though one would have been fine. Here’s my exact listing if that’s helpful!

And from Olivia’s angle:

The butterflies are two pieces of felt from the Etsy company Three Sheep Studio (they don’t sell quite the color range I was looking for at Joann’s or Michael’s, and this felted wool is just beautiful) connected together by complimentary embroidery thread that wraps around the entire outer edge in a simple stitch. Read more about creating each of those guys here.

The made over glider has been moved to next to the crib for now while we build out Liv’s little reading nook.

Very excited to cross ‘updating Liv’s mobile’ off of my list! And wanted to be sure to share my resources with you all since they were so great to work with.

More Project Nursery posts found here: a new reading nook part 1, finished after photos, no sew fabric pennant, baby clothing art, handmade felt butterfly mobile, DIY crib skirt, basket liners part 1, part 2, the, glider makeover, recovering an ottoman, sewing lined curtains part 1, part 2, part 3, curtain fabric selection, nursery fabric board, rocking horse find, new pendant light, new sconce lighting, vintage wall art addition, changing table makeover, nursery wall striping tutorial , painted animal project, the initial inspiration board breakdown, the before pictures

- posted on March 27, 2012 Filed Under: Crafty Solutions, DIY, Home, Liv's Nursery, Projects, Renovating Adventures Tagged With: Accessories, Bedroom, Crafty Solutions, Decorating, DIY, Home, Nursery, Pink, Sewing

Master Bedroom: A New Rug + Austin, Texas!

March 26, 2012 by Morgan

Happy Monday! Hope you had a great weekend. I am just getting back from a three day visit to Austin for a girl’s weekend getaway and my first BIG weekend away from Liv. It was both challenging and wonderfully relaxing (more on the trip below).

Back at the homestead I’ve been working on finishing up the guestroom/office with a new tufted headboard and new bedding. The new guest bathroom is waiting on a few lovely pieces of Etsy art, a few necessary bath accessories and a super awesome glass shower door install before it can move forward. And my 9-5 work has been busy – very busy. We just finished up with a decent sized product release involving many deadlines, but happily all went smoothly and since overly busy = really productive = loving my job, I’m thrilled about that, too.

But excuses for the lull in posting aside, I’m enjoying warming up our little abode (which after 3.5 years the bedroom is in decorating limbo, err, progression) with a few new purchases and some wonderful inspiration! One is a new rug.

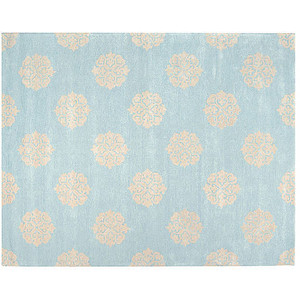
Isn’t it pretty?

While our bedroom usually isn’t on display, it’s desperately in need of a mini makeover that will bring it back to the serene, restful space that is its purpose. Because it’s usually seen by few other than our family, the room has been low on the list for attention. In fact, when we had finally painted it a non-exciting tan, found a new task lamp for reading at night and scored a sweet thrift store chair find, I put the room to rest entirely. Waiting to be inspired at some forlorn point in the future.

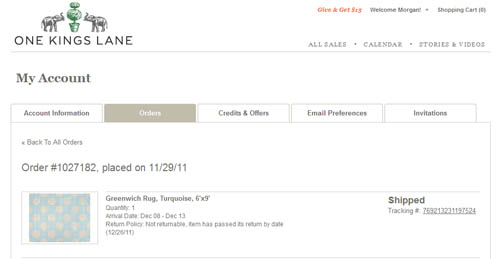
But! Imagine my surprise when I came across this stunner on One Kings Lane! And then despite my horrible history of indecisiveness, pulled the trigger in buying it! I’m awful at making decisions about rugs and curtains and bedspreads and fabrics – I wait until I’m sure I’ve made the absolute right decision (is that possible?) and that usually means that no decision is made at all.

After months (maybe a year) of keeping an eye out for a new rug for the master bedroom though, I have found a piece that I’m quite smitten with. Look at that ice blue! And those giant oatmeal-colored medallions.

I’m not a huge Daily Deals shopper for big purchases but I have made a few. My tips for these types of investments are:

1. Keep a list of items you’re on the look out for + an inspiration board of what you imagine those items looking like (to make sure they’ll match your current style/decor). Add measurements of the desired find (a dresser or rug, for example) to the list so that you’re not persuaded by the wrong deal (70% off of a too short $1000 table is still $300 hard earned dollars, after all).
2. Utilize coupons and referral credits to bring a big discount down to an even better deal.
3. Have an escape route. Double check the return policy (shipping back a rug will set you back $20-$60 but that’s better than being out $400) or find an alternative for a big ticket purchase should you not like it when it arrives if it’s not returnable (what could this go for on Craigslist or eBay? Could I use it in a different room?).

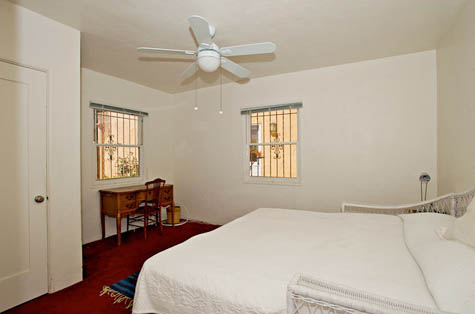
Back to the bedroom… here’s the before we moved in photo from the realtor:

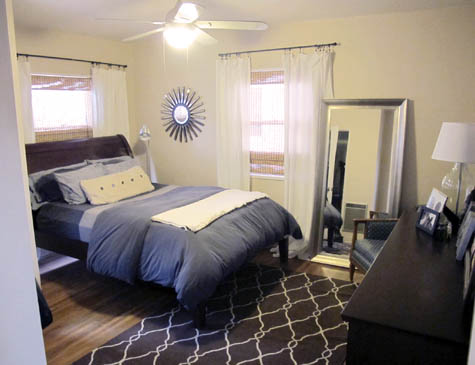
We originally configured our bed in much the same way, but found that we had more space when we swapped it for the other wall:

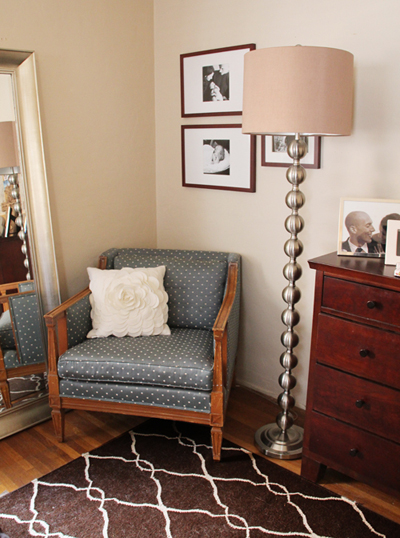
And that cool chair? She’s on the same wall as the dresser, back in the corner there. The tan below is much more realistic to the tan in the current room, not so much the above yellow-tan.

I’m a little hesitant on matching the blue of the chair to the rug, but it’s usually covered in Kevin’s clothes so I guess that’s not the end of the world :).

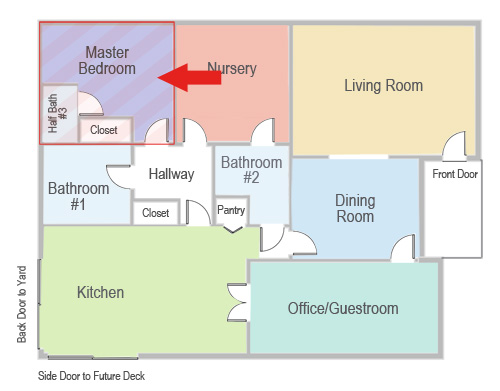
For a bird’s eye view, here’s the room in the back right section of the house. We have plans to knock out that Bathroom #1, Half Bath #3 and Closet to create a bigger master suite and bathroom combination in the future, but for now the room does have a few interesting chunks taken out of it making furniture placement creative.

It was actually about a year and a half ago that I was on the search for the brown rug that’s currently in the room. It’s a pretty neat rug and if you’re in the market for a basic geometric print I highly recommend. The only problem for us is that the rug is a Dhurrie style and for some reason Bodie’s white dog hair really gets embedded in the fibers. We’ve found that flat weave rugs are just not for shedding dogs and that instead a plush rug is much easier to vacuum.

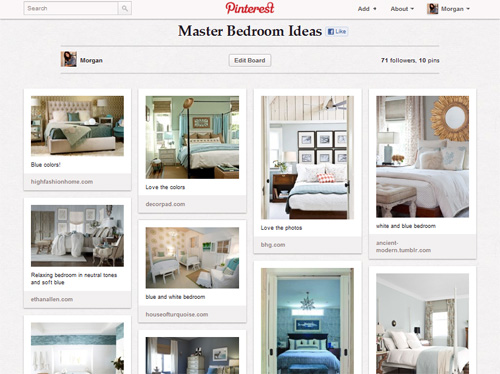
With this new rug in mind, it’s time to add just a few more pieces to the space! You can check out all of my growing inspiration over on my master bedroom idea’s board on Pinterest.

*************************

PS Austonians, I had such a wonderful time in your beautiful city! I cashed in frequent flyer points and met up with college roommates for our annual reunion (to a city in the US that we’re anxious to explore) to sight see, shop, visit places of historic significance, eat and most importantly to catch up on the craziness that is our lives over cups of coffee or cupcakes.

Here are a few of our Austin favorites:

We toured the capitol building on Friday afternoon, visited the Rodeo and local county fair on Friday night, shopped South Congress Ave on Saturday, walked Lady Bird trail and 2nd Avenue on Sunday, and line danced at a local pub two nights in a row!

When it came to exploring the local cuisine there was no shortage of finger licken’ BBQ in the form of Salt Licks or food trucks. As far as shopping goes, I highly recommend any and all boutiques/cowboy boot shops around that most wonderful treasure called Uncommon Goods (a well-edited version of the Pasadena Rose Bowl Flea Market, if you’re familiar) and a chunk of 2nd Ave that’s near the river.

PS Kevin had a great daddy daughter weekend – I was kept well informed with little updates of them playing at Legoland, on the beach or while golfing. I loved my surprise photos and videos!

Related Posts Plugin for WordPress, Blogger...

- posted on March 26, 2012 Filed Under: Family & Friends, Our Master Bedroom, Renovating Adventures

  • « Previous Page
  • 1
  • …
  • 227
  • 228
  • 229
  • 230
  • 231
  • …
  • 438
  • Next Page »

Welcome to my little slice of the web where I practice finding family, career, homemade & inspired balance on a daily basis. This is where I capture my happy moments, and I'm honored that you're here to join us. Home + creativity + good eats + journaling + life as a working mom. Read more...

  • Email
  • Facebook
  • Google+
  • Instagram
  • Pinterest
  • RSS
  • StumbleUpon
  • Twitter

Search

Categories

Craft Projects CategoryCrafty Projects Good Eats & Recipes CategoryGood Eats Entertaining Ideas CategoryEntertaining Ideas Decorating Projects CategoryDecorating Style Boards CategoryStyle Boards Everything Holiday CategoryHolidays

Daily Dose

Favorite Posts

Dog Days of Summer: Craft Kits for Kids

Summer Craft Kits for Kids

August is a slower month for our family. Preschool summer school is out, dance lessons are taking a brief break for the month, our family vacation is

Our Double Stroller: Mountain Buggy +One Review

A Mountain Buggy +One Double Stroller Review

I'll preface by saying that this is not a sponsored review - we've found an awesome double stroller and we love it! Our Mountain Buggy + One has served

Wardrobe Style Board: A Work-From-Home Uniform

Wardrobe Style Board: A Stay-At-Home Mom Uniform | Cropped Light Jeans, Tan Sven Clogs, White Madewell V-Neck T-Shirt, Colorful Necklace, Gold Earrings | PepperDesignBlog.com

tan clogs | pocket tee | light jeans | gold disc earrings | colorful necklace It's not uncommon for people to come and go from our house all day long,

Happy 2nd Birthday, Taylor Rose!

Happy 2nd Birthday, Taylor Rose! An Infographic for My Girl | PepperDesignBlog.com

This weekend Taylor turned two. Taylor is such a bright, wonderful light in our lives. She is our funny, spunky little daughter that will do just about

How to Listen to Audiobooks on OverDrive

Intro to Audiobooks on OverDrive Public Library | PepperDesignBlog.com

Liv has developed a big interest in audiobooks as of late. One of my favorite ways for her to spend her 'quiet time' while Taylor and Marley nap is for her

Pistachio, Caramel & Sea Salt Chocolate Bars

Pistachio, Caramel & Sea Salt | Father's Day | PepperDesignBlog.com

Father's Day is not so far away, so here's an easy gift idea that can be made in advance or (literally) the night before. Homemade chocolate bars can be

Liv & Taylor-isms

Liv & Taylor-isms | Funny Things Kids Do & Say | PepperDesignBlog.com

Sometimes I capture something so funny/adorable/sweet that I can’t help but make note of it. Because Taylor is now expressing herself in full sentences, I

30 Things That I’ve Learned By 30

30 Things I've Learned by the Age of 30 | PepperDesignBlog.com

Today is my 30th birthday. I don't feel much older, but hearing that number roll out of my mouth feels as though I'm closing on a big chapter in my

Featured

Featured
VRBO San Diego Flying Bridge Vacation Rental cool toys for kids

Favorite Topics

Welcome to my little slice of the web where I practice finding family, career, homemade & inspired balance on a daily basis. This is where I capture my happy moments, and I'm honored that you're here to join us. Home + creativity + good eats + journaling. Read More…

  • Email
  • Google+
  • Instagram
  • Pinterest
  • RSS
  • StumbleUpon
  • Twitter
May 2025
MTWTFSS
« Feb  
 1234
567891011
12131415161718
19202122232425
262728293031 

Copyright © 2025 · Foodie Pro Theme by Shay Bocks · Built on the Genesis Framework · Powered by WordPress