Pepper Design Blog

A Little of This & That... Renovating, Decorating, DIY Projects & Family

pepper_header_flower

Building a Bathroom: Time for Color

February 9, 2012 by Morgan

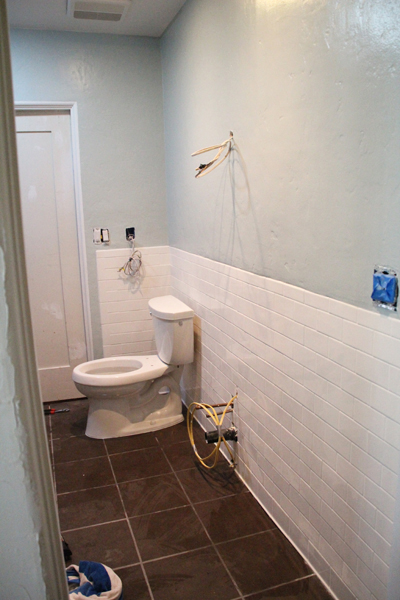
Happy to report that the bathroom is painted! It’s hard to convey in these photos, but the color of the paint is a saturated blue/green named ‘Sea Salt Blue’ by Valspar. At different times of the day it almost takes on a grey tint (similar to below) but is most often that calming, soothing blue (with a tinge of green) that was just what I was on the hunt for.
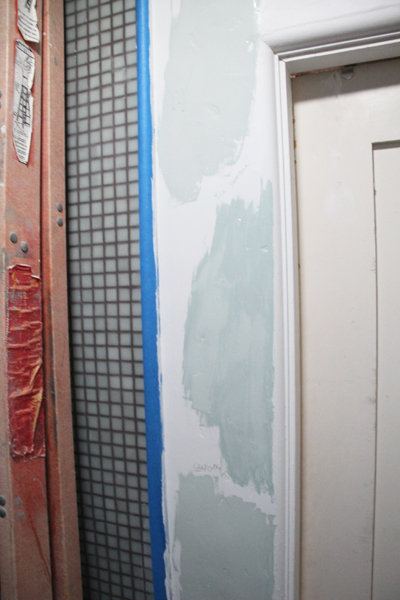
We tried out four variations of blueish/greens. Actually, nearly all four read too green on our walls (and yet they look so blue in these photos!) in the light of the bathroom. The Chosen One is pointed out below.
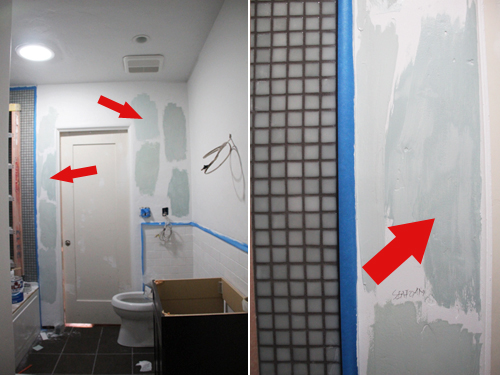
Usually I’m a big fan of adding a swatch to each wall to get an idea of what the color will look like when sunlight hits different walls at different times of the day, but because we have no windows (except the new skylight!) it was more of a concern that the color compliment that awesome recycled tile hiding in the shower nook.
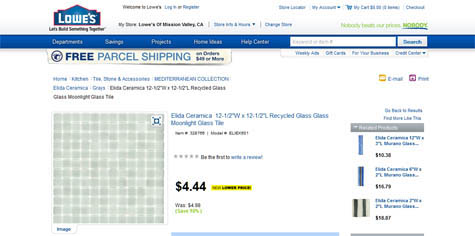
See how the tile looks greener here? We could have totally gone green in the room and it would have looked just as great. This tile is tricky like that…
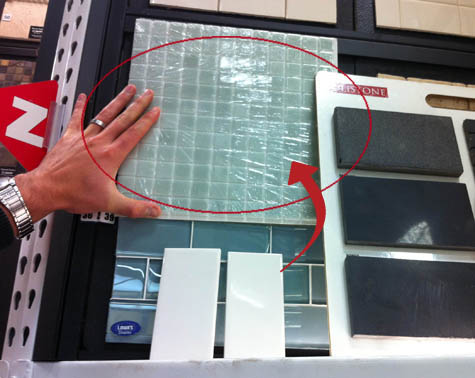
But as you can see when the paint colors are up right against the tile it matches our blue options really well:
We opted for Valspar Signature’s Hi-DEF paint in a low VOC version (for the babe). Their new line offers enhanced color accuracy, meaning the color you select on the chip will match the color on the wall and (if we had old paint on the walls) claims to cover your old paint faster in less coats, saving both time and money. The paint is also highly durable and has superior fade resistance, meaning it will last even in high traffic rooms like our bathroom. You can learn more about its benefits over here.

Wanna check out a nifty color sample tool? Try this one here (I’m a huge fan of the Ideas Library). I tested a few different blues in the Color Selector tool and it made searching for specific shades of specific colors so much easier than trying to cross your eyes and compare paint chips at arms length in the florescent lights of the store. Since I was going for a blueish-green, I chose a color palette that boasted of coastal and ocean shades and then just slid the little highlighter box from grey to green to blue until I found a few that I loved. If something was too blue I moved one box back to the green or vice versa.
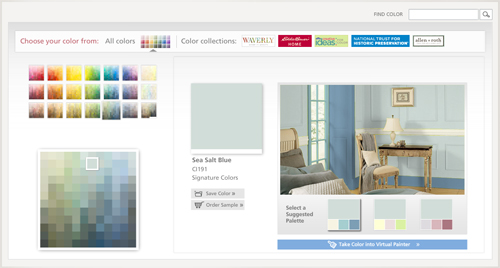
You can even upload your own photo, here’s our unfinished wall waiting for plaster and paint:
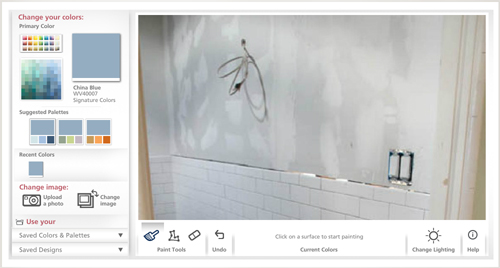
Next I selected a color from my palette:
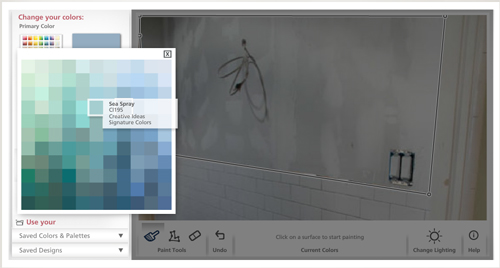
And then I boxed off my space using the little tool provided and ‘painted’ in the color:
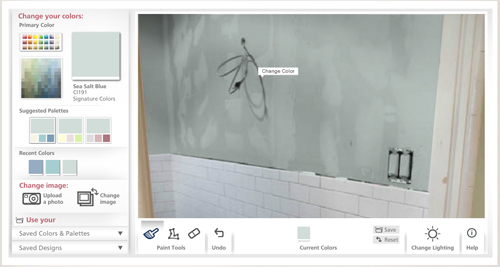
We didn’t end up choosing Sea Spray (too teal) but here’s the Sea Salt Blue on the actual wall:
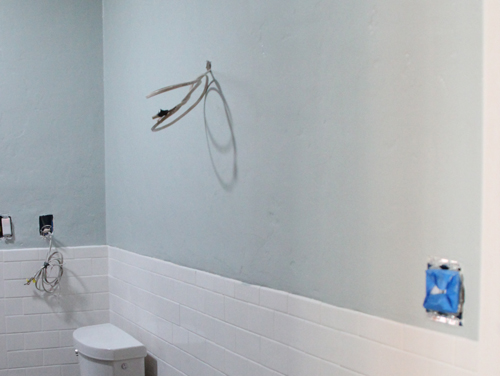
Of course you don’t have to upload a pic, you can always play around with a selection of rooms they have ready to go, too:

Anyway, it’s one more cool tool to file away in the home improvement toolbox for making big decisions like settling on a room color. And it might just save us some serious dough in the long run if it cuts back my paint sample expenses from 10 mini cans a room to just two or three :).

PS this is how we were able to funnel a little bit of that awesome natural daylight into the space. It is definitely the DIY of skylights!
I love a freshly painted room! Now we are one step closer to a finished bath.

As shown above, the toilet no longer resides in the living room… but as one reader put it, it sure would have made potty training easier!

More building a bathroom posts: vanity wars, subway tile installation,  floor tiles and toe warmers, a quick catch-up on our work on the bathroom in 2011, tiling with recycled glass, choosing and installing a bathtub, demo time!, a peak at the layout, initial inspiration, partnering with Lowe’s

We partnered with Lowe’s on our bathroom remodel and received some product at no cost and some product at a discount. The ideas and stories shared in this post are entirely our own.

- posted on February 9, 2012 Filed Under: Construction, DIY, Our Guest Bathroom, Project Lowe's, Renovating Adventures, Sponsored Post Tagged With: Blue, Construction, DIY, Home

Customized Valentine’s Day Treat Bags

February 7, 2012 by Morgan

I have a massive stationary collection (I heart beautifully made cards) and was rifling through my stash the other day to write thank you notes for Liv’s first birthday when I came across a handful of cards that I had purchased for envelope purposes only. I am often short on envelopes and sometimes buy the super cheap cards just for extras!

These cards have a sweet pattern that remind me a little of a playful Valentine’s day note – and an idea was born.

After hunting around the house I was happy to find that I had nearly everything I needed on hand for my Valentine’s Day treat bags. Though I did pick up those two small bags of salt water taffy for $1 at Target.

**************************************************************

Custom Valentine’s Day Treat Bags
m

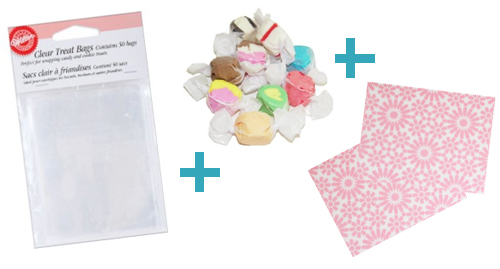
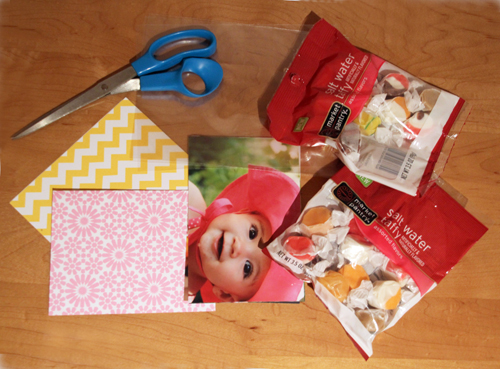
Materials: cellophane treat bags (available at Michaels or on Amazon), note cards, candy, photos, scissors and stapler

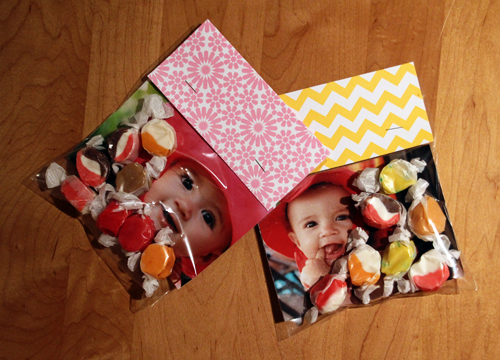
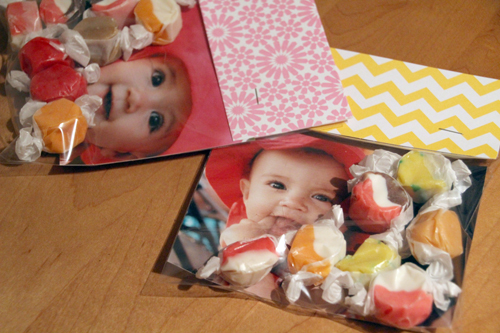
To make the treat bags, I filled each plastic sack with salt water taffy and a photo of Liv trimmed to size (I keep a stack of pictures on hand from Costco to send to grandparents and great grandparents when they’re needing a Liv fix). My cellophane bags were just the right size to match up with my 4×6 note cards, but if you’re buying all of your materials from scratch that’s something to keep in mind (you can always trip down your note cards but you don’t want the bag to be wider than the cards).

The notecards have the perfect fold for the top of your treat bags, I simply chopped mine in half length-wise (so that the card was shorter near the fold) and sandwiched the treat bag between each side of the card. Two staples held my finished bag in place.

An alternative to note cards would be scrapbooking paper with a bone folder for a professional looking fold (this tool scores and creases your paper). Or for a cheaper option just fold that sucker in half and press between heavy books so that the fold stays put.

These would be great for family, but for a kid-friendly option I would fill the baggie with animal crackers and include a fun illustration instead of a photo, or perhaps a few crayons and a coloring sheet. Cookies and wrapped candies are probably the way to go since any candy prone to melting would smudge up the photo and transfer ink to the candy. Fun stamps or stickers might make for a neat note at the top of the treat bag, too.

I can see reusing this ideas for party favor bags somewhere down the line… PS I can’t believe it’s already the middle of February!

More Valentine’s Day ideas right here.

- posted on February 7, 2012 Filed Under: Crafty Solutions, DIY, Family & Friends, Holidays, Parties & Entertaining, Projects, Tutorial, Valentine's Day Tagged With: Birthday, Crafty Solutions, Decorating, Desserts, DIY, Kid's Party, Paper Crafts, Parties & Entertaining, Party Favors, Patterns & Color, Pink, Red, Tutorial, Valentine's Day, Yellow

Bedtime Stories Baby Shower Part 3: Temporary Cake Stands

February 6, 2012 by Morgan

I have two more posts to share with you from the Bedtime Stories baby shower (part 1 & part 2) that I threw for our friend Diana back in November (ps, Baby Noah is here! And as adorable as can be).

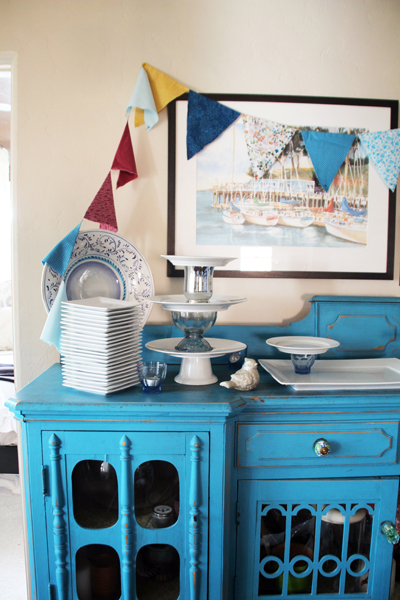
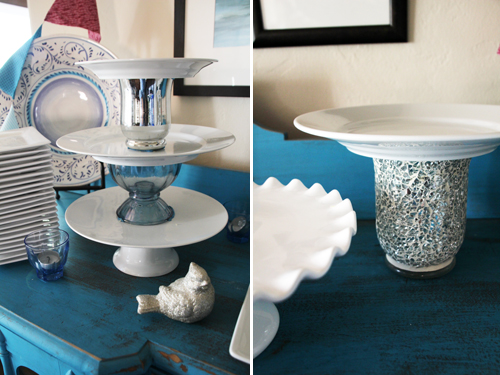
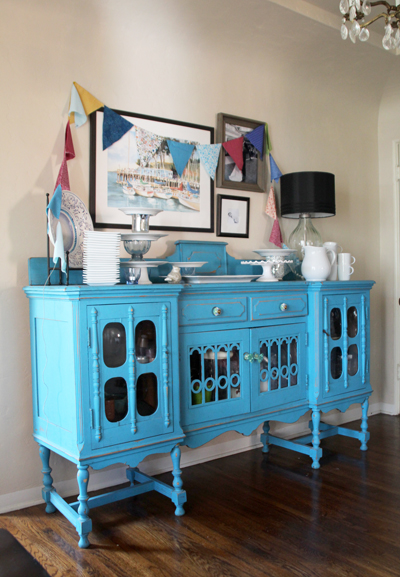
When putting together the dessert buffet that was sort of the focal point of the dining room, I wanted to create a few tiered cake stands that would add a little height and variety. In the past I’ve covered boxes or stacks of books with fabric so that certain platters would be higher than others, but this time around I came up with a temporary adhesive solution so that I could turn a few of my favorite plates, vases and candle holders into cake stands without any permanent damage (I’ve also gone the super glue route with thrift store finds).

This is a trick I will use time and again! It’s so easy.

**************************************************************************************

Temporary Cake Stands
a

Materials: any sort of glassware, platter, plate, dish or vase, adhesive putty

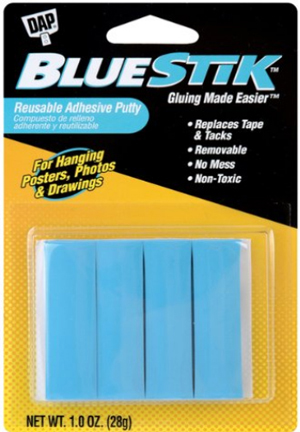
My trick to getting a fairly good stick with stacking dishware is by using an adhesive putty like this one. It’s available at nearly all craft and home improvement stores and the brand isn’t important, but you want to look for a product that claims a strong but removable stick.

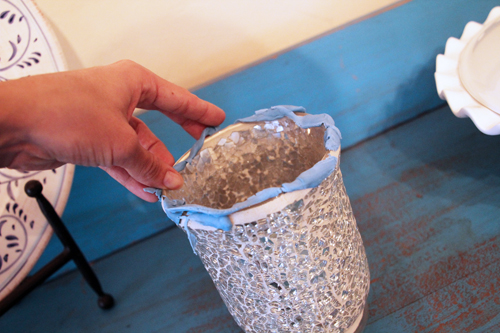
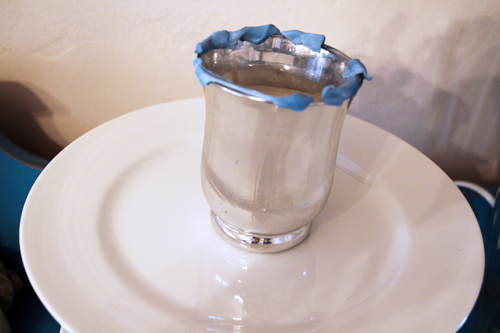
The process of assembling is pretty simple. I applied a layer of the adhesive to the edge of the glassware and plates making sure to cover as much surface space as possible.

Since I was covering an area of the vases/plates that wouldn’t be seen, I applied a thick layer:

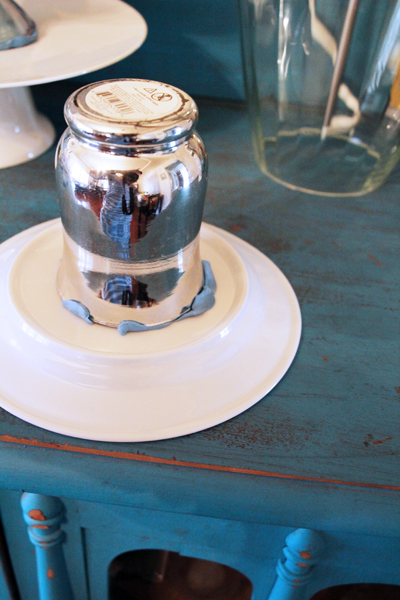
Then I turned the vase/candlestick/dish over and pressed it into the center of my plate or platter for at least 30 seconds. You could use a utility knife to clean up any edges if you wanted a cleaner look.

Using this technique a made a few different tiered stands for our selection of desserts.

At the end of the shower I simply pulled off all of the putty and washed each dish. No harm done!

**************************************************************************************

Related Posts Plugin for WordPress, Blogger...

- posted on February 6, 2012 Filed Under: Craft Projects, Crafty Solutions, DIY, Food Tips & Tricks, Parties & Entertaining, Projects, Tutorial Tagged With: Baby Shower, Birthday, Blue, Crafty Solutions, Decorating, DIY, Kid's Party, Parties & Entertaining, Tutorial, Wedding

  • « Previous Page
  • 1
  • …
  • 235
  • 236
  • 237
  • 238
  • 239
  • …
  • 438
  • Next Page »

Welcome to my little slice of the web where I practice finding family, career, homemade & inspired balance on a daily basis. This is where I capture my happy moments, and I'm honored that you're here to join us. Home + creativity + good eats + journaling + life as a working mom. Read more...

  • Email
  • Facebook
  • Google+
  • Instagram
  • Pinterest
  • RSS
  • StumbleUpon
  • Twitter

Search

Categories

Craft Projects CategoryCrafty Projects Good Eats & Recipes CategoryGood Eats Entertaining Ideas CategoryEntertaining Ideas Decorating Projects CategoryDecorating Style Boards CategoryStyle Boards Everything Holiday CategoryHolidays

Daily Dose

Favorite Posts

Dog Days of Summer: Craft Kits for Kids

Summer Craft Kits for Kids

August is a slower month for our family. Preschool summer school is out, dance lessons are taking a brief break for the month, our family vacation is

Our Double Stroller: Mountain Buggy +One Review

A Mountain Buggy +One Double Stroller Review

I'll preface by saying that this is not a sponsored review - we've found an awesome double stroller and we love it! Our Mountain Buggy + One has served

Wardrobe Style Board: A Work-From-Home Uniform

Wardrobe Style Board: A Stay-At-Home Mom Uniform | Cropped Light Jeans, Tan Sven Clogs, White Madewell V-Neck T-Shirt, Colorful Necklace, Gold Earrings | PepperDesignBlog.com

tan clogs | pocket tee | light jeans | gold disc earrings | colorful necklace It's not uncommon for people to come and go from our house all day long,

Happy 2nd Birthday, Taylor Rose!

Happy 2nd Birthday, Taylor Rose! An Infographic for My Girl | PepperDesignBlog.com

This weekend Taylor turned two. Taylor is such a bright, wonderful light in our lives. She is our funny, spunky little daughter that will do just about

How to Listen to Audiobooks on OverDrive

Intro to Audiobooks on OverDrive Public Library | PepperDesignBlog.com

Liv has developed a big interest in audiobooks as of late. One of my favorite ways for her to spend her 'quiet time' while Taylor and Marley nap is for her

Pistachio, Caramel & Sea Salt Chocolate Bars

Pistachio, Caramel & Sea Salt | Father's Day | PepperDesignBlog.com

Father's Day is not so far away, so here's an easy gift idea that can be made in advance or (literally) the night before. Homemade chocolate bars can be

Liv & Taylor-isms

Liv & Taylor-isms | Funny Things Kids Do & Say | PepperDesignBlog.com

Sometimes I capture something so funny/adorable/sweet that I can’t help but make note of it. Because Taylor is now expressing herself in full sentences, I

30 Things That I’ve Learned By 30

30 Things I've Learned by the Age of 30 | PepperDesignBlog.com

Today is my 30th birthday. I don't feel much older, but hearing that number roll out of my mouth feels as though I'm closing on a big chapter in my

Featured

Featured
VRBO San Diego Flying Bridge Vacation Rental cool toys for kids

Favorite Topics

Welcome to my little slice of the web where I practice finding family, career, homemade & inspired balance on a daily basis. This is where I capture my happy moments, and I'm honored that you're here to join us. Home + creativity + good eats + journaling. Read More…

  • Email
  • Google+
  • Instagram
  • Pinterest
  • RSS
  • StumbleUpon
  • Twitter
May 2025
MTWTFSS
« Feb  
 1234
567891011
12131415161718
19202122232425
262728293031 

Copyright © 2025 · Foodie Pro Theme by Shay Bocks · Built on the Genesis Framework · Powered by WordPress