
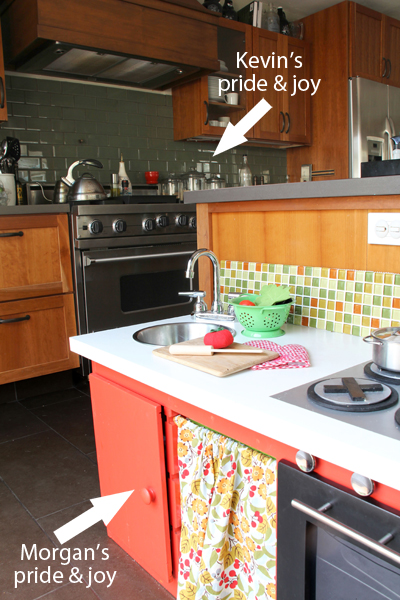
Back as promised to share some of the details of Liv’s new kitchen!
I might be as excited about this project as she is (maybe even more so) because it was a bit of a labor of love. As Kevin comments to everyone that checks it out “and it took twice as long to build the little version than it did to build the big version”. Smirk, but true, true ;). Mine may not be as practical or useful or anywhere near the size of our actual kitchen (which Kev really did whip up in about three months), but I’m still pretty smitten with it.
It all started when I began to collect little bits of mini kitchen inspiration way back when Liv was waaaay too small to even know what a kitchen was. I just knew that one day I wanted to build one. It was that inner kid imagination – the channeling of building mini anything (which I did all the time as a wee one) to be as realistic as possible. Did you ever build your Puppy Surprise stuffies a pretend house in your desk at school? Every girl in my kindergarten class would be raising her hand. Or how about a lair for your GigaPet? Or the perfect dollhouse? Those were the days.
My version of an adult dollhouse (and I guess that makes Liv my little doll):
Inspiration in hand, I thought I might try and convert an older media unit into a cool kitchen. Or perhaps a left over set of garage/kitchen cabinets. Anything rescued and transformed from a thrift store or the Habitat for Humanity Re-Store would be awesome. But since I had a very specific spot in mind for the little kitchen (the end of our island in our kitchen), measurements never quite worked out. And the prices weren’t super either.
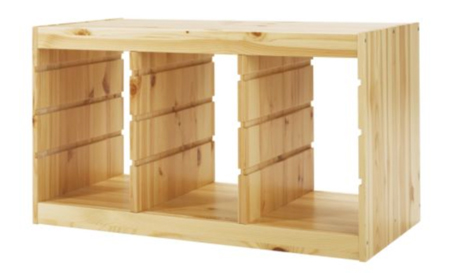
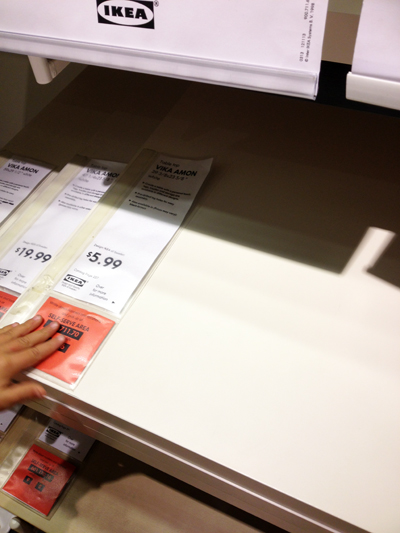
Enter a little trip to Ikea for browsing and the TROFAST toy storage unit which checked out in price and size. The price for the pine version was a little on the heavy side, while the white particle board version was more my budget. But I was worried about applying paint to the particle board (and it lasting a while without chipping) and so decided to play it safe with the pine.
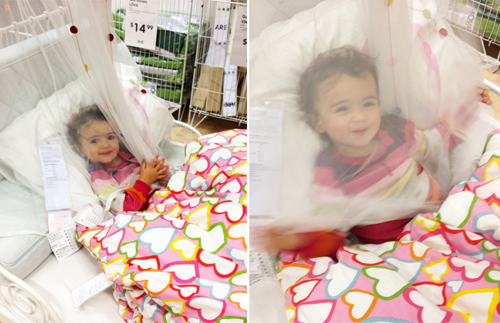
(We have fun at Ikea.)
Assembling was tons of fun in that special Ikea way (har, har). Here I am at Christmas time tackling this beast. As with most Ikea products, I’m pretty sure I had to assemble twice and disassemble once before it was put together correctly :).

When choosing a color, an orangey-red kept coming back to me again and again. I finally color matched a pomegranate illustration from one of my favorite Rifle calendars that hung in the kitchen at the time (but with actual paint and not spray paint, wouldn’t that have been nifty?).
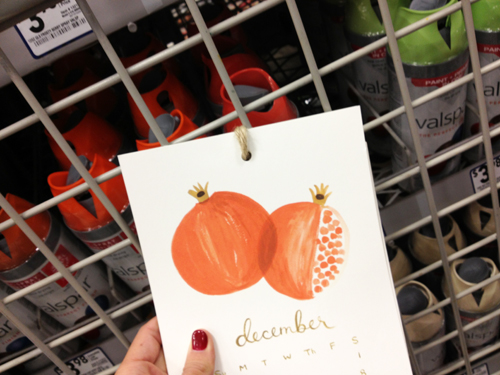
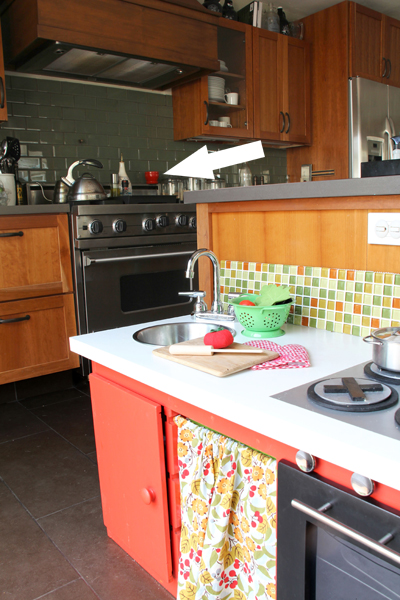
That burnt orange is definitely a favorite accent of mine in our mostly green kitchen. It pops up here and there.
The counter is from the VIKA desk collection at Ikea and fit the storage unit lengthwise perfectly. No chopping required. We did have to cut it down about 3″ or so in the width but for $5.99 you just can’t beat it. Five months into life it’s experiencing some wear and tear which is a bummer (but what can you expect from particle board).
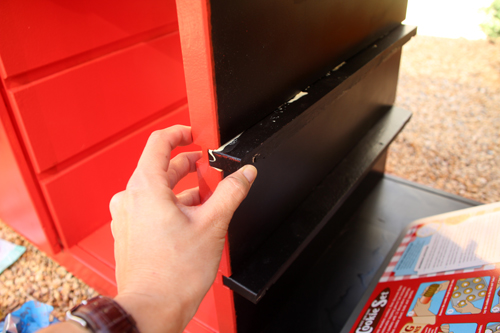
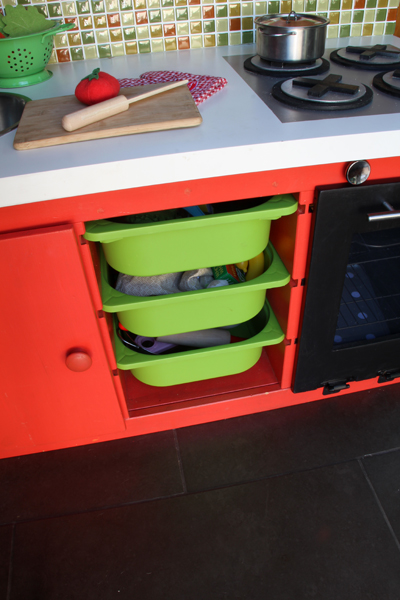
The TROFAST shelves (which were made to fit the little slots of the toy storage unit) covered the front of each compartment of the toy unit near perfectly so we converted one into a door that opened like a cabinet and one that opened like an oven door with two hinges each.

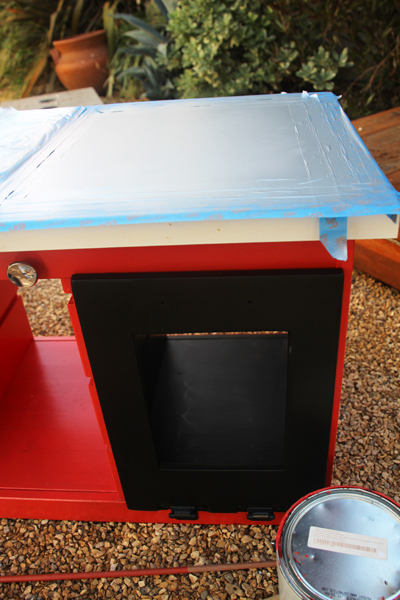
The oven door itself was cut to add a little window so you could see inside of the oven, then we lined it with clear plastic from an Ikea frame.
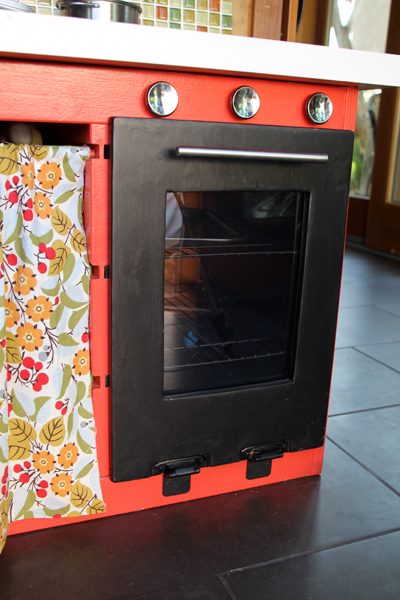
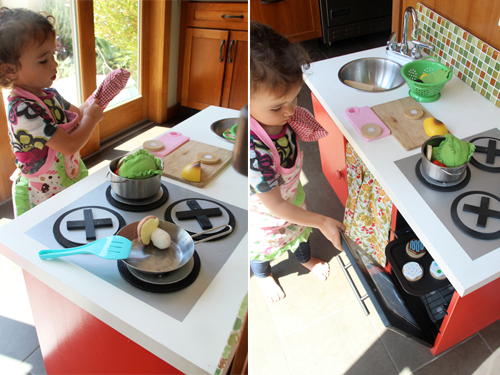
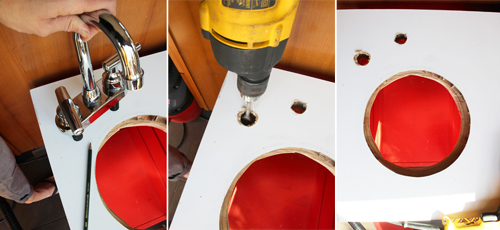
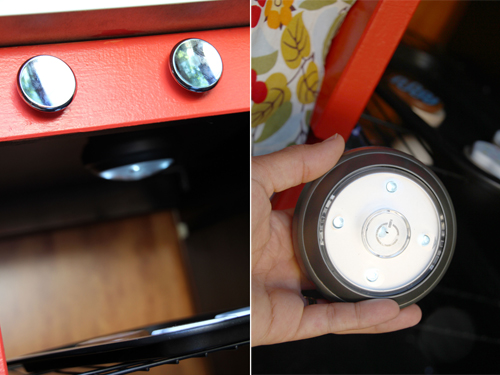
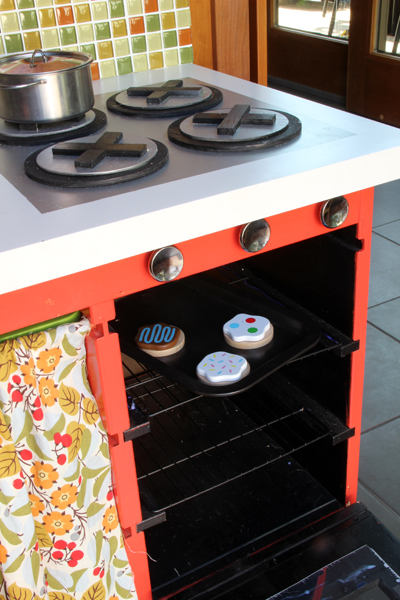
We drilled and installed three little silver knobs (from the hardware store) so that you could ‘turn on’ the stove.
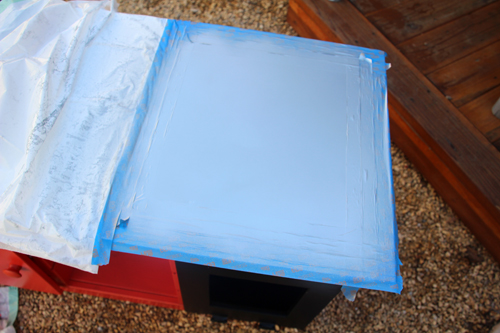
Speaking of stove, creating the range was as simple as taping off a square on the top of the countertop and spray painting it silver. I’m a big fan of using garbage bags as mini drop cloths for projects just like these, they’re easy to reuse for an entire project but you can throw them away (with all of your empty paint cans and trash in them) when you’re done. I’ve taped off the entire left hand side of the counter with a trash bag here.
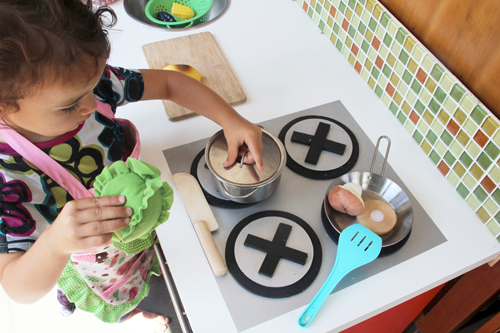
The Junkman on Etsy is my go-to guy for unusual wood cuts and he came through for me with two sets of plywood circles, one 4 1/2″ and one 5 1/2″. I spray painted the larger circle black and topped it with a silver spray painted smaller circle, and then a small wooden X shape in black again to complete the burners.
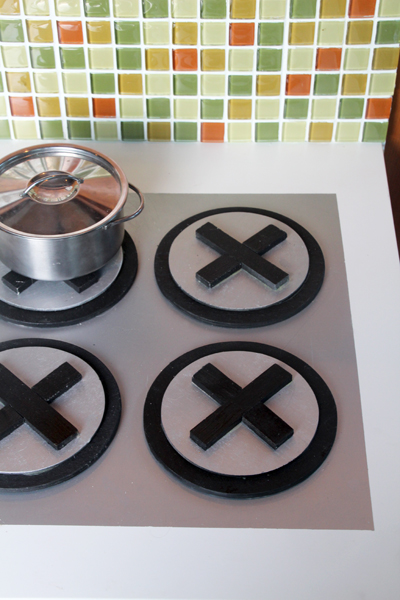
But that was actually my May stove top fix. I actually attempted to use furniture moving discs (from Joann’s) initially:

Peeling paint + pretend food consumption = bad. Bummer. The newer solution is 10x better! and cuter:
I stole the sink idea from most play kitchen builders that have gone before me: measure a metal mixing bowl (with a lip) to size, cut out to fit in your countertop. The lip on the metal bowl should keep it in place.
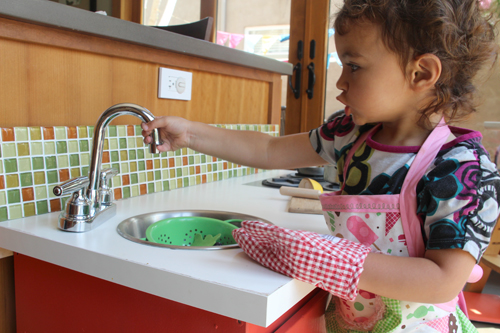
I found the bar sink on either Amazon or eBay, can’t recall (but both are great for tracking one down) for $15 ish.
Let’s talk about the oven for just a second. I painted the inside of the third compartment of the TROFAST unit black and we cut down one of the TROFAST shelves into four skinny pieces to hold the oven racks.
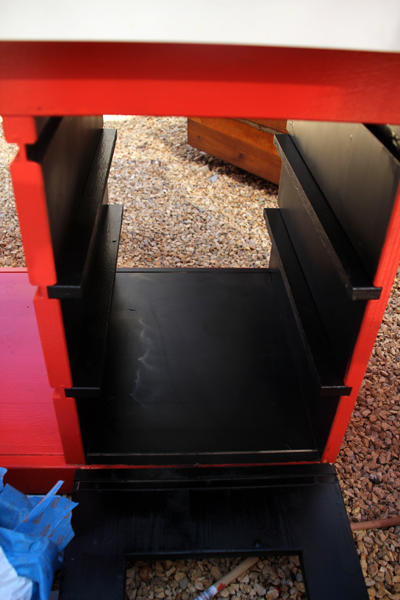
A little wood glue (be sure wipe off the excess that squeezes out) ensures they’re stuck in place.
I added a little push light to the inside of the oven just for fun, though I’m sure it’s going to run out of batteries soon since Liv loves to keep it on all. of. the. time.
The oven racks themselves are from a two-tiered cooling rack that I found on Amazon and cut the legs off of, I then glued (with a glue gun) the racks directly to the little black shelves.
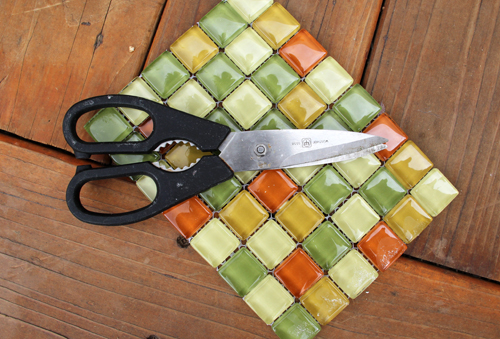
The backsplash was a recent addition. As the little kitchen sat in its spot, I kept picturing something that would give the cabinet unit a little height and a fun backsplash kept coming to mind. I trolled eBay for a bit and found this lovely green, mustard yellow and orange 1″ tile and was able to talk the seller down to a pretty sweet price (I can’t really imagine this tile in someone’s modern bathroom or kitchen… but it’s perfect for my little one!).
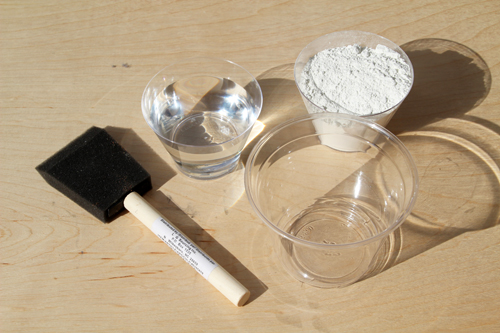
Using a piece of plywood cut to size as my base, I adhered, grouted and sponged my tile into place.
We had left over grout around the house but if you’re not wanting to buy a bulk bag from a home improvement store most craft stores sell small bags for mosaic projects. A little water plus a little grout plus a sponge brush (my favorite tool for small projects and if you don’t have actual tile tools lying around).
Use thin set (or even glue ;)) to attach tile (with mesh backing) to plywood. Apply a generous amount of grout to your tile surface while also really pushing that grout into the cracks between your tile (watch it as it begins to dry so that you can catch cracks in your grout and add a little more).
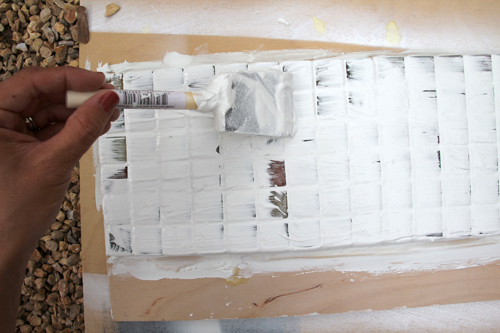
Use fingers when necessary.
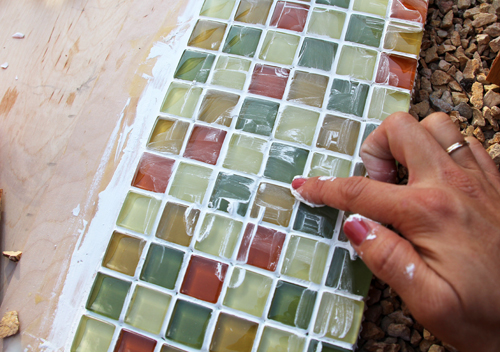
Then begin to slowly wipe away the grout from the tops of the tile pieces while the grout is still wet. A sponge, towel or even paper towels can be great for this.

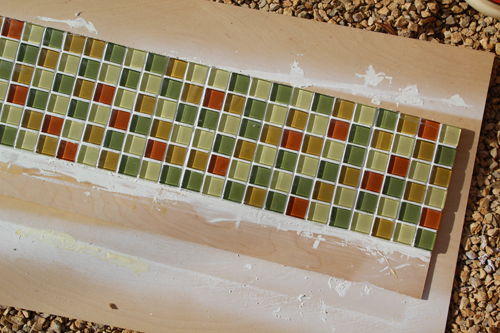
I then added the backing to the back of the kitchen (not the countertop, which is particle board, but the actual pine unit):
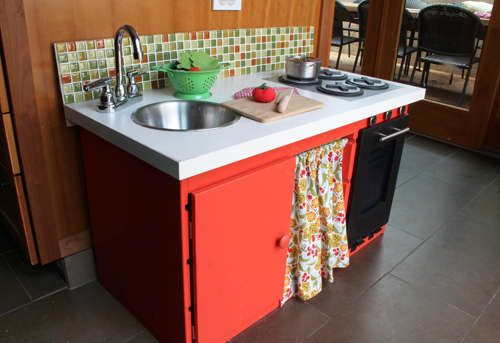
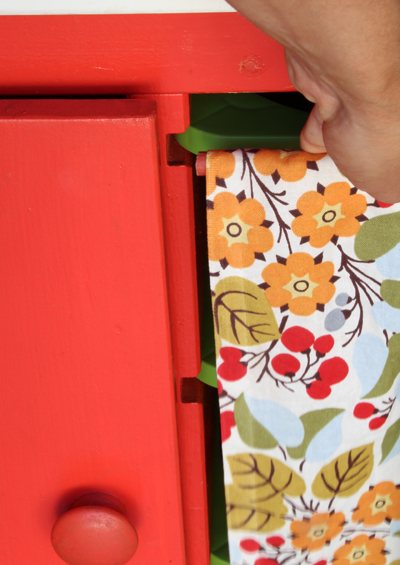
Last but not least are the TROFAST storage bins and the dowel + curtain that we assembled with iron-on hem tape for the door to the middle unit:
The cute floral fabric is a remnant of mine from my fabric bin, but I’m almost positive it’s from Joann’s. The dowel worked out well because it fit perfectly into the top notch of the toy unit (the notch for those green bins) that was already built into place.
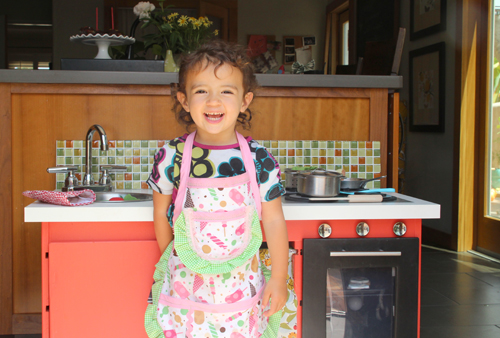
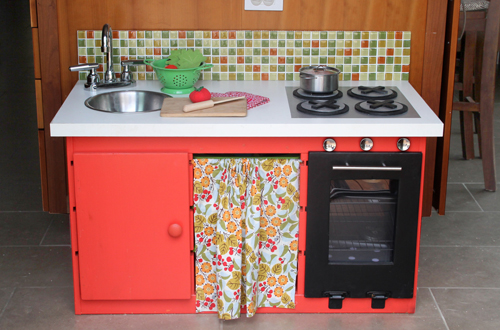
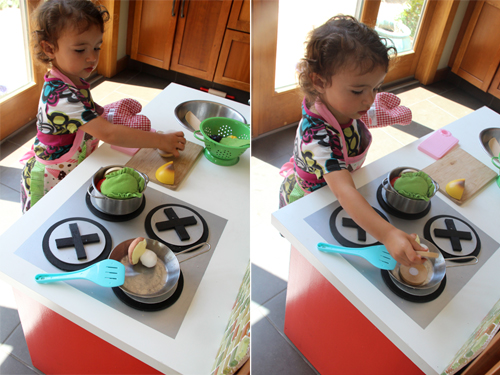
Finished!
The only missing component? One happy little chef:
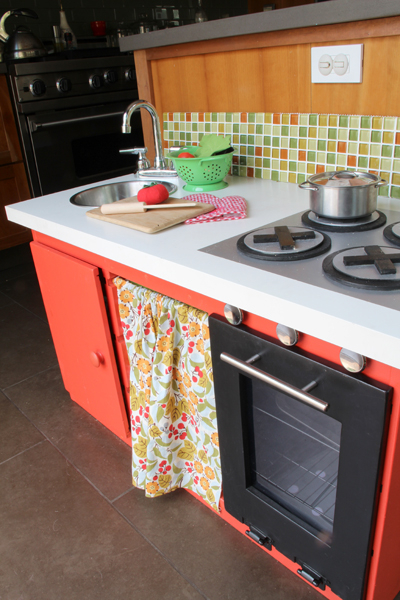
And one happy momma who is so happy with how it turned out.
Happy weekend!


This is great. I love that it is along side the actual kitchen. I built this one for my daughters birthday. I used battery touch lights to get a cool look for the gas burnners…
https://www.facebook.com/photo.php?fbid=10154229659942998&set=pcb.10154228819502998&type=3&theater
Looks amazing, Brian! Not sure how you did the burners (the wooden pieces over the touch lights) but those are awesome.
This is great. I love how it’s built along side the actual kitchen. I just finished building one for my daughter. I used battery touch lights (Lowes) to make some cool looking gas stove burnners…
Oh, I’m completely in love with this cute little kitchen. I wish I had had something like this when I was a child. <3
I like the oven light most, it's just fantastic.
Sabrina
Thanks, Sabrina!
Hi
Love your kitchen and have done something very similar but we are struggling with the type of hinge for the cupboard door. Do you have any suggestions please? We have also done the oven but have chosen to have it open as a normal cupboard also.
Many thanks
Hi Sara, if you shoot me an email I can send you a close up pic of the cupboard hinges. I wish I knew the technical name… but it’s a standard 2″ hinge right off of the home improvement store aisle. I hope that helps!
Hi
I’m trying to email you direct about the hinges on the play kitchen but can’t find direct email address. Mine is
ma************@Gm***.com
. Thanks
Sara
I’ll email you right now :).
I’ve found piano hinges work great. They lend to the look of an appliance.
I remember the joy of building our little girl her first kitchen set!! It was such a great memory when she saw it for the first time. I am so glad I found your blog and I look forward to following you.
Tiffany
http://thiswholehouse.blogspot.com
Hello Morgan – hope all is well and good with y’all. Excited about the approaching holiday I’m sure.
I need to ask you a couple of questions. A lady saw your blog with the little oven. She wanted to know if I could make her some of those circles and X’s for burners. I can’t recall if the circles were 1/8, or 1/4″ thick. And, I’m pretty sure your hubby made the X’s, right?
Thanks,
Paul
Hi Paul, happy holidays!
My burners are a 4.5×1/8″ silver painted round stacked on top of 5.5×1/4″ black painted round, I made the Xs out of scrap wood, they’re 3.5×3/4×1/8″ strips. I hope that helps!
Hi! Thanks so much for laying out what you did with this kitchen. We are making one right now for our girls and are following many of your suggestions. Do you have a link for the cooling racks you bought? Thanks!
That’s great! here is a link to the cooling racks that I purchased: http://www.amazon.com/gp/product/B00030CGKY/ref=as_li_ss_tl?ie=UTF8&camp=1789&creative=390957&creativeASIN=B00030CGKY&linkCode=as2&tag=peppdesiblogc-20, I ended up clipping off the stand part.
So does this set up mean you have to take down the curtain to pull out the top bin? Was there not enough room for a curtain above?
Seriously thinking of trying this … love it! The kitchens I’ve seen either have too much stuff (microwave) or not the right features (counter space) for my ideal.. the only thing that’s not quite perfect about this one is clicking knobs. I guess I’ll have to see if I can find a solution for that – we love knobs that click!
Hi there, the curtain is hanging in a pre notched area on the particular Ikea unit that we purchased. We could have hung it higher but this made for the most convenience in build :).
Adorable! would love one for my 2.5 year old :) and the fabric is definitely from Joann’s, I made a few pillows from it myself :)
I thought it was! Thanks for the confirmation on that.
I love this kitchen! I have a few questions!!
1. Was it not possible to fit a shelf (door) in the center for a another door covered cabinet?
2. You said you used the Vika desk but it is now showing wear and tear signs. If you were to do over, would you go for another counter material? Had you looked at any other more expensive/higher quality options? Is the counter attached with liquid nails?
3. When you cut the oven door, did you need to do anything extra to make it “kid safe” or just sand it? What did you use to attach the plastic to the oven door?
4. Could this be easily moved if you needed to?
I just love this! I am thinking about buying two units, standing the other one up and making it a fridge. (I assume one shelf door for the freezer, but I need to think about the fridge door!)
Any other suggestions/advice would be great!
Amy
Hi Amy! Sorry for the very late reply, we just got out of the hospital with the birth of our second daughter and things have been a little hectic :). Hopefully these answers help!
1. It is possible to add one more shelf door in the center of the unit, we chose to use fabric just to add a little pattern and color but there’s room for a hinge.
2. The Vika desk top was a bad choice. We can’t switch it out now without making major modifications to the whole kitchen but if I could do it again I might even just use a piece of plywood that I had lacquered white. Or maybe a large chunk of butcher block countertop (maybe scrap material from Ikea?). Our Vika top is definitely showing lots of wear and tear six months later. A plastic top, like the material plastic butcher blocks are made of, would be even better now that I’m thinking about it… I’m sure you can come up with something more sturdy.
3. We sanded the oven door until all edges (that were cut into) were soft and round (lots of hand sanding), and I attached the plastic window with a hot glue gun (the first time around I used double sided adhesive, but when the plastic broke a month or so ago and I had to replace it I used glue).
4. The entire kitchen could be easily moved, it doesn’t weigh too much and it might find its way into our daughters’ room at some point.
I love your idea for the freezer!! Would be so cute! If you figure out all of the building details do share :-). This was a fun project!
Wow that looks awesome! I’ve been toying (hehe) with the idea of making one for my 1.5 year old…but it seems like a lot of work! Just aren’t enough hours in the day…
How does the oven door stay up when it is closed? Does it just balance or is there a way to latch it?
Hi Camilla, the hinges on the bottom of the door keep the door solidly close all on their own (they’re fairly heavy duty considering the size of the shelf we modified to make a door), but our back up plan was a little magnetic strip similar to the ones you’ll find in a commercial play kitchen. I’m glad we didn’t have to use that though because it’s much easier for Liv to open and close her oven than it is for her while she’s playing at Ikea, for example. I hope that helps!
I’m curious how much it cost?
Hi Autumn, that’s a good question. We’ve added a lot of unnecessary add-ons over the months :), but if I totaled it all up I’d say maybe around $150/$175? Of course there are short cuts here and there that include choosing the cheaper base unit from Ikea (knocks off $40 I believe)…
LOVE IT! For families like mine there are ALWAYS children that come over so this is PERFECT in so many ways. It adds livable color to the Real kitchen (Why are nearly all commercial girl’s toys pink?) it’s virtually indestructible and I’m pretty sure you’ll keep it around for her babysitting days and beyond…..it’s that good! Thanks for also telling us the journey for this beautiful piece, cuz we DON’T always get it “just right” the first time! Thanks Again!
Anastasia, thank you so much! Totally just made my day!
this is amazing! well done!! our little (retail) kitchen brings hours of happiness for brother, sister, and mama! ;) good luck with the new baby!
Thank you, Amber!
Wow this is so adorable and very inventive! :) Love it!
Thank you!!
Very impressive! You are becoming quite the carpenter!
So many great details! Now that I see the picture up close, I recognize the stacking cooling racks you used for the oven racks – total genius there! Thanks for the tip on The Junkman. I very well may need to use his services for a couple projects that I’ve been slacking on for the last couple of years.
He’s great! Sometimes it’s not worth the effort to pull out ALL of the tools for, say, a circular stove top cut :). Junkman is so awesome.
gorgeous! you are so creative, i’m a big fan!
Thanks so much, Valerie!
Cuteeeeeee and clever!!!!
Thanks, Silvia!!