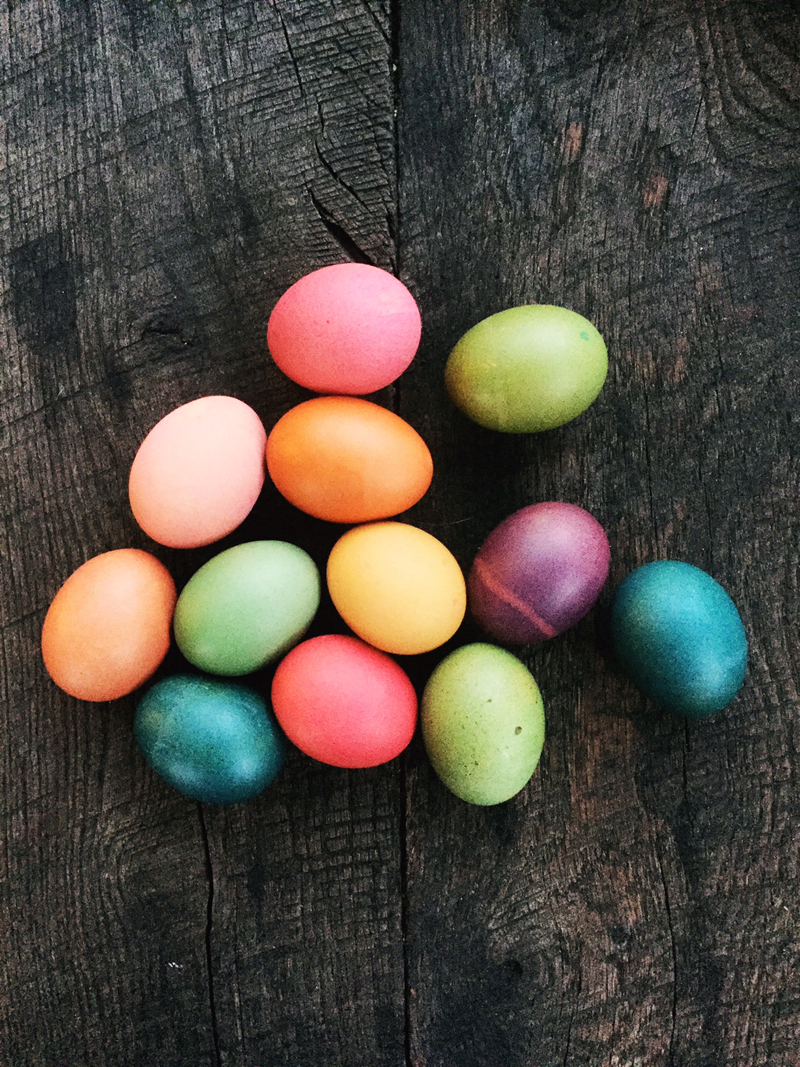
An Update on Our City Chicks
April 22, 2013Recently a neighbor who knew we had chickens stopped by to check them out. He was considering setting up his own little city hen house and was curious as to how we were getting along with our feathered friends – the conversation sparked a little reminder that I haven’t posted an update on the ladies in some time!
Here’s the original post on when we added them to the roost, complete with a tour of the homemade coop and blue nesting box Kevin built from scratch.

You’ll notice in this post that we have just two lovely ladies left in the mix. Due to an unfortunate mix up early on, we accidentally returned our white hen back to the farm when her frequent ‘cockle-doodle-doo!’ early morning wake up calls had us convinced we ended up with a rooster. Turns out she was really a she and from that day forward we stopped finding white eggs in the hen house. I later learned that it’s not unusual for a female chicken to exhibit a few of the traditional rooster cries and reactions when there’s no rooster around. Sigh.

But! Our two other ladies are doing just great. See how much they’ve grown? They joined our family at just 4 months old – almost two years ago.
Between breakfast, hard boiled egg snacks and baking, two hens are actually the ideal for the amount of farm fresh eggs our family eats each week.

Each hen lays maybe 5-6 per week which means that we rarely ever have to purchase eggs from the grocery store or Farmer’s Market. Plus, the eggs are the best you’ve ever had. Rich, dark yellow yolks full of yummy nutrients, thick egg whites perfect for separating out or cooking with, and of course they’re incredibly fresh.

We feed the ladies a mixture of pellets, mash (a corn blend) and kitchen scraps. They devour left over morning oatmeal with raisins (a near everyday treat) and love veggies – especially greens and tomatoes – and fruit. It’s a great way to compost, nothing goes to waste.

Prior to us finishing the new deck and outdoor dining area, the chickens freely roamed our entire backyard. Gathering up eggs turned into all out Easter egg hunt where one of us would suddenly stumble upon a hidden nest. Here’s an Instagram post from a little while back:

(Don’t worry, fresh eggs can be left outside for weeks before going bad.)
But letting them loose outside had its pros and cons. They had their choice of vegetation and bugs to snack on plus plenty of daily exercise. But they also made a mess. Once the deck went in, back to the coop the ladies went.

Locked up. Now instead of just sleeping in their home, they enjoy their studio apartment full time. But don’t feel bad for them, their home comes complete with wood shavings for a nicely textured floor, fresh hay and alfafa in their nesting box and a roosting pole that’s quite high for sleeping.
And we still enjoy a nice big bowl of free-range, farm-fresh, naturally grown eggs. If your chickens are really mad at you they’ll stop laying
.

Questions that I’m frequently asked:
1. Where do you find your feed and hay supply? We used to have to source both of these from the outlying San Diego feedshops (the nearest being a half hour from our home). But we recently found out that there are quite a few city farmers in our neighborhood! And now our local pet supply store happily orders and delivers all of the supplies we need.
2. Have you had to deal with rodents or bugs? Yes. Both. We eradicated all of the above within the first few months of the hens moving in and haven’t had an issue since, but it was definitely not fun to learn how to fend off non-feather friendly creatures. Diatomaceous Earth (DE for short) became a product we now know.
3. Do you add any supplements to their food? These ladies receive A LOT of delicious fruit and veggie scraps and I think that has a ton to do with how delicious their eggs are, but after a little research I began adding ground up oyster shells (also from our pet store) to the mix for extra strong egg shells.
4. How much do they cost to raise? Is it worth it? Truth be told, the cost of caring for these ladies is about equal to the price you’d pay for free range eggs at the supermarket. You have to love the idea of caring for and growing your own food to be a full fledged chicken farmer. Or, invest in more than two hens and share the wealth with friends and neighbors. We’ve considered expanding the flock since taking care of two or six is probably about the same amount of work.
5. What’s one thing that really surprised you? We didn’t realize that hens take a break from laying during winter to more permanently roost or brood. The newbies that we are, we couldn’t figure out why the ladies suddenly stopped producing so frequently November – February! Many backyard farmers add heat lamps or lights to extend the daylight that chickens receive during the winter so that they’ll continue to lay, but we’re going au naturale – we all need a break now and then.

The conclusion? Chickens are a lot of work! and they’re not for everyone. But we love ‘em. Our mini city farm will be sticking around for a while.
In honor of Earth Day, here’s a link to all of our Going Green posts (with ideas on worm composting, favorite green household products, cloth diapering, etc).
Tags: Chickens
Posted in Family & Friends, Going Green | 4 Comments »
Curb Appeal: I Spy Spots of Yellow
April 18, 2013We’ve had some spring-awesomeness reveal itself over here and, being my first bulb planting attempt, I had to share it with you.

I took a chance last fall (despite not having a green thumb… yet) and planted two dozen or so daffodil and allium bulbs in our front yard. It was my first go, my first foray into bulb planting, so I kept it small and manageable. Just in case project bulb failed.

I actually remember watching my mom plant daffodil bulbs by the wheelbarrow full while growing up on the slightly more fertile, rain-loving northern coast of California. She would literally trowel out holes the size of graves and fill the ground with hundreds of bulbs at varying depths. Come spring, those bulbs would slowly break through and line all pathways leading up our driveway in a brilliant yellow! It was beautiful. It marked the arrival of the season.
My planting is slightly more diminutive.

I was actually pretty sure that come spring (5 months post-planting), little would show for my efforts. So imagine my surprise when these beautiful little stalks began to poke up through that gravel-rich, ultra-dry soil that is our desert front yard.
Oh hello spring!! (in my best Carrie Bradshaw voice) you have arrived!

The allium has yet to make an appearance… but I’m keeping my fingers crossed that just as planting daffodils at different depths will yield different blooming periods, these guys will suddenly pop through and surprise us! Because… maybe they take longer to germinate? At least the packaging promises ‘late’ spring blooming while my daffodils boast of ‘mid’ spring blooming.

Oh please pop through you pretty little puffs.
As for actually planting these guys, last fall I chose four or five special little spots in the yard and nestled 3 or 4 bulbs in each. I hadn’t started the bulbs in water outside of the ground nor have they received special attention since (except for the occasional watering). I planted them about 5″ or so below the soil, but that includes the decomposed granite and mulch that is the ground covering for most of our desert-friendly front yard.

Your average visitor would have no idea my delight in the garden at the moment. But I spot that little yellow welcome sign every day!

Actually, I’m a little surprised that they are already starting to wilt and shrivel up. So much work and anticipation for just a week’s worth of bloom. Is this odd? Perhaps next year (now that I know that I can do it!) I’ll plant layers of bulbs so that just as my mom did so that as one set begins to die down the next will begin to bloom. Kinda sounds like a pricey solution to a month’s worth of blooms though?

In other spring bloom news, remember when the flower pots on the porch were finally planted and alive with color? Well there was one plant that I was a little nervous about…

This one.

The tag from the original half gallon container mentions that verbena is of the half sun/half shade variety, and sure enough after a few weeks of zero sun (well, no direct sun) she looks a little bit more like this these days:

Can you spot the faux plants above? Love that they still look so pretty and green
.

Sometimes it’s the small bright spots in our life that cause us to stop and reflect. Thinking of all of those affected by the Boston and Waco tragedies today and offering up prayers of support for the courageous actions of all of those involved.
PS More curb appeal projects found right here.
PPS Talk about unusual art! This artist recently sent over this neat quack-inspired video.
Posted in Curb Appeal, DIY, Gardening, Home, Our Yard, Renovating Adventures | Comment »
New Nursery: The Wallpaper Has Arrived
April 17, 2013Well sort of. The wallpaper samples for the nursery remodel have arrived. I’ve been staring at them for a couple of days now and am trying to imagine how each might look covering an entire 10×15′ ish wall – and I have to be honest – I love them all. I’m pretty sure that any one of these designs would be so perfect in here. Which oh which to choose?

Here they all are up close if it’s hard to see the above at an angle.

Most of these I shared here when I was debating on what direction to take my solo statement wall. Clearly I’m still debating, even when I was sure that ordering my favorites and hanging them up would help settle that nursery quandary!
All of these wallpaper samples are from Spoonflower, an awesome site that lets you design and print your own fabric and wallpaper (oh search thousands of predesigned options by different artists, sort of like Etsy). I’ve used them a ton and they are reasonably priced compared to purchasing something manufactured (though boy does it take a long time to process and ship your order… I have too little patience these days).
I designed the two starry prints (top left, bottom right) which were inspired by this Osborne & Little wallpaper. I spotted the pretty night sky in House Beautiful a while ago and the image sits in the back of my mind. Not happy with any of the colors offered through Osborne & Little, I recreated from scratch and used both a peach (top left) and light pink (bottom right) as the background, while also softening up the stars and playing with the frequency in pattern. The rest of the prints are handmade on Spoonflower by various artists. Clockwise you can find the links here: 1, 2, 3, 4, 5, 6, 7 & 8.
The pinks are not exact, the fabric examples are still undecided (and will depend largely on the wallpaper) and this is in general a pretty crude photoshop markup, but here’s how I think the bookshelves will work with the space once they’re installed:

Amazing for storage, right? Oh man I can’t wait.
Update: Fabric Warehouse Direct is offering that beautiful Kravet window covering fabric that I photoshopped into the above pic at a steal of a rate right now.
Ignore the random throw pillows and the other pieces of photo I didn’t get a chance to photoshop out. I’m imagining a dark pink painted backing in those top shelves, hence the awkward block of color at the moment. If you squint you can begin to see it all come together…
Ahhh, it’s all becoming so real!
Tags: Bedroom, Decorating, DIY, Home, Nursery, Patterns & Color, Pink, wallpaper
Posted in Girls' Room, Home, Liv's Nursery, Renovating Adventures | 8 Comments »


